
Missing Remote Tips and Tweaks #2 – Preventing Sneaky TV Overscan in Windows 7 Media Center

If you’re at all like me, you want to see the entire picture as it was originally broadcast so you calibrate your display. One of the steps of our display calibration guide is to display a test pattern to correct for any overscan. Overscan is a vestige of the old cathode ray tube (CRT) TV days and largely no longer needed.
The overscan test pattern might commonly be played back in Windows 7 Media Center (7MC) via the videos section and reveal no overscan. However, 7MC has a dark and sneaky side to it.
At my day job, I often watch the same network content over and over again on professional monitors so it is quite easy to recognize when network tickers and logos aren’t in their usual places. Much to my surprise, when I configured 7MC for my flat panel plasma, it was obvious that Microsoft decided that 7MC needed to overscan live and recorded TV.
Take a look at the following images showing what the same image looks like with and without the overscan that 7MC applies.
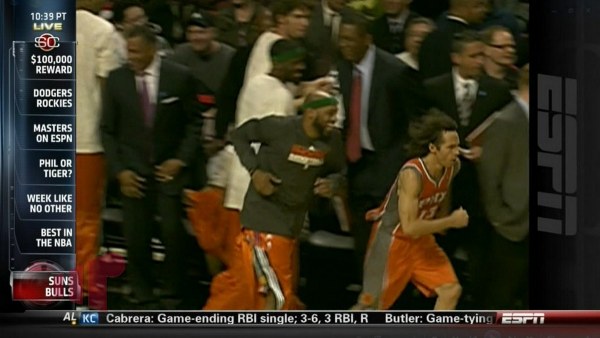
Overscanned Image in 7MC
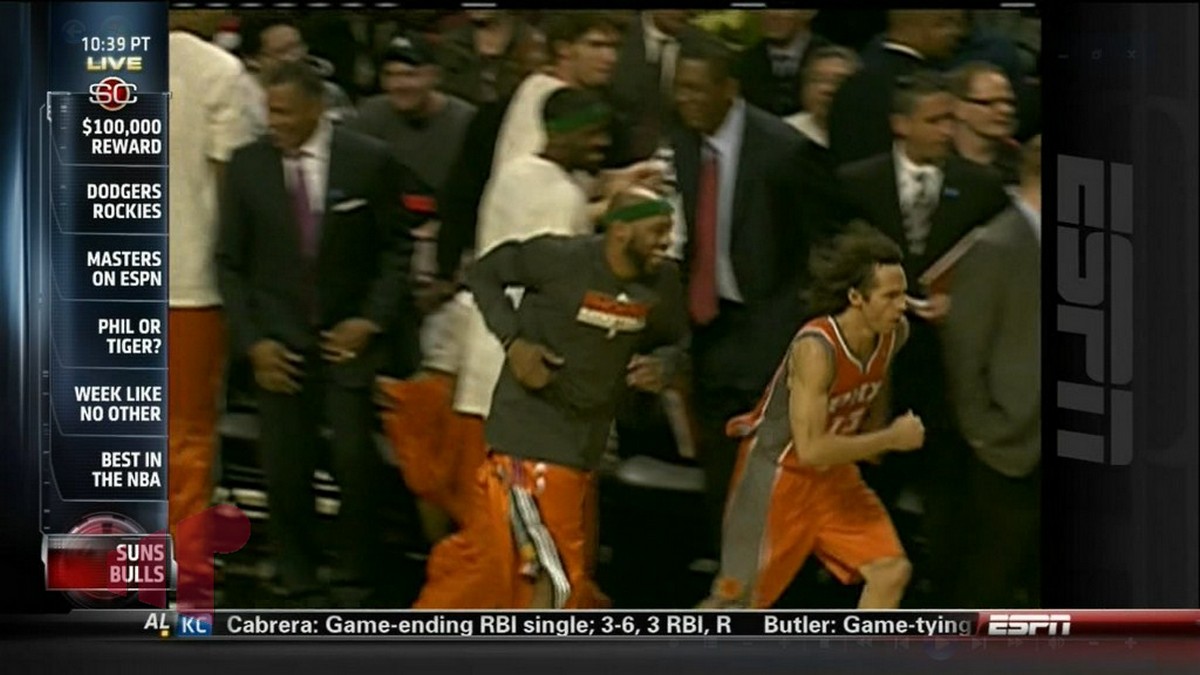
Original, Non-overscanned Image in 7MC
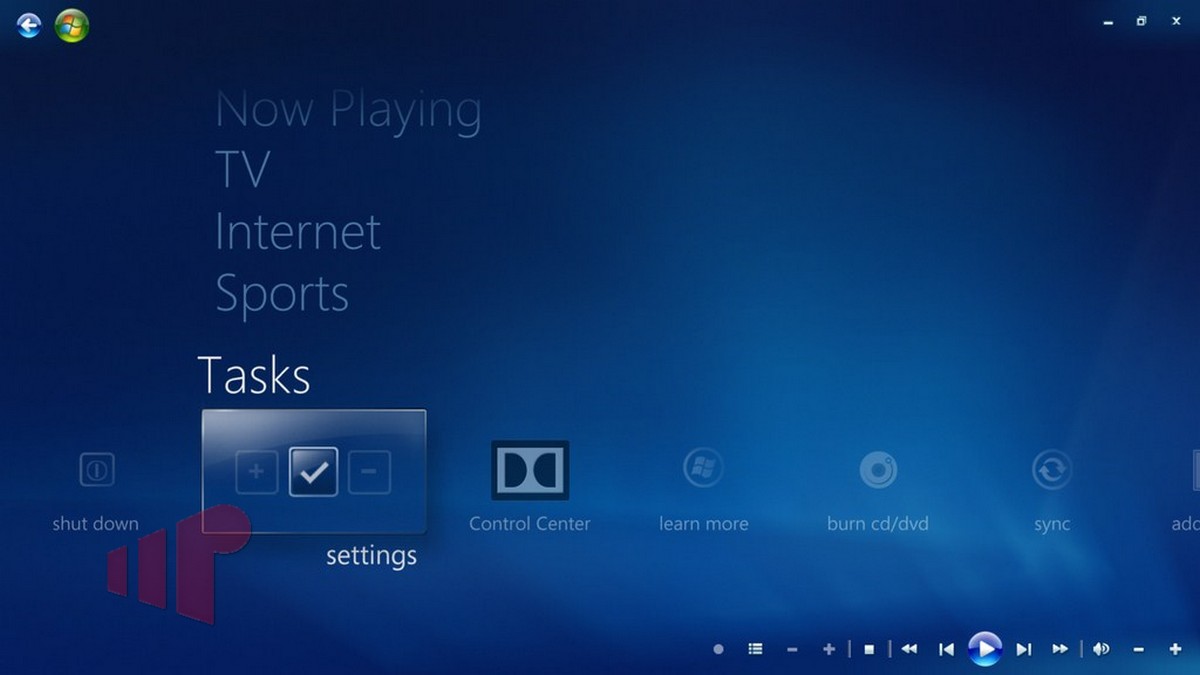
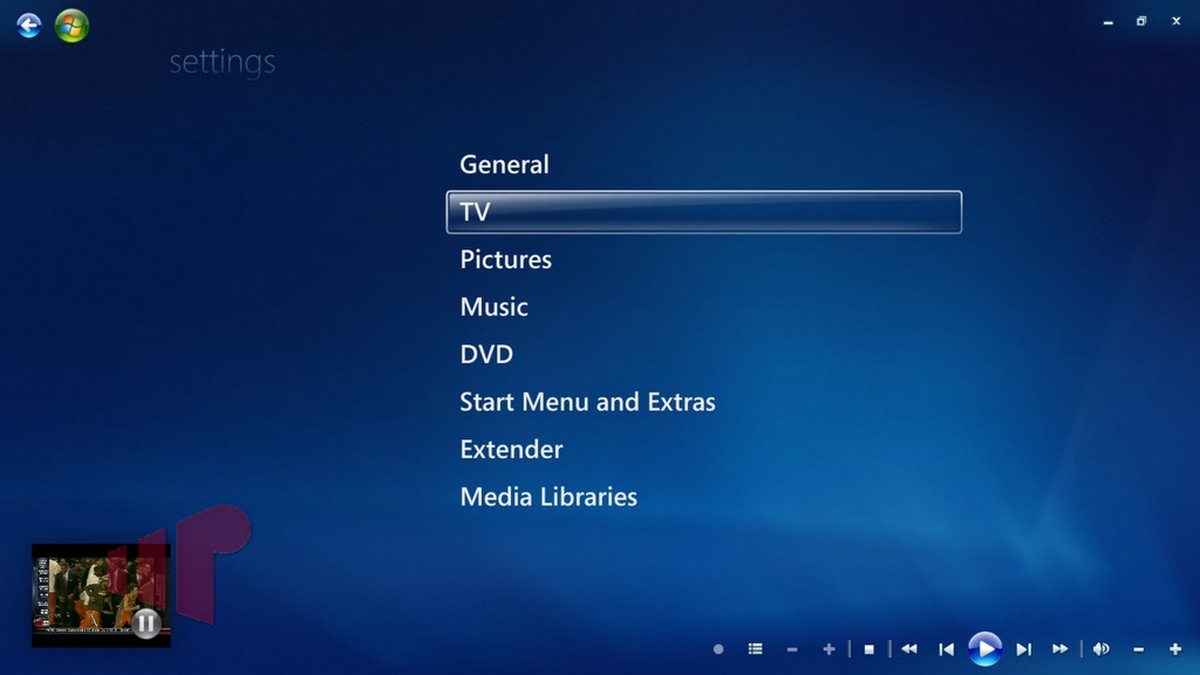
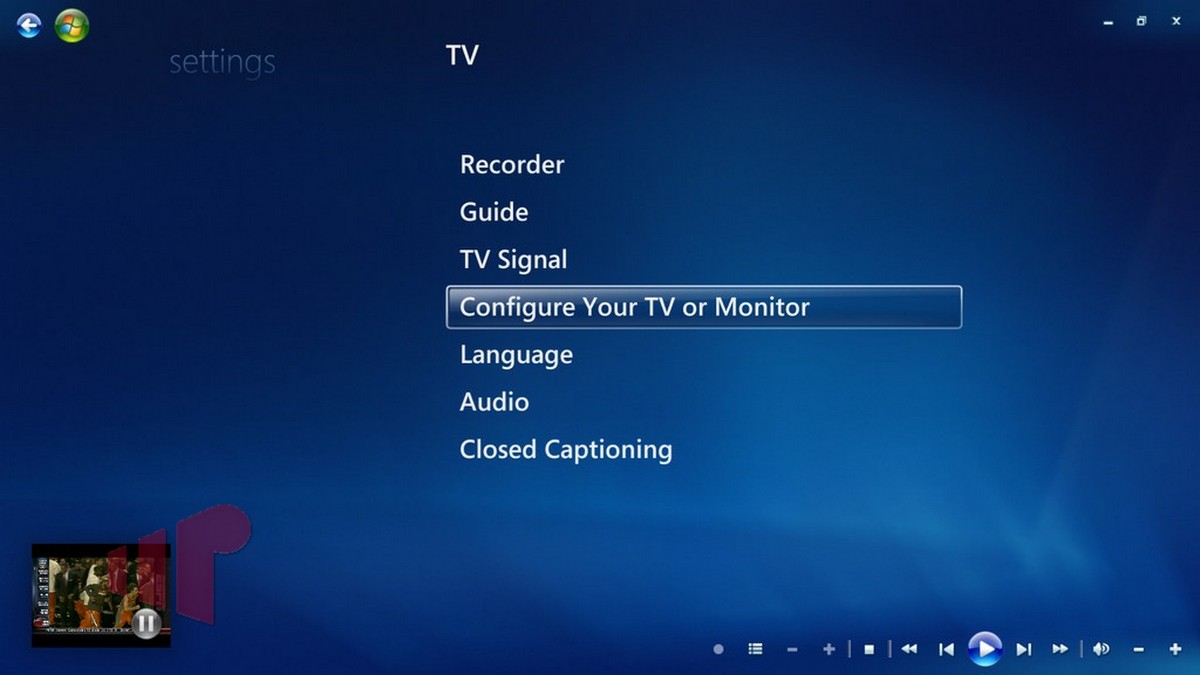
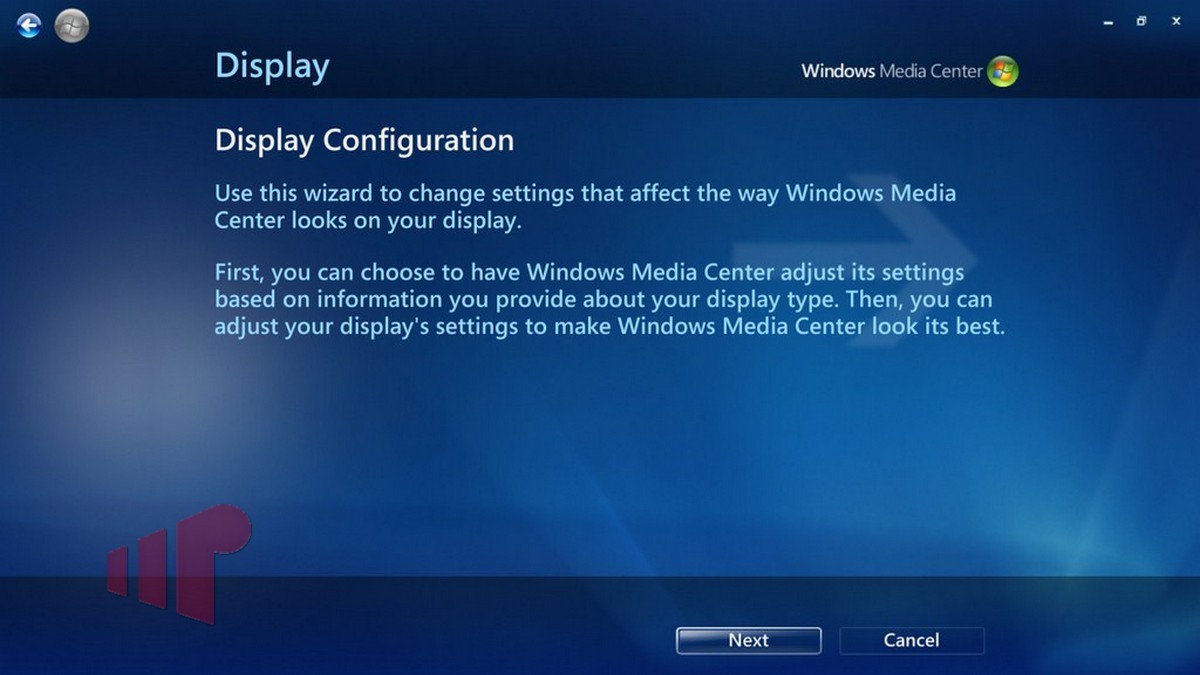
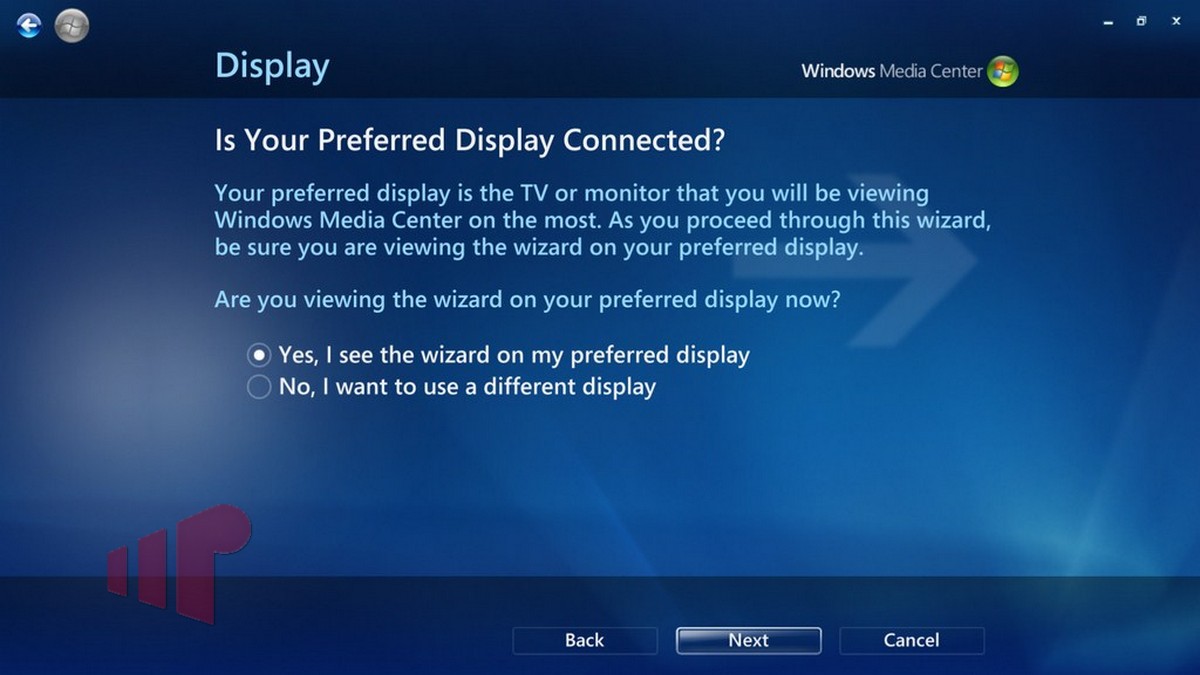
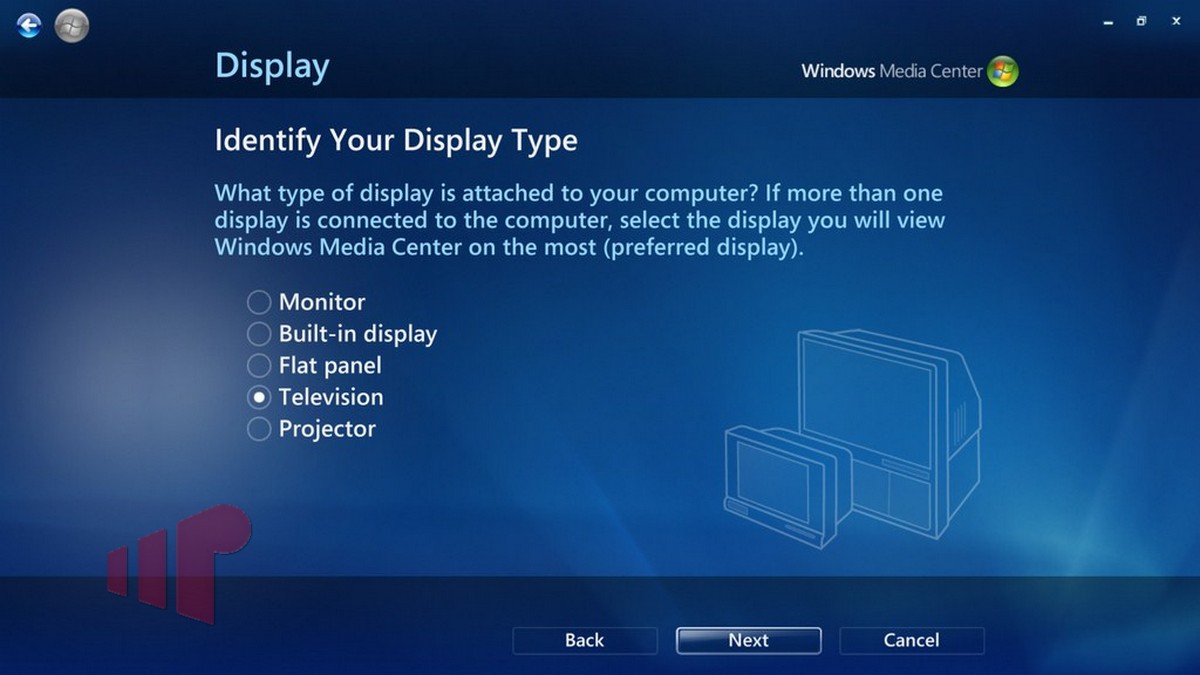
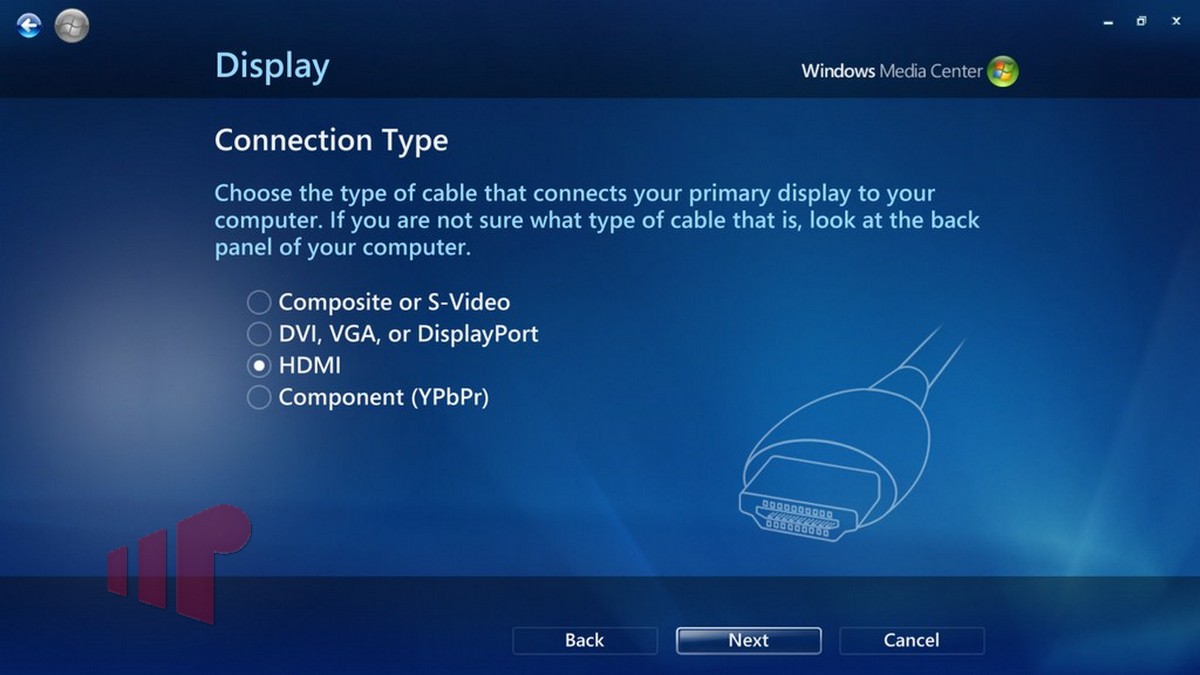
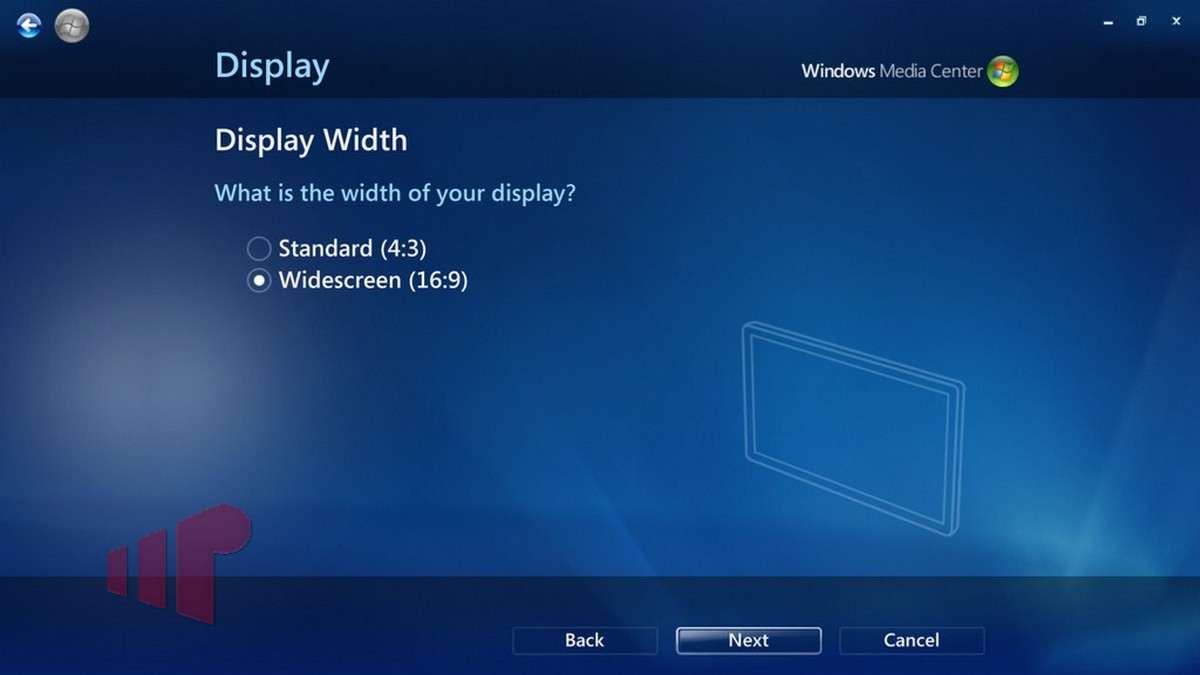
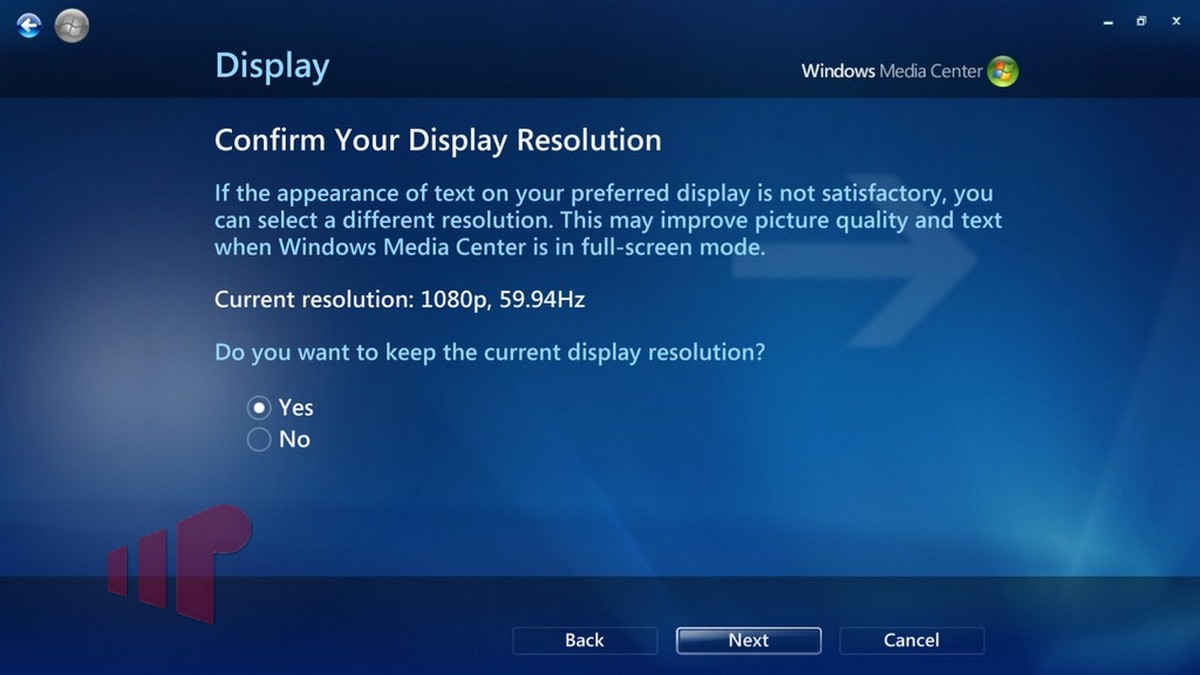
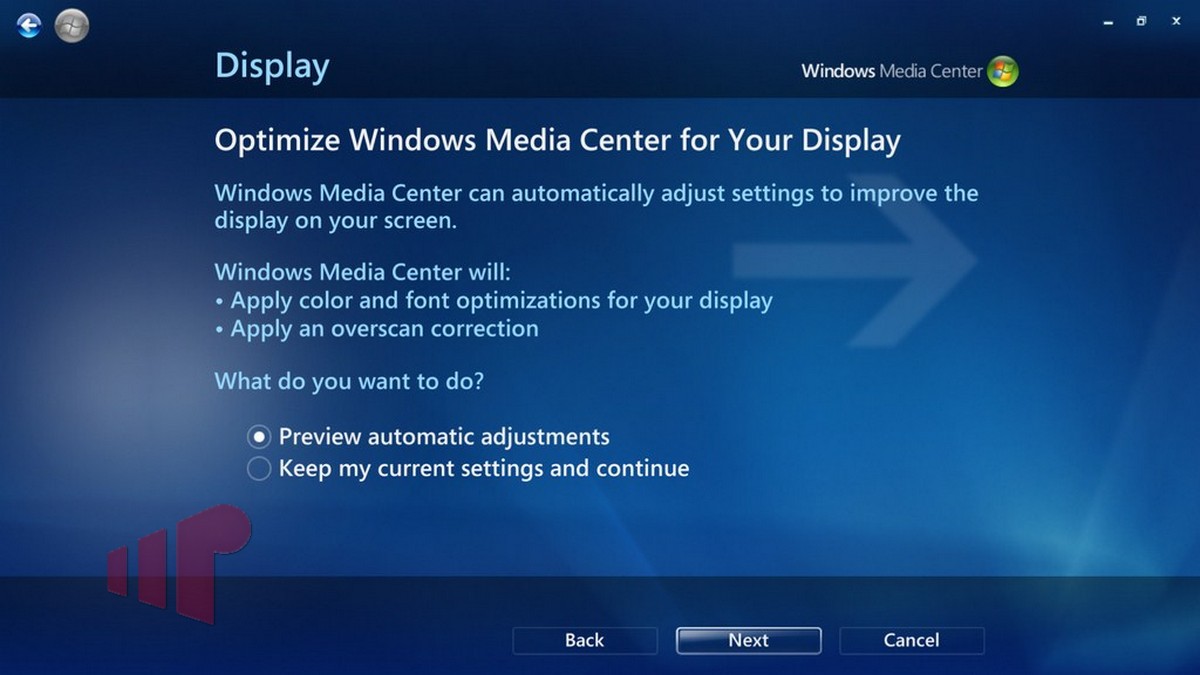
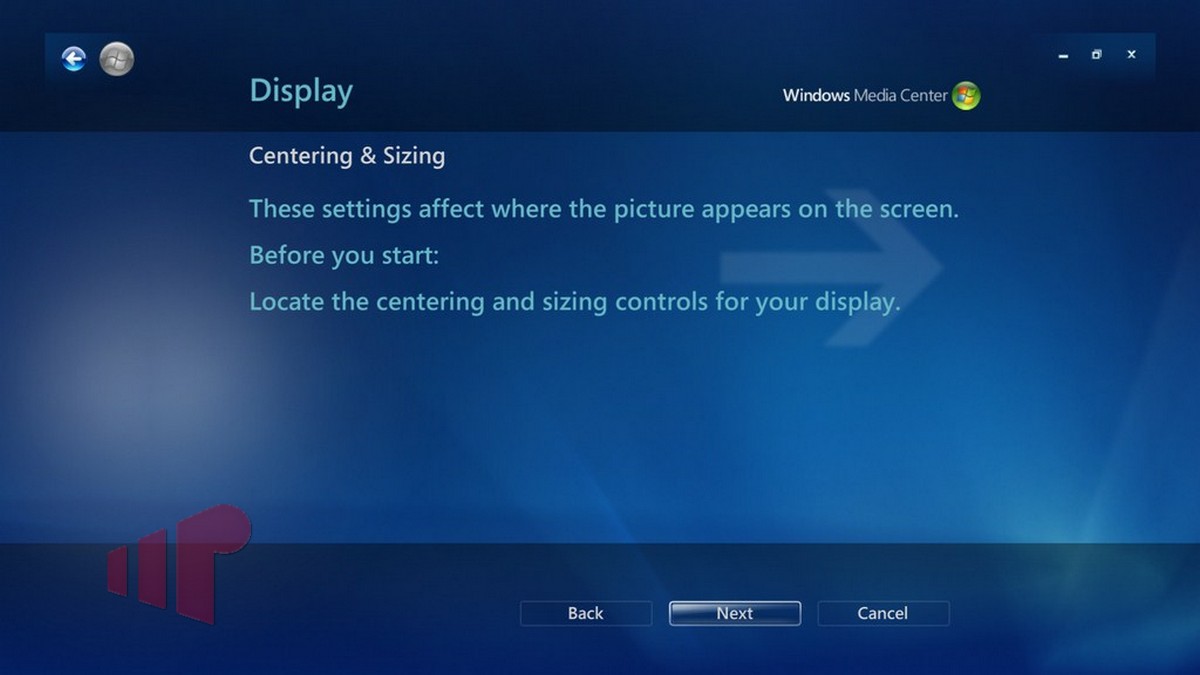
I discovered that by choosing “Television” as my display type instead of “Flat Panel” caused 7MC to not introduce the overscan. Follow along the screen captures and you’ll see exactly how to do it.
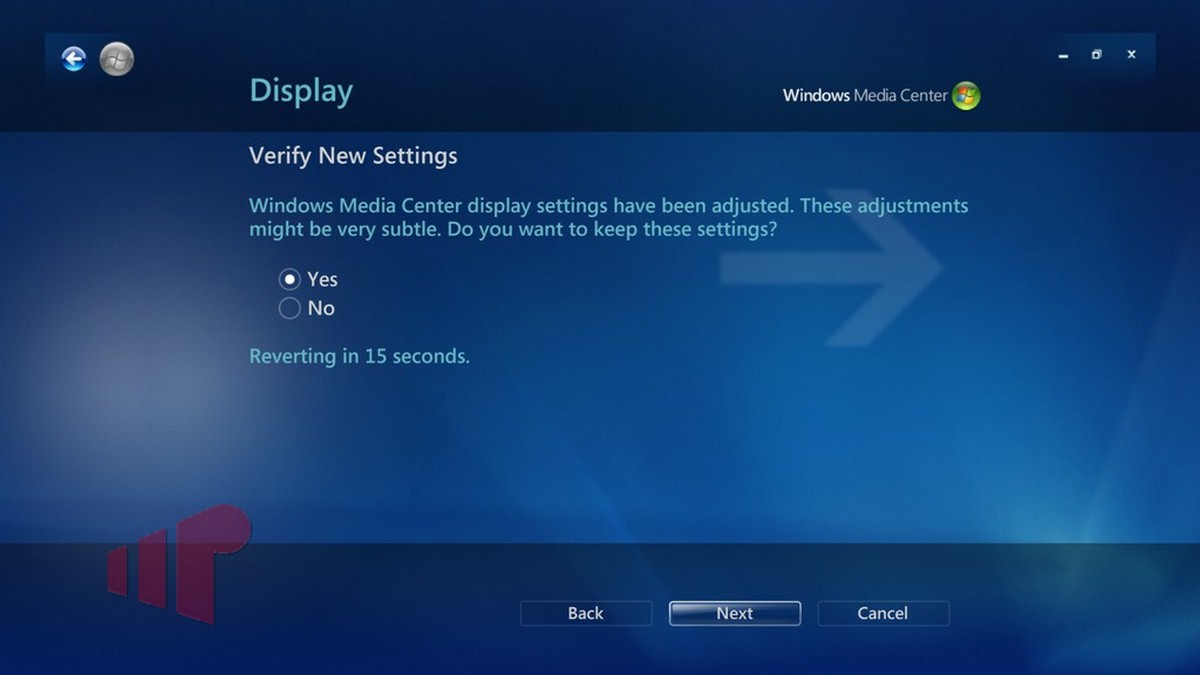
At this point, you’ll notice some of the elements in 7MC have moved to a different location than usual. Don’t worry, once 7MC is restarted, they will appear in the proper place.
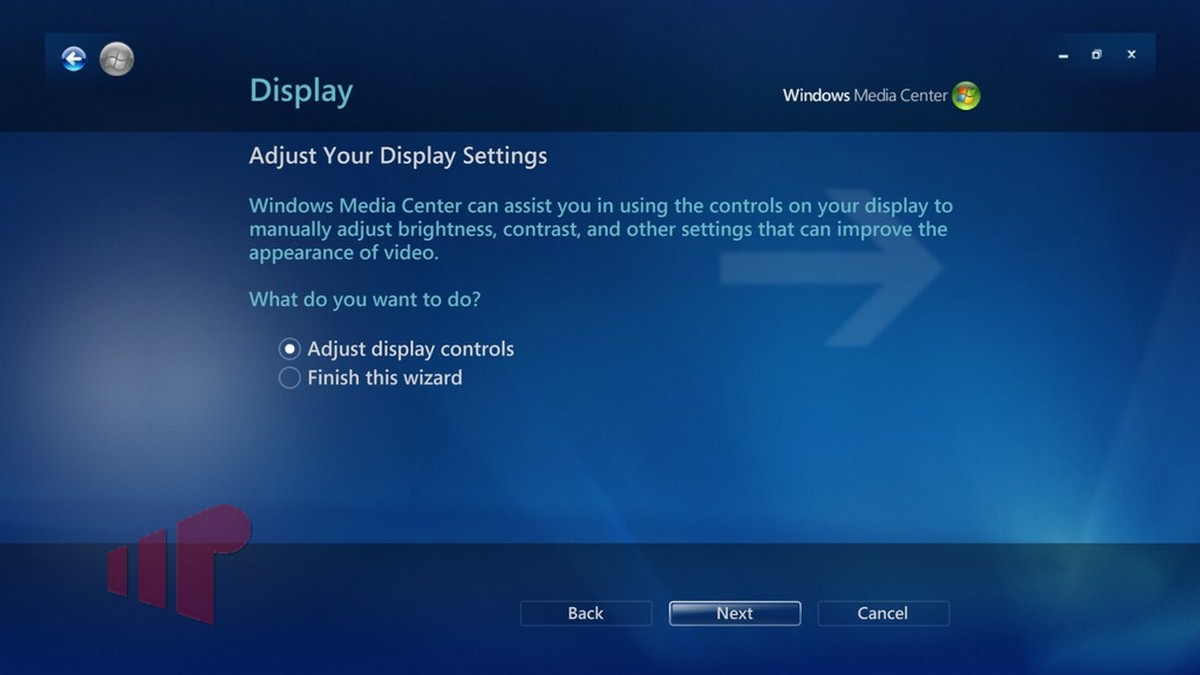
While the wizard has been finished, let’s just take a look at a test pattern provided within 7MC.
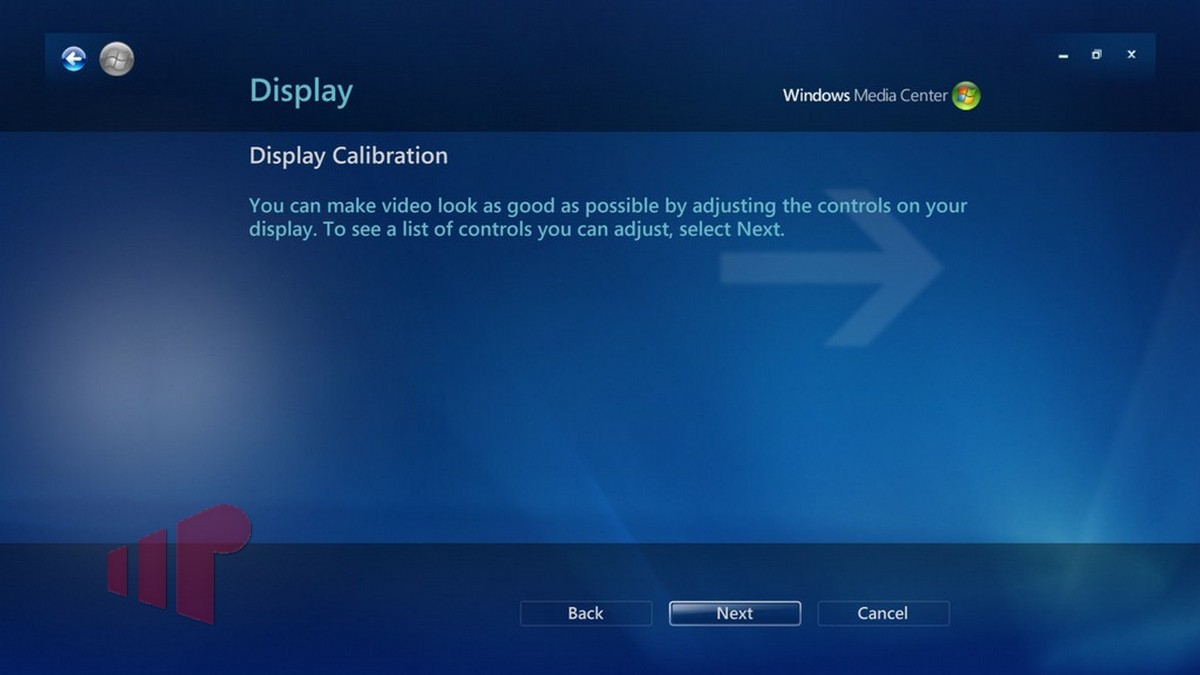
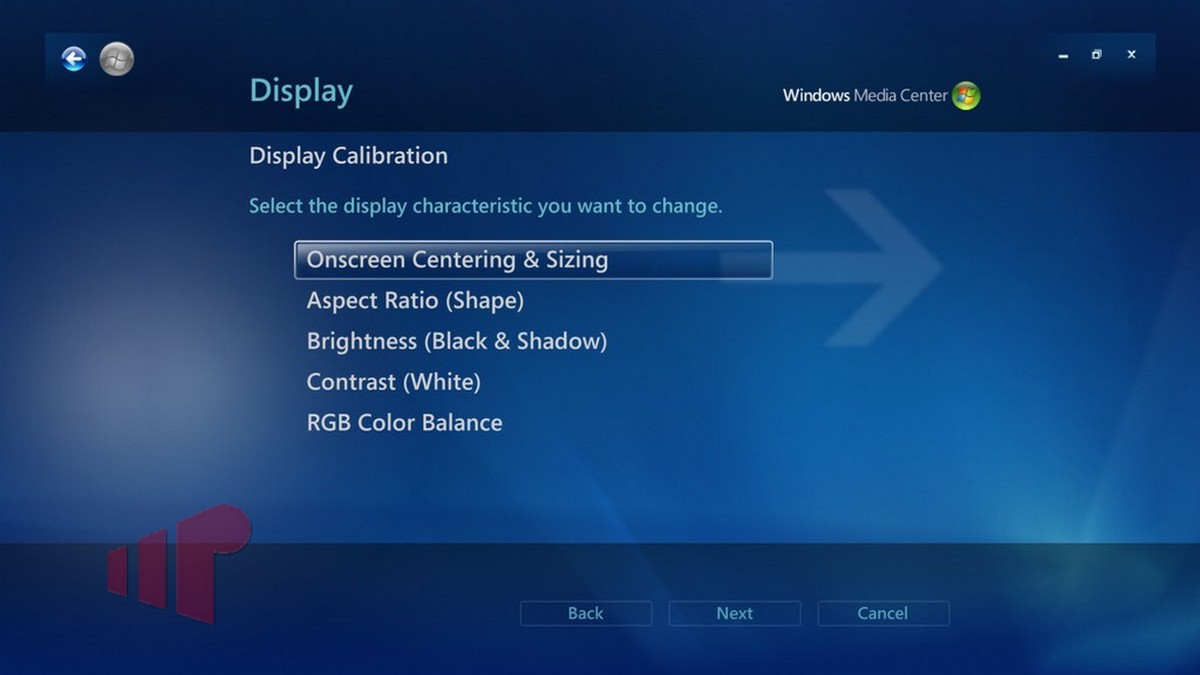
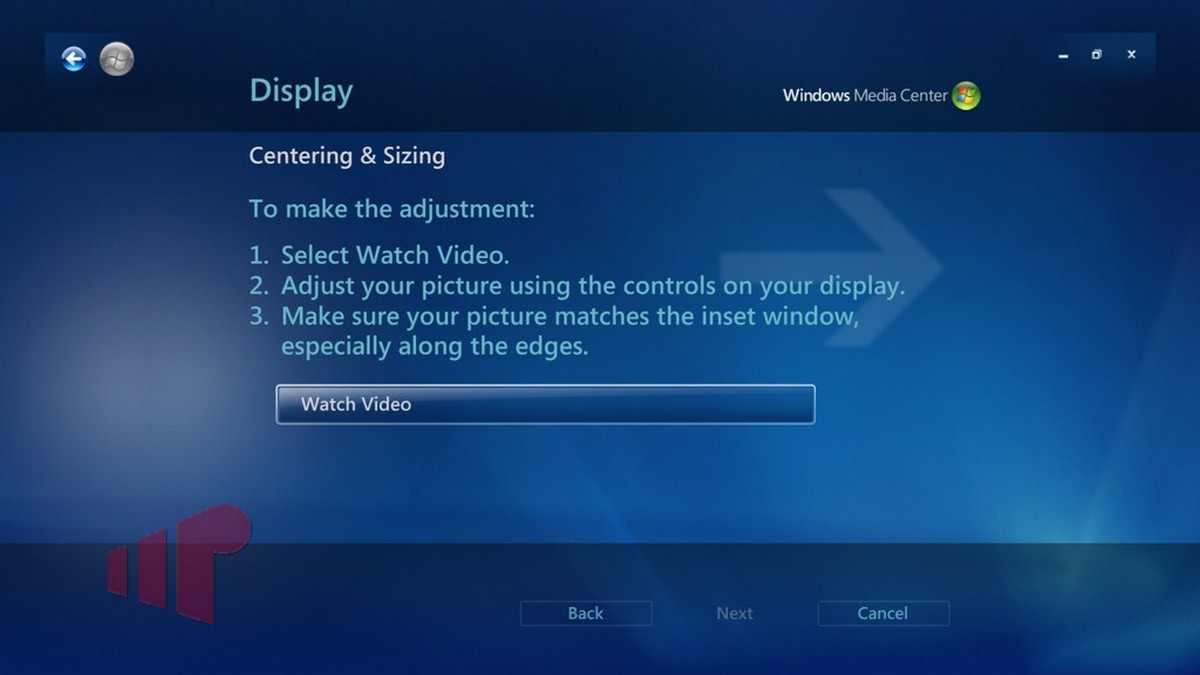
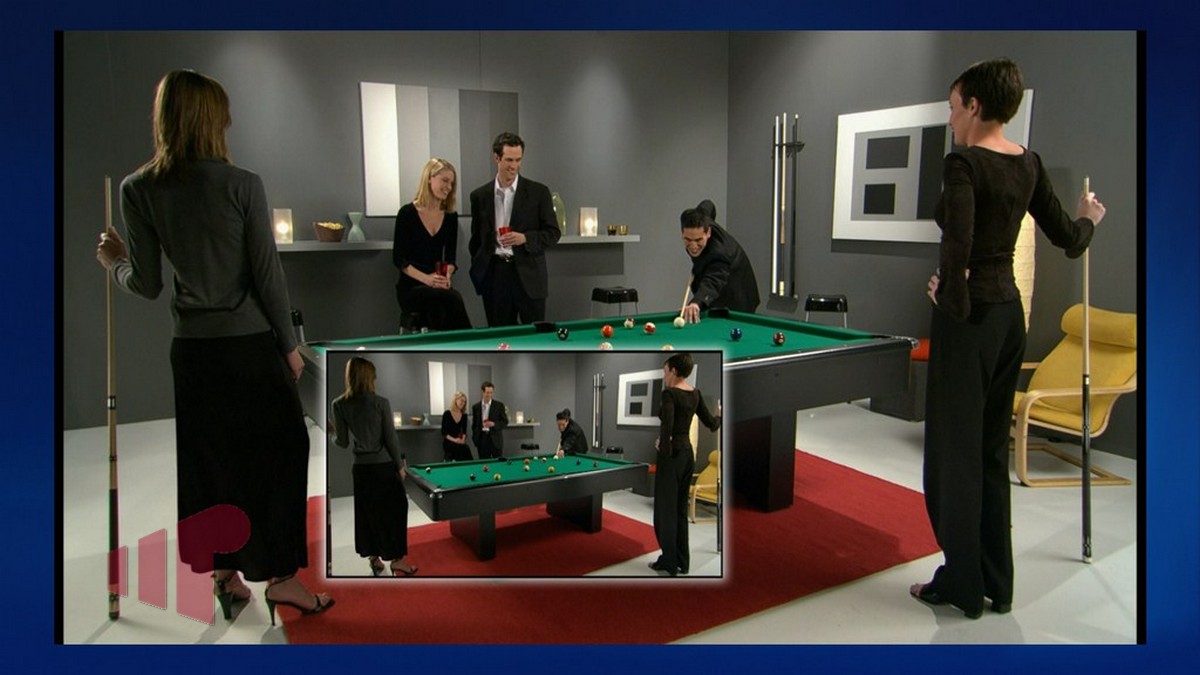
You’ll see here that the test image extends beyond what is displayed in the inset. It is pretty obvious that Microsoft thinks you should be seeing the overscanned image shown in the inset. If this configuration had been performed using “Flat Panel” as a display type, the inset and test image would match exactly.
Also, as mentioned before, that blue border will not be present after restarting 7MC. You should be seeing only the test pattern image that shows the entire frame extending beyond the pool cues unlike what is shown in the inset.
Hopefully, Microsoft can do a better job next time because it certainly isn’t all that clear that “Television” is the correct choice for a flat panel display. At least now, you’ll know what to look for to make sure your live and recorded TV isn’t being overscanned in 7MC.
I guess I have to reset both
I guess I have to reset both machines now. I hope it gets rid of an anoying line on the right hand side of one machine.
If it is a system with
If it is a system with integrated Intel HD Graphics then the 1 pixel line on the right can be solved with http://support.microsoft.com/kb/974324.
Using ATI-5450 in both
Using ATI-5450 in both machines. Only the bedroom machine shows the line on the right. Once any video playback is started, if I go from full screen to windowed mode then back to fullscreen the line is gone untill the next time I start MC. It’s kind of anoying but not so much that I’ve been loosing sleep trying to fix it.
Your problem sounds exactly
Your problem sounds exactly like the issue described in the KB article Michael referenced. I haven’t heard of it on the 5450, but give the hotfix a try and let us know if that solves the issue.
Still apply the hotfix like
Still apply the hotfix like Aaron suggests. It isn’t limited to Intel HD Graphics but Intel is the most common culprit as it happens on just about every H55, H57 and H67 board whereas AMD I’ve only seen some instances.
Shall do. Might not be till
Shall do. Might not be till I go on vacation next week as we are getting pounded with OT in my office. (maybe I’ll skip out early)
To push the UI elements
To push the UI elements back out to the corners after getting rid of overscan, you can modify the registry:
[HKEY_CURRENT_USERSoftwareMicrosoftWindowsCurrentVersionMedia CenterSettingsMCE.PerUserSettings]
“marginLeft”=dword:00000000
“marginTop”=dword:00000000
“marginRight”=dword:00000000
“marginBottom”=dword:00000000
“marginSaved”=dword:00000001
“useDefaultOverscanMargins”=dword:00000000
All this does is move the UI elements back to the corners.
Thanks, this worked perfectly
Thanks, this worked perfectly
You forgot about the TV’s
You forgot about the TV’s built in overscan. A lot of people try to use the controls in the display configuration software for the GPU to adjust for overscan, but that is not correct. Users should put their display device into 1:1 pixel matching mode instead of using the display software. Using the display software just to deletes pixels from the image and smashes it together so it looks correct, but actually using 1:1 mode will result in all pixels being retained in the image.
In the display calibration
In the display calibration guide that is linked in the article, we recommend calibrating the display so that it is 1:1 pixel mapped using the AVS HD 709 overscan and sharpness test pattern. The sneaky aspect of WMC is that even when that has been accomplished, WMC zooms/overscans the image if selecting “Flat panel”. If the display has been setup to overscan as well, the problem is even worse.
Ahhh, I didn’t read the
Ahhh, I didn’t read the linked article. I really wish Microsoft had thought this through a little more. I think they just have it backwards. The overscan should be on a television but not any of the other devices, but instead WMC applies overscan to all the other selections but not television.
MIke, Aaron,
That fixed
MIke, Aaron,
That fixed it. No more goofy line on the right side of the screen. And I set both displays for Television and HDTV seems a tad crisper. More detail in things like the news anchors hair. Thanks for all the tips.
Awesome. Thanks for letting
Awesome. Thanks for letting us know. I love it when people are watching better video!
Now we know that the bug CAN
Now we know that the bug CAN effect ATI 5450’s as well.
When I went from my old TV to
When I went from my old TV to my current one (both via HDMI), my new Samsung PN50C675 had the opposite issue. On the desktop it had black bars around the edges and was underscanning. I had to go into my graphic card’s advanced settings and adjust it.
When you initially connected
When you initially connected to the old TV, was the image overscanned and did you correct it in the computer? If you corrected the overscan using software, and if the new TV was already in 1:1 mode, that would make perfect sense. The computer would be sending an “overscan corrected” signal to the new TV, thus the black bars around the edge.
I probably did, been so long
I probably did, been so long since I originally setup the old HDTV. I went ahead and updated my ATI drivers and it had overscan afterwords, had to tweak the slider bar down a few notches.
AMD has definitely had some
AMD has definitely had some strange overscan issues with their drivers in the past.
Thanks,
Just a couple weeks
Thanks,
Just a couple weeks ago I finally realized that win 7 mc was probably overscanning… thanks for the tip to fix it.
This does make me think though… I can’t recall how configuring the display for extenders differs in this regard. Should I be configuring the extender to output to Telivision as well to get rid of overscan? (For both TV’s I do have them mapped to 1:1 pixel mapping)
All you need to do to check
All you need to do to check for this problem is bring up the test pattern image shown in the final step. You should see the area beyond the pool sticks on the edges. If the image is cut off right at the pool sticks, the image is being overscanned/zoomed.
I don’t have an extender so I am unable to tell you if this problem exists on them in general.
This is funny. When I had my
This is funny. When I had my Toshiba rear projection HDTV I had Media Center set to Television. But when I would play a bluray in PowerDVD when launched from Media Center there was a blue border all the way around the picture. I found out that by setting Media Center to Flat Panel, it got rid of the blue borders. So it might fix one thing and mess up something else.
Everyone,
Found a little
Everyone,
Found a little hicchup with this. After changing to TV instead of flat pannel, TMT3 had a boarder around it. I applied NitDawg’s registry edits and now TMT3 displays to the edges of the screen.
Thanks for that. I was
Thanks for that. I was having the same problem with TMT5.
Wow, all this time I have
Wow, all this time I have been watching overscanned picture assuming it was 1:1.
Thanks for this!
Quick side question:
Regarding a decently calibrated TV to MC output, I am noticing the image slightly more ‘washed out’ then when I select TV as opposed to Flat Panel. Is this just me or does selecting TV adjust the output somewhat? I calibrated the TV whilst in Flat Panel mode.
Selecting Television doesn’t
Selecting Television doesn’t have any bearing on luminance that I have noticed. For a quick check, I recommend using the brightness test pattern found in the same wizard as the overscan pattern (with the pool table that was shown in the guide). The brightness pattern shows a man in a black suit and tie.
I also recommend that you at least follow through the display calibration guide linked in the guide. It won’t take too long to run through and the brightness pattern will guarantee an ideal setting for your display. I like to keep the .mp4 variant of the “Basic Settings” AVS HD 709 patterns in my video library so that I can quickly bring up the patterns when desired.
Aaron is absolutely correct.
Aaron is absolutely correct. Goto the MR display callibration guide, dowload the video files and run through a calibration. Also remember that, depending on the broadcast material, local or network news, a well produced HD show or commercial, the quality will vary. Sometimes radicaly.
Well, just to throw some mud
Well, just to throw some mud into the mix, certainly with my setup, I have found the brightness needed to be notched down 1 click on the TV when MC is in TV output mode. My black level is different comparing both modes.
I use the Calman set of calibration videos.
My theory is this; MC is not changing any luma values as you say, but my TV, because it was showing a non 1:1 representation of the output, it had to ‘blend’ pixels together. Now it is showing true 1:1 for the output, the image is sharper so visually not being processed as much.
Samsung LN46B550 and an ATI 5670 in YCbCr 4:4:4.
Thoughts?
The only problem with your
The only problem with your theory is that the display didn’t know that what it was seeing before was a zoomed/overscanned image. To the display, it’s just another 1080p source and it is treating it 1:1 in either case (assuming you haven’t changed the setting in the display, Samsung calls 1:1 “Screen Fit”).
I totally understand what you
I totally understand what you are saying, but there is a difference with my setup.
Even looking at the screen grabs for your how to, check out the player on the right’s forearm. The lower picture his arm is slightly ‘brighter’. Well, it is to me anyways .
.
The white shirts are just a smidge different too(?).
So, as these were diect
So, as these were diect screen grabs, doesnt this point to the way MC is processing and displaying the data?
Definitely, do not make any
Definitely, do not make any judgements based on picture quality on those posted captures. They may not be exactly the same frame. Moreover, the images have gone through multiple mainupulations such as resizing and compression. These images were merely meant to show the difference in zoomed/overscanned image vs. non.
I’ll be investigating this further and I’ll let you know what I find out. It will probably be a couple weeks though.
swoon wrote:
(assuming you
[quote=swoon] (assuming you haven’t changed the setting in the display, Samsung calls 1:1 “Screen Fit”).
[/quote]
I had mine sitting in “16:9”. I just assumed ‘screen fit’ would rescale a screen to fit, that’ll teach me to try and apply logic to a naming system.
Yah, screen fit is the one
Yah, screen fit is the one you want.
-Aaron, thanks for your assist, and no need unless you are interested in finding out.
It could just be a quirkyness with my particular hardware.
Anyone have a Sony Projection
Anyone have a Sony Projection TV here. XBR is the model I think. The only options I have on the TV is to center the screen. I can’t size. So my next question is about the ATI settings.
On one screen there is the check box for GPU scaling. I’ve check it and unchecked it and I don’t see anything happen.
Ultimately the only way to get the media center to fill the screen is to use the overunder scan control.