Tip Of The Day: Ripping A Blu-ray Disc To Your Hard Drive
The goal of today’s tip of the day is very simple! All we want to accomplish is to rip a Blu-ray disc to your hard drive for playback with the program of your choice. One thing to note, media center programs such as VMC or SageTV will natively playback Blu-ray discs. A bit of a pain in the butt but there are a couple of good alternatives out there.
There is no way around it. You will need to purchase AnyDVD HD to rip a Blu-ray disc. It is on the pricey side, but it is a small price to pay to manage your Blu-ray disc through your HTPC. The install is pretty painless and you will be presented with a tiny fox icon on your start bar on the right hand side.
When you right click the Fox, a menu will pop up and you can simply choose to rip the Blu-ray in its entirety. This will be the entire disc with extras included. In Arcsoft’s Total Media Theater’s case, I simply point it to the BDMV folder and it will play the entire disc as if it was a standalone disc.
When AnyDVD HD is loaded it automatically removes the encryption on SD and HD discs. This allows you to perform any operation on the disc as if it was already ripped and decrypted onto the hard drive. The method I choose, since I am not interested in the extras, is to grab the audio and video stream right from the Blu ray disc.
Steps
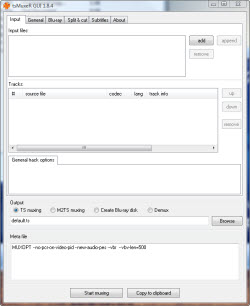
Grab TSMuxer from Doom9.org. Open up the tsmuxergui and you will be presented with a screen that looks like this.

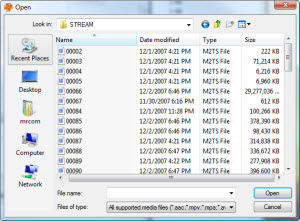
Click the add button and navigate to the .mts stream in the Blu-ray disc. This can be found by clicking on the Blu-ray title>BDMV>Stream>many .mts files.
You are looking for the .mts file that is obviously the largest size. Usually something greater then 10GB. There are discs with multiple .mts files that make up the main movie but I have yet to come across an example of this. If this is the case, you will have to go through an additional process of joining the multiple files together. At any rate, the .mts file contains the audio and video portion of the movie. In most cases, the largest files contains the movie file and that is it.
As you can see in this case, the 29 GB file is clearly the largest and that is the one we will go with.

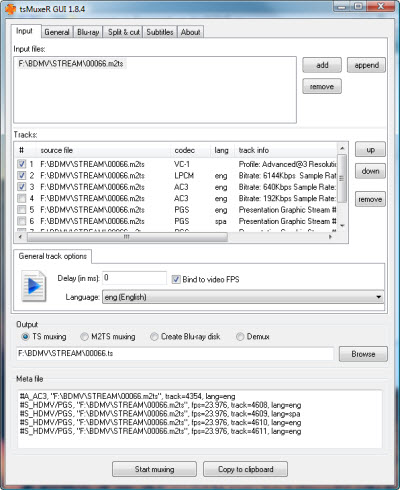
Next we will be presented with all of the available information about that stream including audio and video data. Choose the CODECs you want to keep and then click on the Create Blu-ray disc. This will create an "image" of a Blu-ray disc with the BDMV folder structure. All you have to do is point your program to the BDMV folder OR associate .mts files with Total Media Theater, Power DVD etc. For the cataloging program I am using (Collectorz.com). I direct link to the .mts files in the BDMV folder structure.

This method can save you several gigabytes by stripping out the unwanted extras and audio files.
The final method you can do is take this folder structure and use image burn to create an .iso and load it with daemon tools. I am really just scratching the surface on how to manipulate HD discs but the methods provided above will NOT touch the audio and video quality above.
Converting the above files to a .mkv without losing the video quality is possible as well. However, that is another tip of the day.
