
Thinkflood’s Redeye: A True iPhone Infrared Remote
|
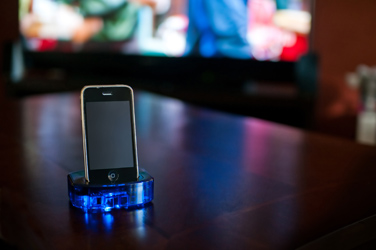
ThinkFlood’s RedEye The idea of an app for the iPhone that allows you to control your A/V equipment is not new, but Thinkflood is unique in that it adds hardware into the mix. RedEye by Thinkflood attempts to convert the iPhone into an activity based learning infrared remote that is competative with the biggest players in the industry. The infrared extender is similar in form factor to the standard Apple charging cradle but packs some specialized hardware. Inside the base station are multiple infrared LEDs that when connected to the iPhone via Wi-Fi allow you to control just about anything with an IR sensor. At an MSRP of $188 this device is priced in the middle of high end activity based radio frequency remote controls. Will it be the "ultimate evolution of the remote control?"
|
Introduction
The RedEye is a WiFi based infra red (IR) learning and activity based remote control that allows you to you your iPhone or iPod Touch as a high end fully customizable remote control. We are all tired of sticky notes and cheat sheets that remind our loved ones how to turn on the TV, receiver, DVD player, amplifiers and which remote control does what. The "activity based" remote control is supposed to be the end all be all fix for the "too many remote control" issues and by in large most of the devices sold work well. It is much easier to hit "Watch DVD" and have all the equipment do what its supposed to do automatically rather than use ten different remotes to turn on each device and set the inputs accordingly. The RedEye brings that technology to the Apple lineup and does so in a way that works.
Product Specs
- Includes: "RedEye" Wi-Fi to infrared bridge; 100-240v, 50-60Hz AC power Adapter, Universal Dock Adapters for iPod touch, iPhone, and IPhone 3G/3GS
- Requirements: iPhone, iPhone 3G, iPhone 3GS, or iPod touch with firmware update 2.2.1 or later, RedEye Software application (available as a free download from iTunes)
- Recommended: Wi-Fi (802.11b/g network with Internet connection
- Supports: Virtually all home entertainment devices with infrared capabilities; WEP, WPA, WPA2 security protocols
|
|
The reason to purchase the device according to the manufacturer:
With a RedEye device, you can turn your iPhone or iPod touch into a remote control for your home entertainment electronics. With multiple RedEye devices, you can control electronics in more than one room in your home.
First Impression
 |

|
| Outer Box | Inside The Well Designed Packaging |
I am not normally a person who notices packaging. I am the type that has the box ripped open as I am walking out of the parking lot, driving home with all the parts on the passenger seat next to me and reading the instructions at red lights. So when I remember the packaging of the product it is either completely intolerable or innovative–the RedEye came in a nice black box that was well constructed with compartments for each component, cables and the instructions. I tried my best not to rip it open walking back from the mail box. The instructions are printed and included with the RedEye and relatively simple. The product comes with the basestation and a AC adapter and that is it. I was surprised to see that it did not include any sort of IR extenders, but more on that later.
Installation and Configuration
The installation for the product is relatively simple as it only requires you to open up the app store on the iPhone, search for the RedEye app, and click "Free." Once you complete the install it is now time to configure the device.
In order to configure the device you need to turn the iPhone on "Airplane Mode" and then turn on your Wi-Fi. This is to insure that the RedEye app is searching over the LAN connection for the device and not the WWAN connection. Assuming the RedEye basestation is already plugged in you will see a Wi-Fi network labeled "RedEye". Once you connect to the Wi-Fi connection you can then launch the RedEye app. This is where I ran into issues. In the written instructions included in the box it left out the fact that you needed to put the iPhone into "Airplane Mode" prior to connecting to the Wi-Fi network. It is on the website and in an email from ThinkFlood Support I was told it would be added to the printed instructions. Once I put my iPhone into "Airplane Mode", turned on Wi-Fi, connected to "RedEye" and then launched the program I was in business.
From there all of the infrared device configuration was done via the iPhone. In my opinion, this is one of the biggest weaknesses of the device. Adding the information required for each piece of equipment on the iPhone’s touch keyboard took a long time. I added an Onkyo TX-SR605, Comcast Motorola Cable Box, my home built Home Theater PC, an Epson 720 Home Cinema Projector and a Digital Lifestyles 32" LCD TV. The good news is that the RedEye’s infrared database had all of my devices IR codes, except the lesser known Digital Lifestyles brand. It does have the ability to learn IR codes from a remote that you have for a device that is not in its database as well.
In order for the RedEye to access the IR code database you first need to change the Wi-Fi network the device is working on. By default it creates its own Ad-hoc network and it needs to have Internet access in order for the IR database to be used. Changing the Wi-Fi network is as simple as opening the "Setup" tab, clicking on the created room that the RedEye device is in and clicking on network. Then just select your home’s Wi-Fi SSID and then change the Wi-Fi connection on the iPhone to your home’s SSID. This process would be much simpler if you could launch the Wi-Fi manager on the iPhone without exiting the RedEye app, but that is a Apple specific issue and to no fault of Thinkflood.
 |
 |
| Activities Screen | Activity Specific Remote Control Screen |
Once you have launched the RedEye app it is now time to add devices. To add a device you click on the "setup" tab, click the "room" the RedEye is in, and click "add new device." The "add new device" screen asks for the normal information for each device you wish to add: manufacturer, device type, display name, model name and a description. It then searches the online database and comes back with the known IR codes. If there are more than one set of IR codes for the device, like my Onkyo 605, it will have you test one button for each code set to determine the correct one. Repeat for each device. I prefer doing this on a PC with my 23" LCD and full keyboard, as it is with other "activity based" remotes, but this process works well enough.
After you add your devices you need to configure the activities for each RedEye you own. The RedEye app can control multiple RedEye devices in separate rooms for a whole house controller. This again is in the settings menu and is found directly under the "add new device" button. It allows you to add the most common activities quickly and easily by selecting them from a list; "Listen to CD"," "Listen to MP3","Watch DVD" and so on. There is an "other" category that allows you to add your own custom activity; I have a USB-UIRT that is connected to my Home Automation Server and have a simple activity setup to control a light in my home. Once you select the activity it then prompts you to confirm the name of the activity and add the devices. After adding the devices in the activity it prompts you to add "actions," which are tasks such as "Power On or Off" and "change input.’ These actions are specific for your own setup and preferences. It includes "Launch Actions" and "Shutdown Actions" for each activity.
You need to repeat this process for each activity you wish to have. I added "Watch HTPC,’ "Watch STB," "Listen to Music" and "Listen to Radio"
Each activity screen and button layout that corresponds to each device and activity are fully customizable. This is where the RedEye shows its advantage over a stand alone hardware remote control. You can completely change the button layout to fit what you want, for every button and command, something that no other remote can do.
Conclusion
After a couple of weeks using the device I have not had any issues with the RedEye device or iPhone app, but I have had some issues with the iPhone itself being used as a remote control. The fact that the devices uses Wi-Fi is great, as I can be anywhere in my house and be able to control the volume of my music and it is a much more robust and reliable protocol than bluetooth.
The biggest issue in my installation is that my home theater computer, AV receiver and cable box are in a different location from my Projector and TV. I could not control my projector with this setup, which meant that it is not going to find a home in my AV rack. This could easily be fixed by adding three to five 2.5mm mono IR jacks on the back of the device to hook up (commonly available) IR blasters. At present, you would need to use a IR distribution system in order to complete the same task. In my opinion this is the greatest issue with the device and is required in order for most high-end users (who hide their components in a rack or cabinet) to find the product viable and worth the cost of $188 USD.
Other than the lack of IR blaster expansion the device is great, works well and has one of the best IR code databases I have seen. If your family is outfitted with iPhones and iPod touches and all of you AV equipment is in the same location this would be a great device to use.
I agree with Thinkflood that using the devices we already own and carry with us at all times, to control the TV and DVD player makes a lot of sense. In order for this model to work well, however, the app would have to be available for platforms other than the iPhone.
Positives
- Completely customizable layouts
- Great IR code database
- sleek looking device
- Only one wire, the power wire.
- Strong IR LED blasters
- Intuitive Setup
- Great reliability. No lock ups or delays when in use.
- Quick e-mail support
- Video "How-To" guides available
- Multitouch gestures
- Accelerometer based motion gestures
Things to think about:
- This device has no wire IR blasters.
- It requires an iPhone or iPod Touch.
- All of the setup is done on the iPhone or iPod Touch.
- $188
Thanks to ThinkFlood for providing the RedEye unit for review.