
Installing SageTV V7
SageTV V7 Installation GuideIf you are new to SageTV getting it installed and everything like ISO playback and HD audio/video playback working can be bit of a challenge; so when I needed to do a V7 install a few days ago I decided to document the process to hopefully make it easier for everyone to get the server up and running. When looking at the guide it is important that many of the steps are not required to make SageTV work, but they either make it work better or accomplish specific goals (like HD audio playback or ISO support). Also note that while V7 is feature complete and very stable it is still in the Release Candidate stage, so not yet "Gold".
Please note that this guide should be considered a living document. So Click through to get the whole thing, but get some refreshments first – it’s pretty long 🙂 |
Prerequisites
Java:
The first step in the process is to install Java. The SageTV installer does include a version of Java, but it is really old and I have had better luck with more recent versions. That said I used to run the latest, but after having some issues with Update 20 that forced a rollback to Update 19 I have not seen a reason to update to the latest (currently Update 21).
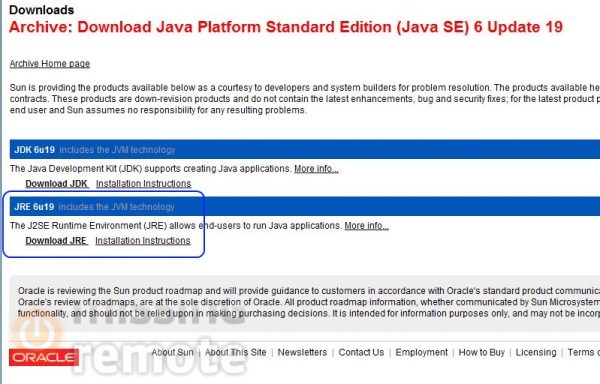 |
Anyone who wants to run the latest can go to the Java download page and grab whatever is there, but for those who want Update 19 you will need to go to the archived download page and choose to “Download JRE” (there are a couple more pages beyond the one shown, but those are mostly click through).
After the download completes run the setup which, at least for archived versions, is very easy. The latest revision usually has some sort of crap-ware included so make sure to opt-out unless you really want whatever toolbar Sun is pushing this month.
After the install is done we want to disable Java’s automatic update feature. For most applications I wouldn’t advise disabling updates, but the Java updater has an annoying “feature” where it checks for a new version which triggers a UAC (consent.exe) dialog if it finds one–which if it happens while you are using the PC as a HTPC (i.e. watching something) it really disturbs the experience.
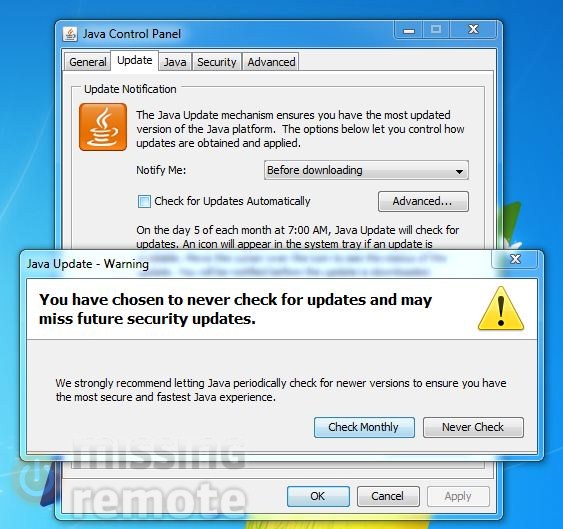 |
Java does not make it easy to accomplish this either because while the updater clearly understands how to escalate, the Control Panel utility does not (so any changes will not stick). Once we understand the problem it is easy enough to work around by browsing to the Java install directory (C:\Program Files\Java\jre6\bin or C:\Program Files (x86)\Java\jre6\bin on x64) and running “javacpl.exe” as an administrator (right-click and select “Run as administrator”). After it opens go to the “Update” tab and uncheck “Check for Updates Automatically” then click “Never Check” when asked to confirm the choice.
Virtual CloneDrive:
For those unfamiliar with Virtual CloneDrive (VCD) it is a lightweight driver for creating virtual optical drives. It is only required for environments with DVD or Blu-ray (BD) rips stored in ISO format usually used by those seeking maximum compatibility between applications like SageTV (which will play BDMV folders) and BD playback software like PowerDVD (which does not). This is an important step for extender only users as well, because even though the HD300 natively support ISO the server still needs to mount it to do format detection during the media file discovery process.
Like Java, installing VCD is mostly a simple exercise in clicking through the installer – the only option I change is the one that puts an icon on the Desktop.
 |
Once installed, the only required change is to open the VCD configuration utility found in the system tray and bump up the number of drives to more than two. For the way I use my HTPC, I’ve found three to be the sweet spot.
Install SageTV
Again not much to do during the install process, minimalists will want to uncheck support for the Hauppauge remotes but I have never seen the need. The only point of real importance is remembering to select the “Launch the SageTV Service Control Application when installation is complete” checkbox (if you happen to miss it, just find the application in the program menu). This is important because the SageTV server can run either as a service or as a part of the “client” shell, but services mode is not the default so we will want to change it before starting Sage. Personally, I don’t know why anyone would not want the additional safety obtained from separating the UI from the backend so we will just ignore that configuration and continue.
Unregister Unwanted SageTV Filters:
Anyone not planning to run Windows Media Center (WMC) on the same box as SageTV can skip this part because we are going to fix a compatibility issue between the two applications. The root of the problem is that–as far as I can tell–the WMC recording service process (ehrecvr.exe) enumerates and loads every DirectShow filter on the box and there is something about a few of the filters that SageTV installs that do not like being loaded by ehrecvr (I have never been able to figure out why because they load fine in GraphStudio) and cause it to crash. The filters are only used by TV tuners that do not have built in hardware encoders, so for most users it is safe to just make the problem go away by unregistering them.Since they need to be unregistered every time SageTV is installed (which during the beta period can be quite frequent) I made a couple batch/cmd files that make the process easy. Just extract the zip and run the appropriate file as an administrator.
Configure The SageTV Service:
With that bit of housekeeping out of the way, it is time to configure the SageTV service. As noted earlier, it is not enabled by default so we will need to click “Enable” to change that. Then unless all of the media that the service will access is local to the server select “Change User” to configure the service with an account that has network privileges. I always use the same account that automatically logs on the HTPC and has administrative rights to simplify things. Finally check “Enable Service Recovery” and then select “Start” to get everything going.
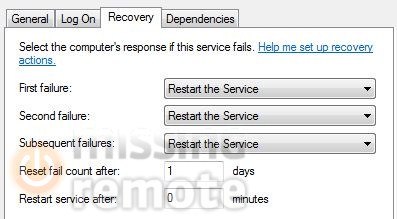 |
Advanced users may want to drill into the services.msc and change the recovery options slightly (I configured it as shown above).
Post-Install
AC3Filter:
AC3Filter is included in the SageTV install but is a really old version, so I like to use the much newer 1.63b release. SageTV is a 32-bit application so for this install head over to the AC3Filter site and grab the “Lite” version. If you plan to also use AC3Filter with native x64 applications the full download includes both, just make sure that when configuring the filter you select the x86 version.
Click through the installer then run ac3config (Start -> All Programs -> AC3Filter Config) as an administrator and configure the filter as shown below.
 |
 |
For those using an audio video receiver (AVR) that accepts bit streamed audio check “Use SPDIF” on the “Main” and “SPDIF” tabs then also check the boxes appropriate for what the AVR can accept (most AVR can decode both AC3 and DTS).
 |
 |
Configurations where decoding should occur on the PC (either because no AVR is present or to output AC3/DTS as multi-channel LPCM) should configure AC3Filter differently. The screens for “Main” and “SPDIF” above show how to configure for stereo output (uncheck “Use SPDIF”); in most cases anyone seeking multi-channel output should select “AS IS (no change)” for the output format instead of “2/0 stereo”.
 |
The last step is to uncheck “LPCM” in the “Use AC3Filter for” section of the “System” tab. For those who have MKV files with LPCM of FLAC audio tracks, it is important to leave "PCM" selected becasue as far as I know AC3Filter is the only filter that can process the PCM audio. I also like to lower AC3Filter’s merit from its default so it does not join graphs where it is not needed. When you are done click “OK” to save your changes.
Before moving onto the next step it should be noted that the next time you reinstall SageTV it will register the old version of AC3Filter again, so to simplify the process of undoing that I also created a set of batch/cmd files that will register the newer version after installation.
Register Total Media Theater Video Filter:
SageTV V7 adds native MKV and WVC1* subtype (used by the WMVideo Decoder DMO included with Windows) support for VC-1 video to its internal splitter filters. While in some ways this makes the install easier because we no longer have to sort out MKV support, it also reduces the number of options available. Because of this currently the only way to enable hardware accelerated decoding (HWA) in SageV7 is by installing the ArcSoft Total Media Theater (TMT) video decoder filter (asvid.ax).
* The MPC-HC and ffdshow DXVA filters will accept VC-1 presented as WVC1, but do not currently provide an acceptable playback experience in SageTV V7. This issue has been escalated with SageTV support; hopefully it will be addressed in future builds.
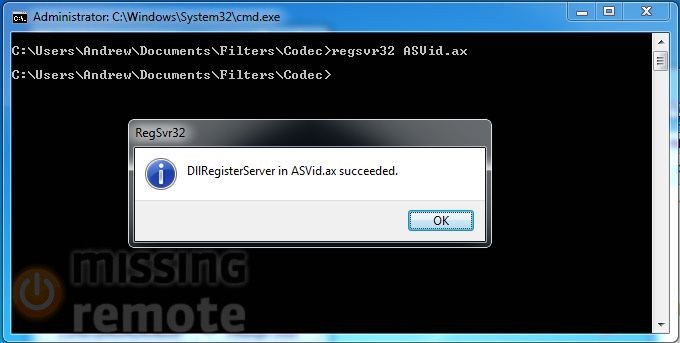 |
Hauppauge HD-PVR users will find obtaining a copy of the filter very easy because a copy of TMT2 is bundled with the capture device. I used to install TMT2 each time I rebuilt the box, but after some issues with a problematic component included with it I just stored a copy of the “Codec” folder and manually registered the filter from an elevated command prompt on subsequent builds.
Install Ffdshow:
Ffdshow is a component necessary to enable HD audio support, so this step is only required for those with audio hardware that supports HDMI 1.3. If you do not want/need HD bit stream support you can skip this step even if you have files with TrueHD/DTS-MA, because by default SageTV presents the core audio (i.e. AC3/DTS)* for those audio tracks. The first step is to grab the latest clsid build of ffdshow and run through the install process which is a little more involved than the other installations so we will walk through each screen.
* I have not tested this, but I assume that this feature requires a core audio stream to be included alongside the losses track so users with MKV files that only contain HD tracks will still need to install ffdshow, but they will need to configure it to decode the audio instead of bit stream.
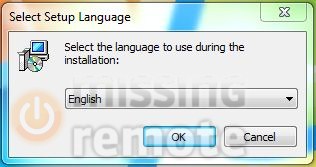 |
Click “OK”
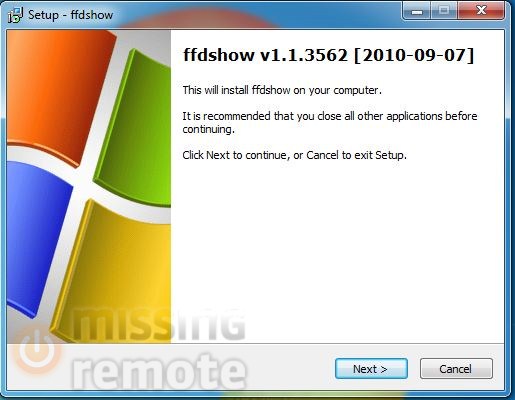 |
Click “Next”
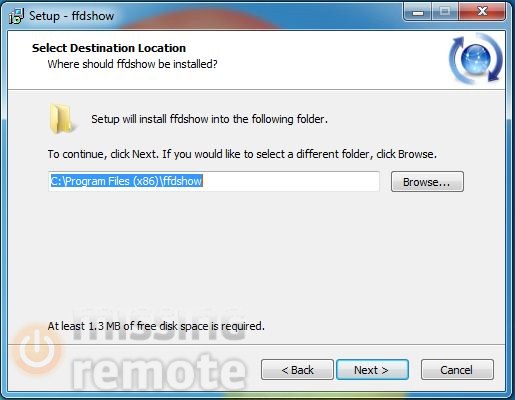 |
Click “Next” unless you want to change the installation directory.
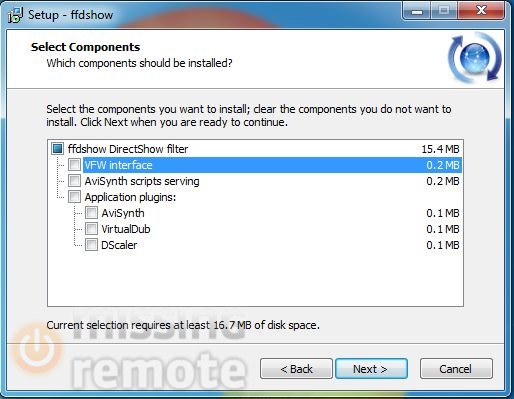 |
Uncheck “VFW Interface” then click “Next”
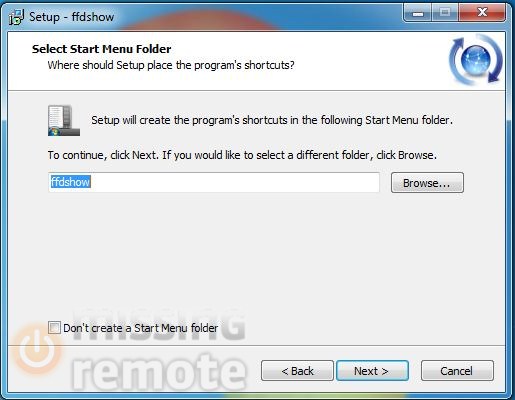 |
Click “Next”
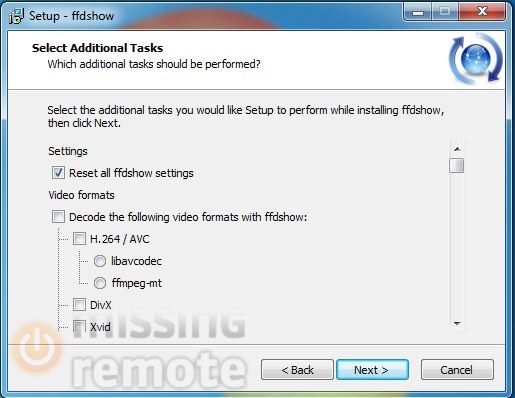 |
Click “Decode the following video formats with ffdshow” twice to clear all of the video formats then go through the list of video formats that you would like to decode with ffdshow (i.e. Divx and Xvid if you are not planning to install a separate filter to handle them) and scroll down to the audio format section.
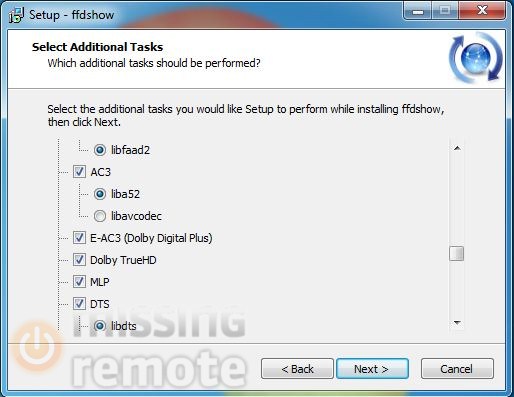 |
Leave the audio formats alone but verify that AC3, Dolby TrueHD, MLP and DTS are selected (they should be), then scroll down to the bottom.
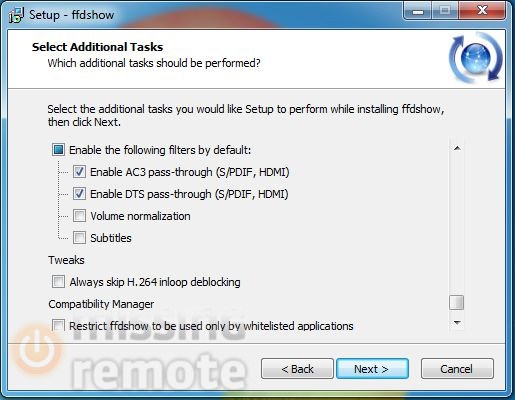 |
Since the goal is to enable HD bit streaming enable pass-through for AC3 and DTS before clicking “Next”.
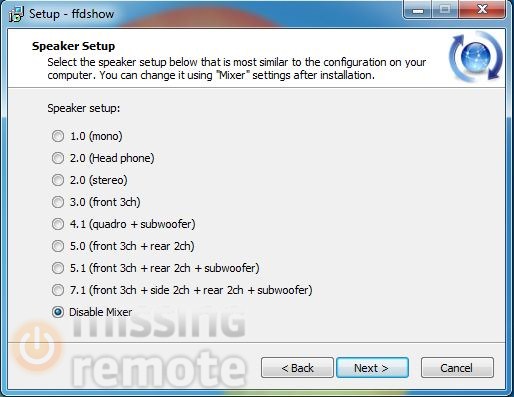 |
Optionally select “Disable Mixer” to turn off down/up mixing on the PC, then click “Next”.
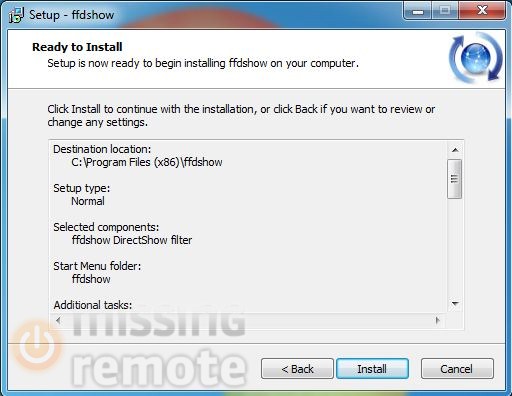 |
Click “Install”.
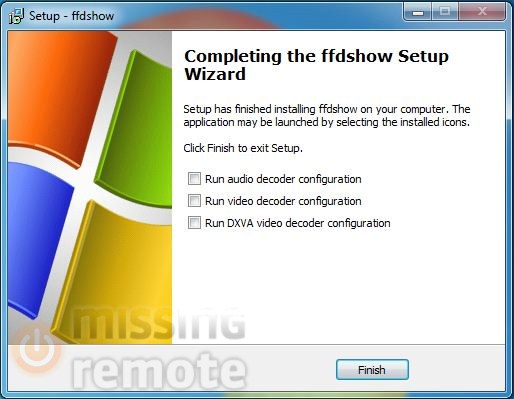 |
Then click “Finish”, but we aren’t done yet. Ffdshow installs with a very high merit so we need to bring that down a bit. There are other ways but I prefer to use GraphStudio so go ahead and grab a copy, then run it as an administrator.
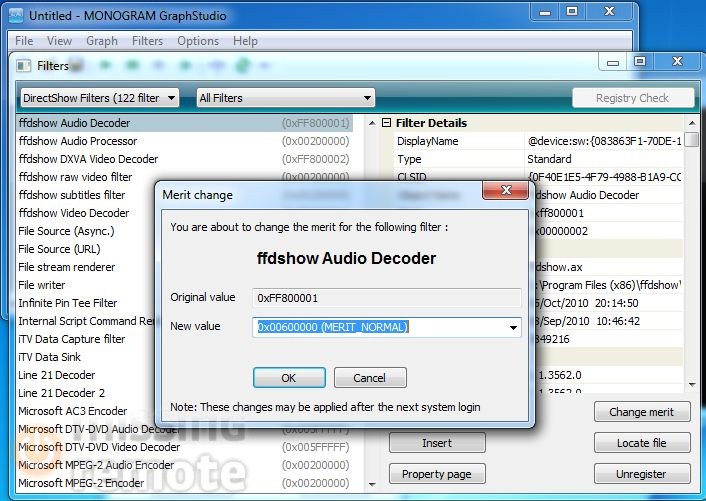 |
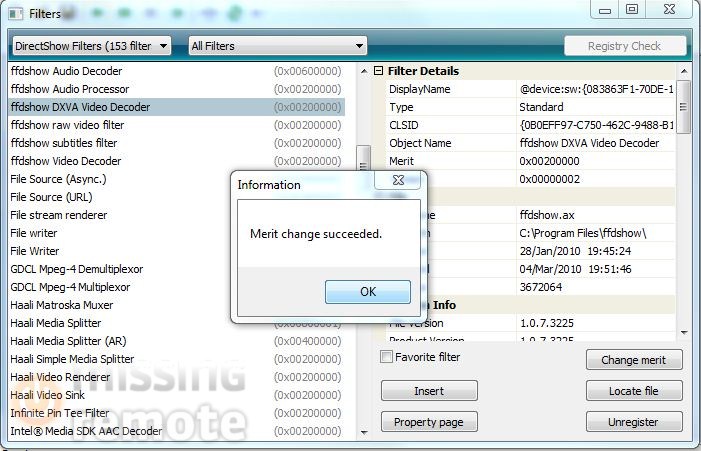
After it opens select “Graph->Insert Filter” from the toolbar (or press control-F), then browse to the ffdshow filters. We only need to touch the “ffdshow Audio Decoder”, “ffdshow DXVA Video Decoder” and “ffdshow Video Decoder” so select each one and click “Change merit” to select a more reasonable value. I only use the audio decoder so I go with “MERIT_NORMAL” for it and “MERIT_DO_NOT_USE” for the other two, but if you want ffdshow to handle any video codecs selected during the install “MERIT_NORMAL” is a safe value.
 |
Now that we are done changing merit select the “ffdshow Audio Decoder” again and click “Property page” to bring up the filter’s configuration dialog.
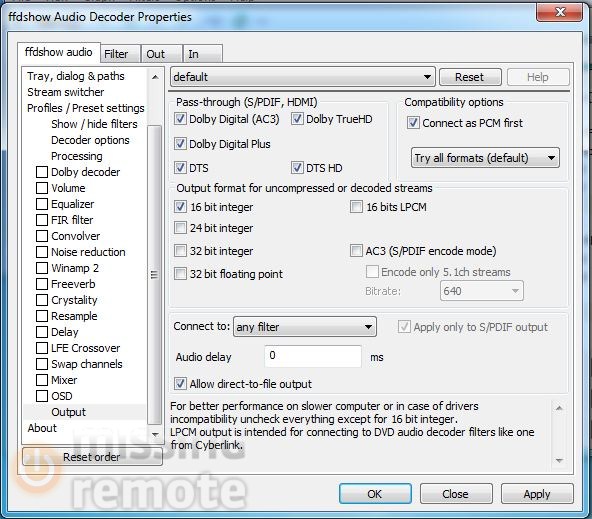 |
We covered the main points during the installation, but there is an additional step required to enable HD audio bit streaming. Scroll down the “Output” section, and then check “Dolby TrueHD” and “DTS-HD” in the “Pass-through (S/PDIF, HDMI)” section. Advanced users may want to change the output format for decoded streams (i.e. audio output as PCM) while we’re here, but that can be configuration dependent and 16 bit is a safe value for everyone, so most will want to leave it alone.
Start SageTV
Initial Setup:
With all of that out of the way we can launch the SageTV client application. There should be a link on the desktop, so go ahead and double-click it.
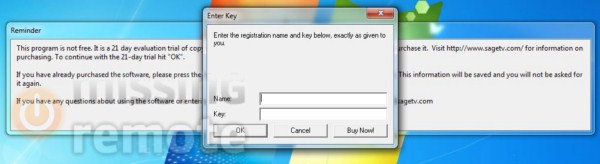 |
Until you enter a license key SageTV will prompt for one every time it starts up, so I usually enter it the first time. If you are just trying it out, there is not a way to make this go away so just click “Continue” to proceed. On the next set of screens we are going to walk through the first-run setup. I like to use the keyboard for configuring SageTV, but the remote should work too (at least the Media Center ones do); if you do use a keyboard everything can be accomplished with the arrow keys and by pressing “Enter” to select items.
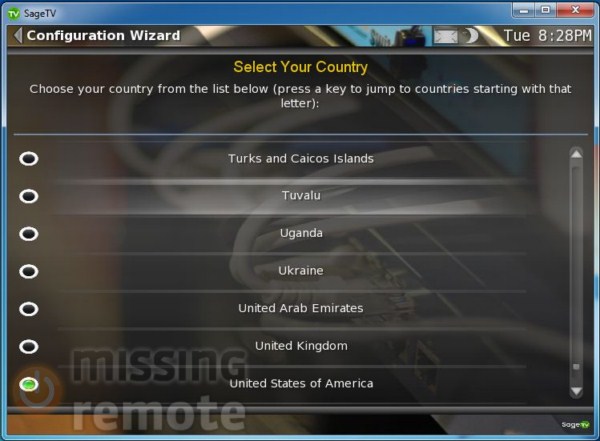 |
Choose a country.
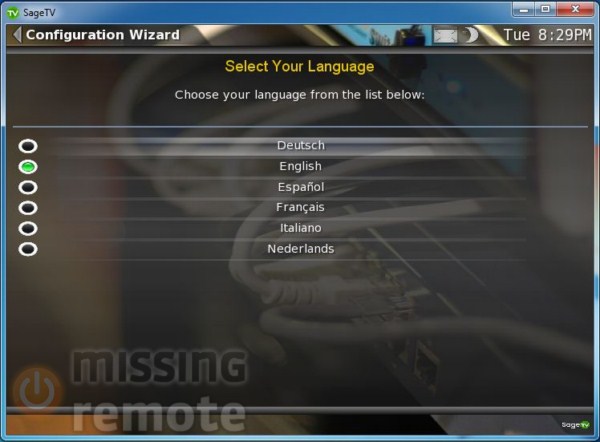 |
Select a language.
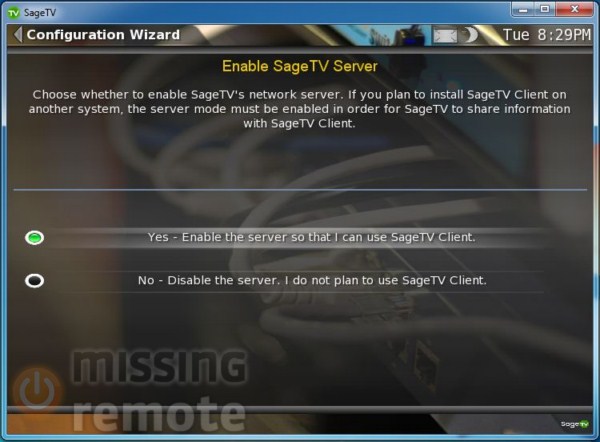 |
Enable the server.
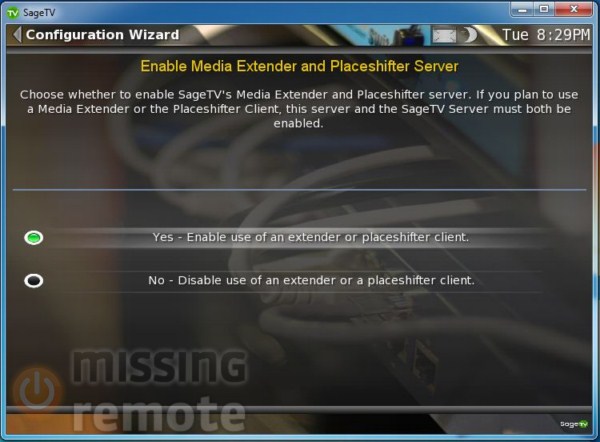 |
If you are planning to use extenders, enable them here. Don’t worry you can change your mind later.
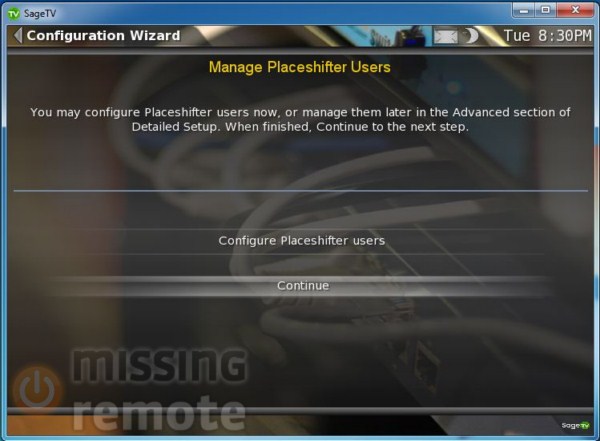 |
I don’t use the placeshifter feature so I just click “Continue”.
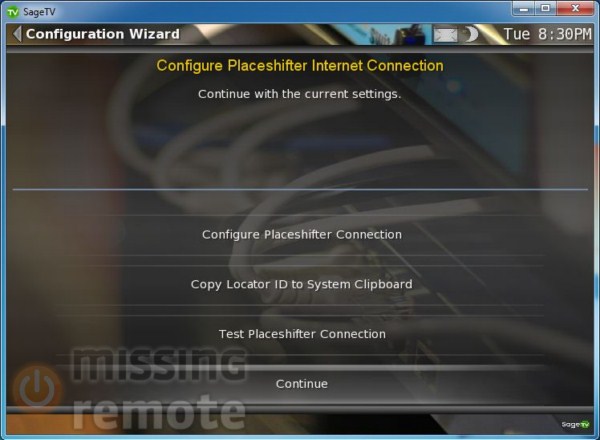 |
And “Continue” again.
 |
I don’t want SageTV to load each time I login, so I select “No…”.
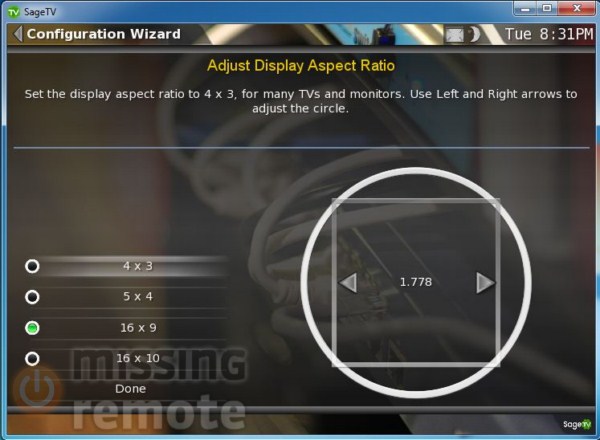 |
Choose the aspect ratio appropriate for your display. If you have a widescreen HDTV, use “16×9”.
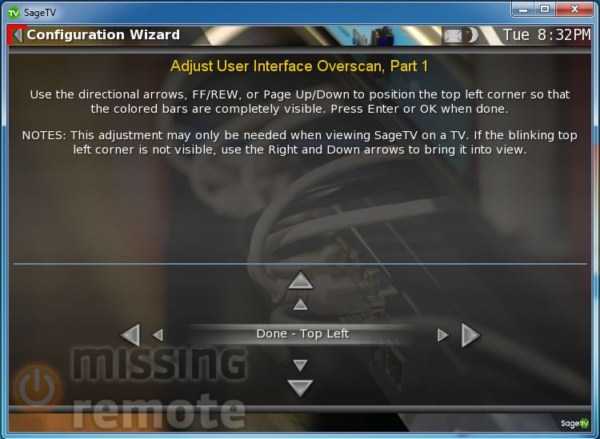 |
If you aren’t running the setup in full screen mode it would be a good idea to do so for this step which is how we tell SageTV the boundaries of the viewable display area. Computer monitors and HDTVs running in a 1-to-1 pixel mode may not require any adjustments, where most rear projection TVs will need to make some adjustments to the “Top Left” boundary…
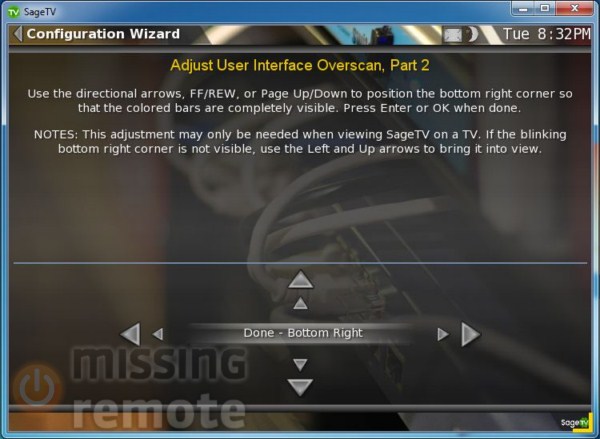 |
as well as the “Bottom Right”.
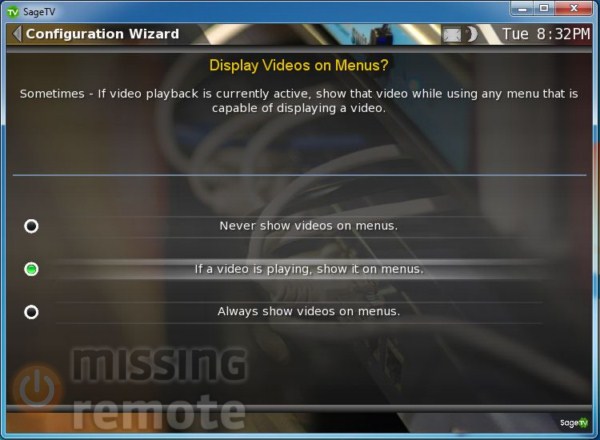 |
Choose whatever value you want – I like to see the video when it is playing.
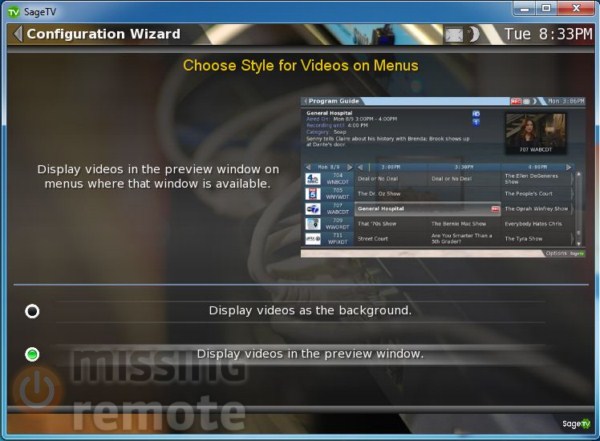 |
Then choose where you want the video to display when it is playing while browsing the menus.
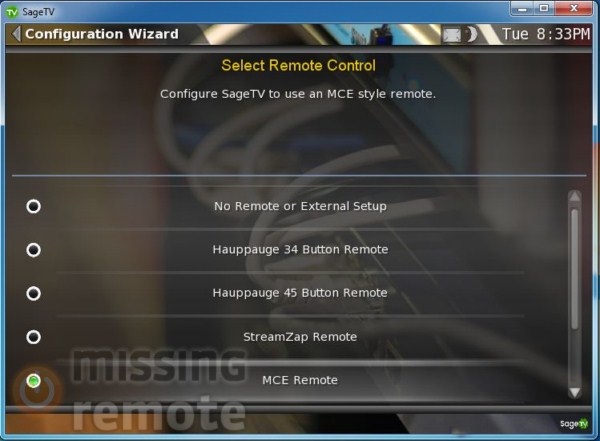 |
Select your remote from the list. On most of my HTPC I use a Windows Media Center remote (aka MCE Remote); if you do too we will walk through how to setup SageTVLauncher to run SageTV using the remote later.
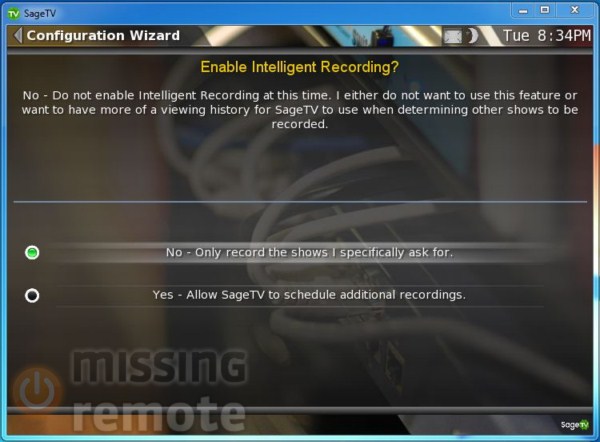 |
SageTV has a feature that tries to record shows that it thinks you will like. I have not found its understanding of my preferences to be that comprehensive so I select “No…”
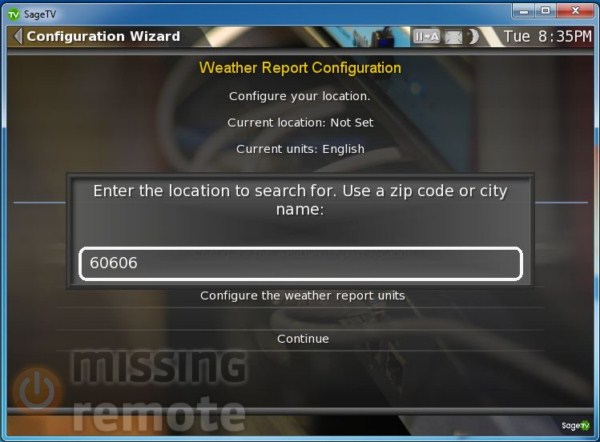 |
Put in your zip code or city name for weather.
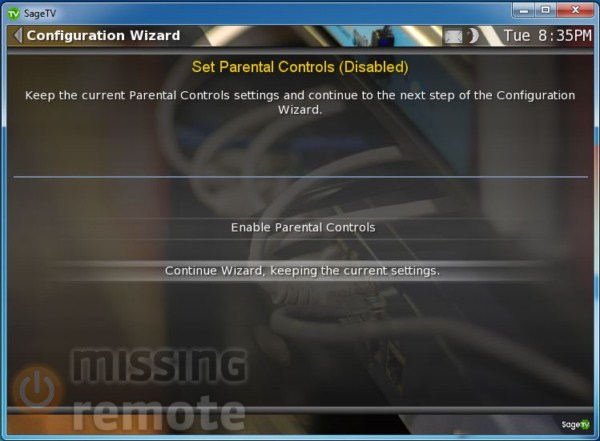 |
Someday I will need to worry about parental controls, but not yet.
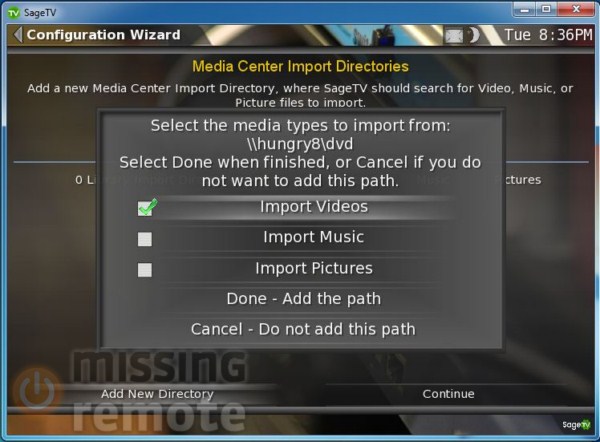 |
SageTV’s media discovery model works best with discrete root folders for different types of media (video/music/photos). So while you can put everything in a big dumping ground, it is much better to map each location separately to avoid problems like fan art getting imported into the pictures library. Those planning to stream Blu-ray from an optical drive (AnyDVD HD or DVDFab Passkey is required for this to work), add the drive (i.e. “G:”) as a video import path.
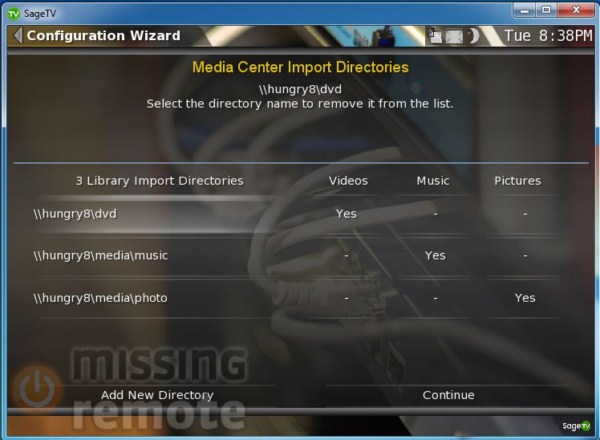 |
If you will only be using extenders there is not much to think about regarding what path you use because all paths are resolved by the server for extenders, but if you will be using other PC clients there are two ways to manage the import paths if they are located on the server.
The first and easiest is to just share a folder on the machine then reference it using a UNC (i.e. \\mysageserver\recordedtv) when adding the path. The other, more complex approach is to share the root of the local drive then map it to the same drive on all client machines (i.e. “D:\DVD” on the server needs to be “D:\DVD” on each client). I use the second approach, but because it can be difficult to guarantee a drive like “D:” on each client I change the letter assignment on the server a letter further down the alphabet like “S:”.
When you have added all of the libraries select “Continue”.
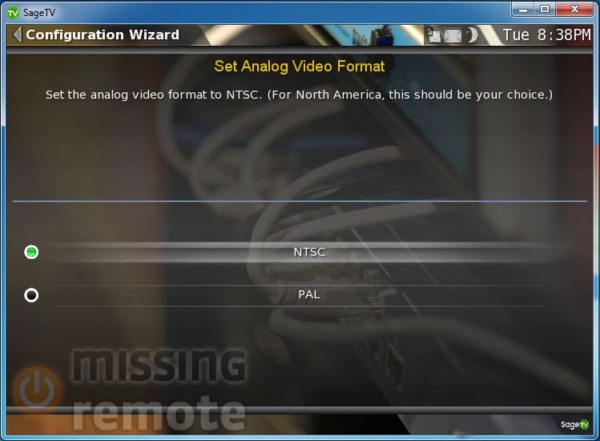 |
Choose the video format appropriate to your locale.
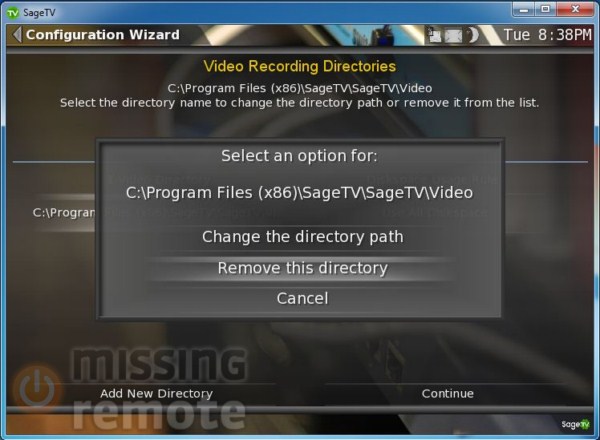 |
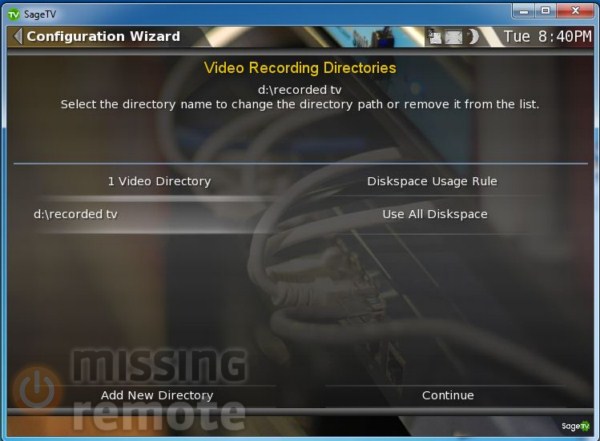
By default SageTV will setup the recorded TV folder in its install folder. I like to dedicate a separate drive for just recordings so the first thing I do is remove that folder from the list.
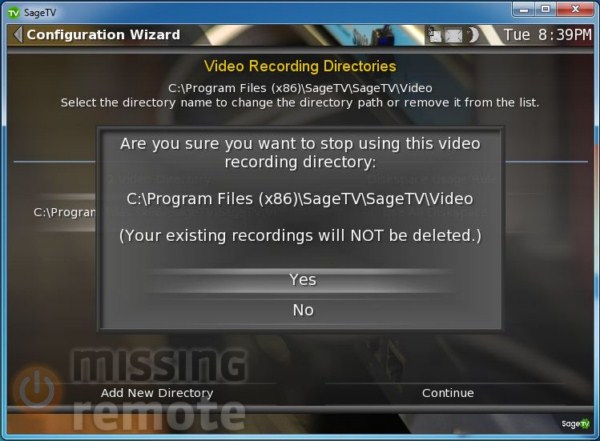 |
When it’s gone “Add New Directory” and point it to a better location. Note that the recording path follows the same rules as import paths regarding UNCs and mapped drives.
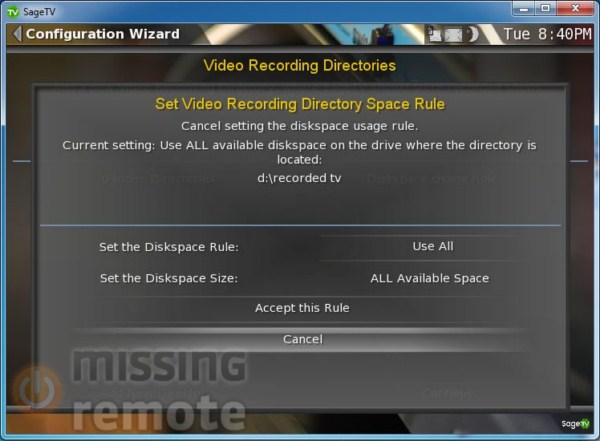 |
Choose the appropriate space rule for your system. You can add multiple drives here if you want; SageTV uses a which-disk-has-more-space algorithm to pick one when it records.
 |
All set, let’s “Continue”.
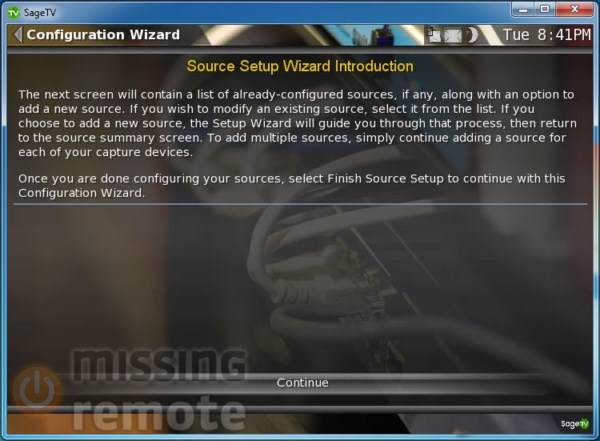 |
Now it’s time to setup tuners. There are too many tuner types to do them all so I just added two ATSC sources.
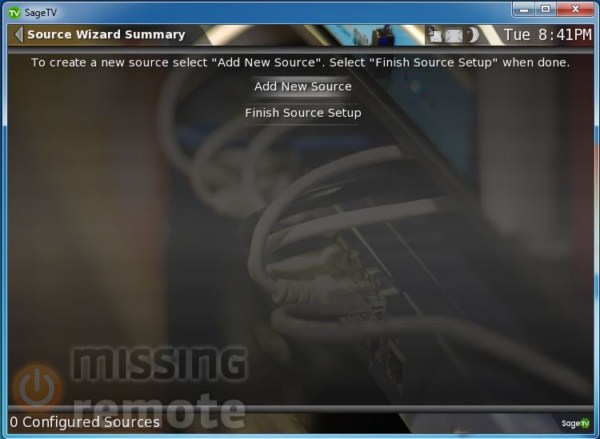 |
“Add New Source” will enumerate all of the valid tuners found on the system.
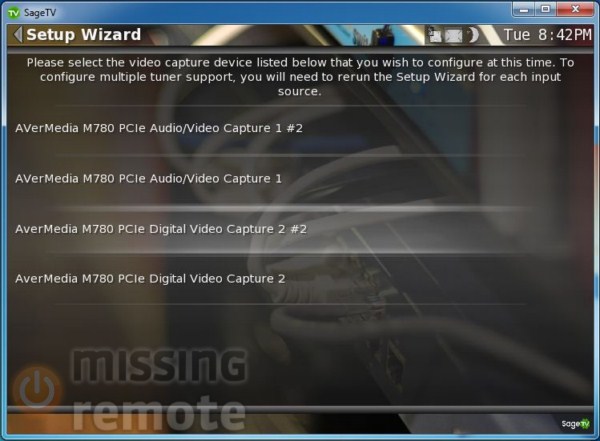 |
Select them one at a time to add and configure the tuner.
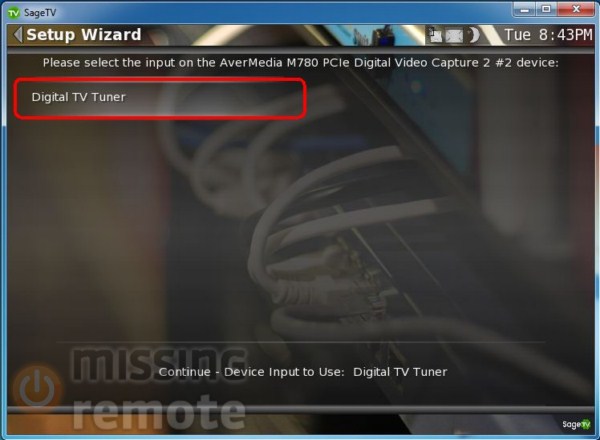 |
This one gets me every time. First select the tuner type, wait for it to turn red, then you can continue. Here it seems like a wasted step, but when configuring a Hauppauge HVR-2250 the process makes sense.
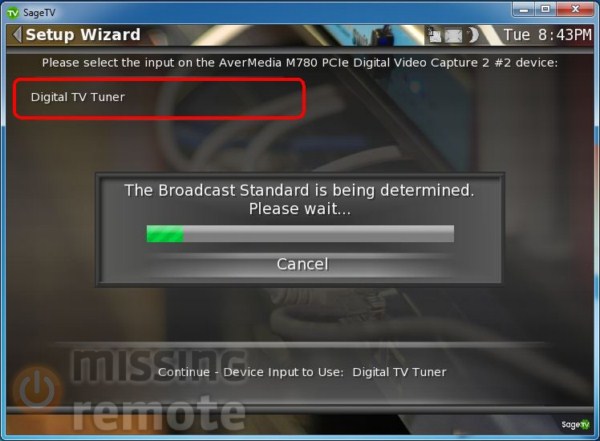 |
Then SageTV figures out what kind of tuner it is.
ATSC:
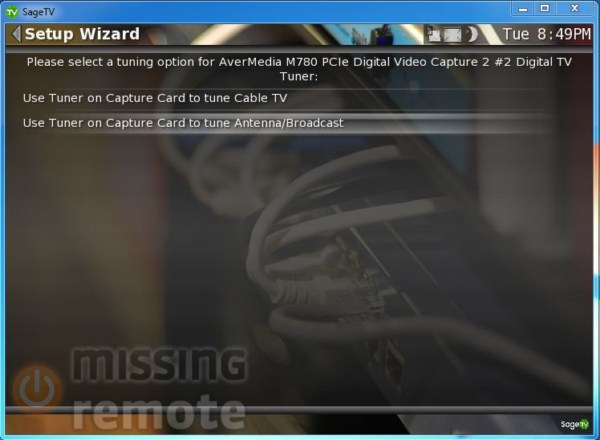 |
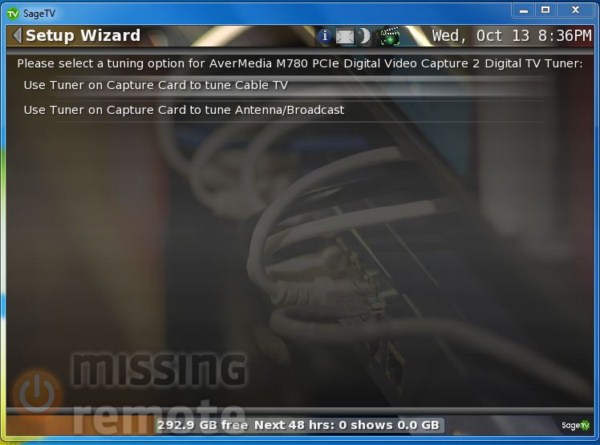
Then we tell it the type I assume because this tuner type can use QAM or ATSC. We will do ATSC first then show the slight difference for QAM. Most users will just do one, but SageTV can support both in the same server so who knows.
 |
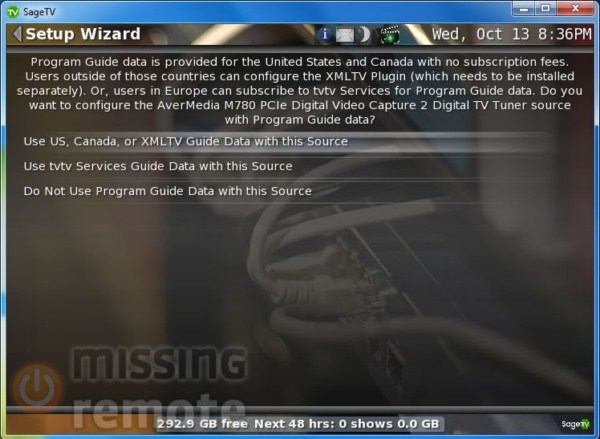
Select the guide data source.
 |
Choose the type of guide data.
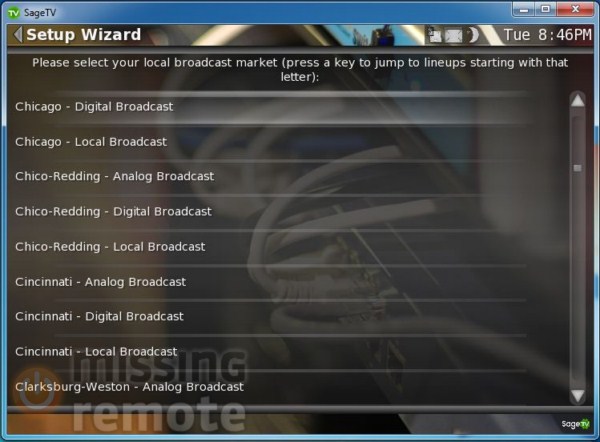 |
And the city/type of data.
QAM:
 |
The main difference versus ATSC is how you select the tuning space and quide data. It took me a little while to figure out the first time that I needed to treat QAM tuning the same way I setup a normal cable tuner like the HD PVR.
 |
Use US guide data.
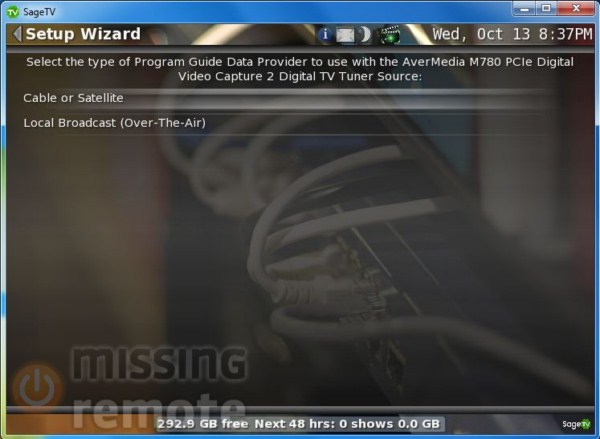 |
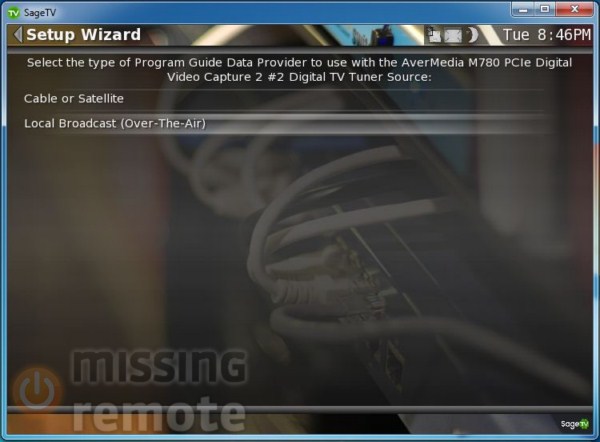
Select "Cable or Satellite"
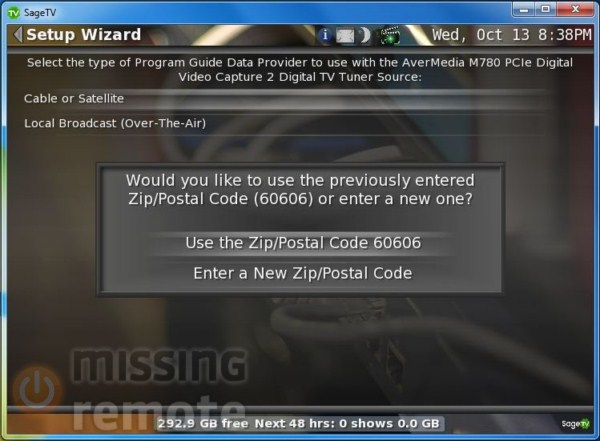 |
Enter your zipcode so SageTV can download cable providers in your area.
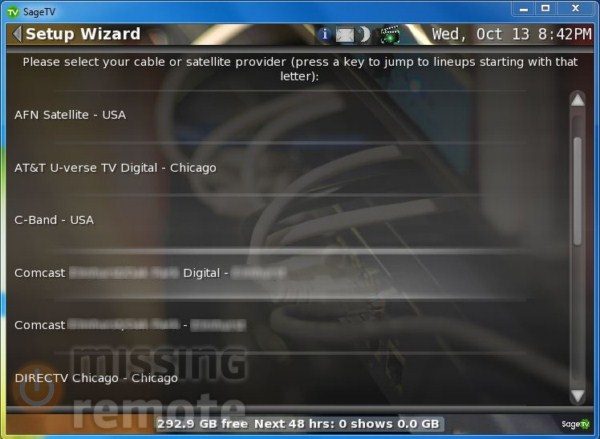 |
Select the "Digital Lineup".
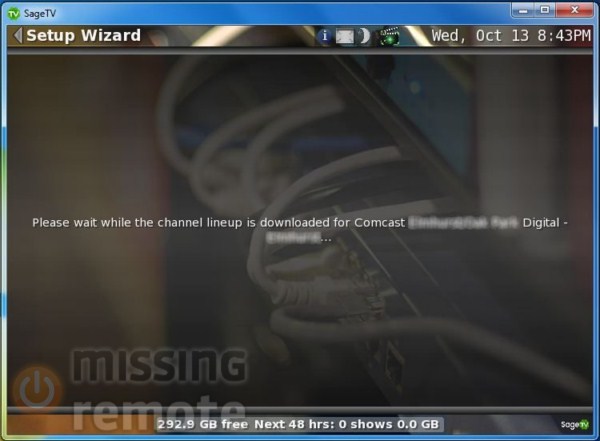 |
Wait while SageTV downloads the channel lineup.
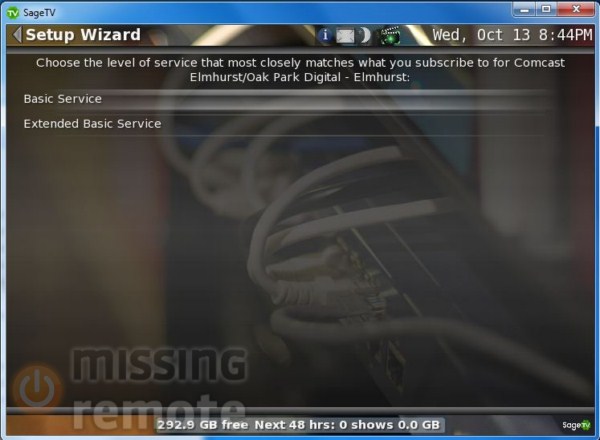 |
I selected "Basic Service" and it worked, but I would think either would work.
Both:
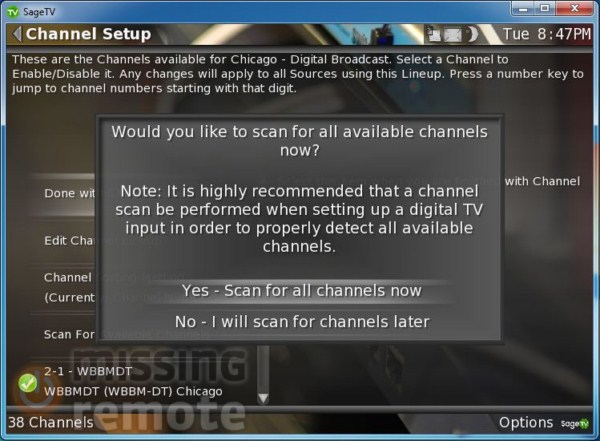 |
For both ATSC and QAM tuners SageTV will scan for channels against the guide data provided. Note that the scan takes a bit longer for QAM.
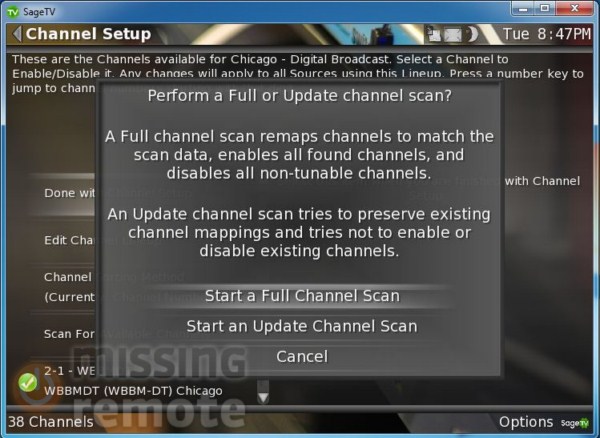 |
Do a full scan.
 |
Get a drink; this can take a few minutes.
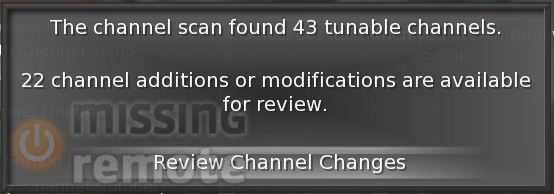 |
When SageTV is finished scanning for channels it will give you a chance to review the results which includes the ability to remove channels from the lineup. After reviewing the results, select “Done with Channel Setup” then repeat the process for all the remaining tuners.
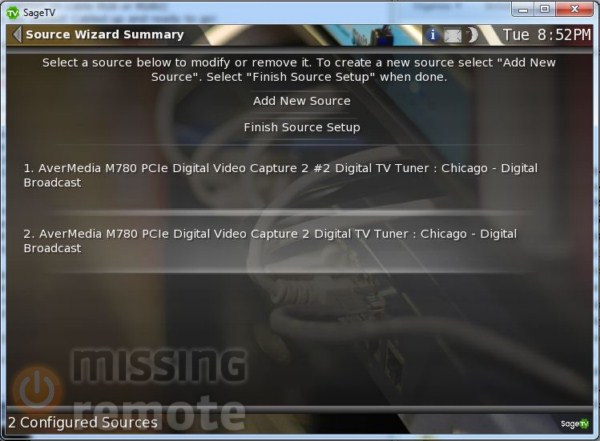 |
In this case I have two ATSC tuners in the box, and while you don’t have to do a full scan for each of them it is a good idea. When you have added all of the tuners select “Finish Source Setup” to continue.
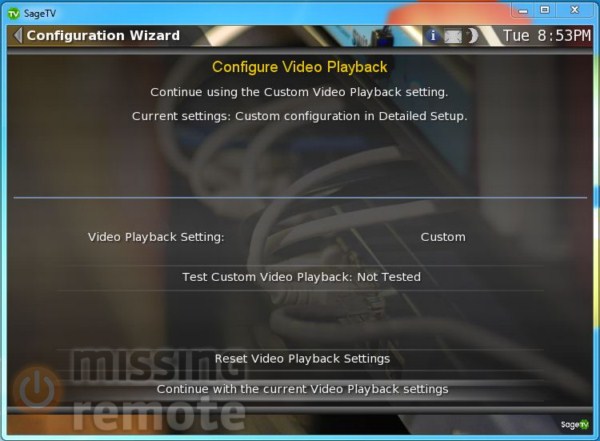 |
If you have modern hardware and a modern OS skip this step, we will take care of it in the next section.
 |
Yep, we are sure 😉
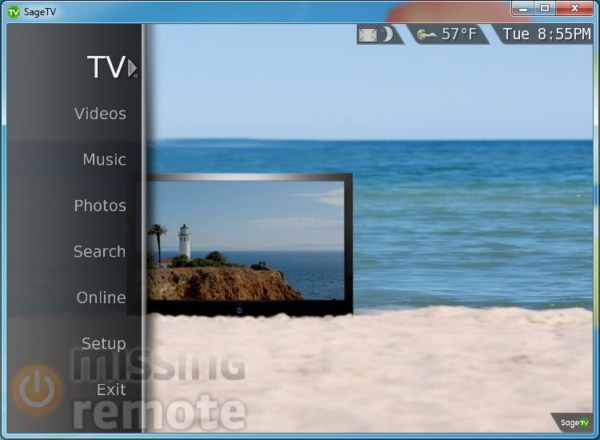 |
And we are done–OK not really but we can take a moment to bask in the new UI.
Advanced Setup
Detailed Setup:
Next we are going to hit the “Detail Setup” to make sure we get the playback experience setup properly. There are an incredible amount of settings exposed in the “Detailed Setup” section, we are only going to cover a very small set.
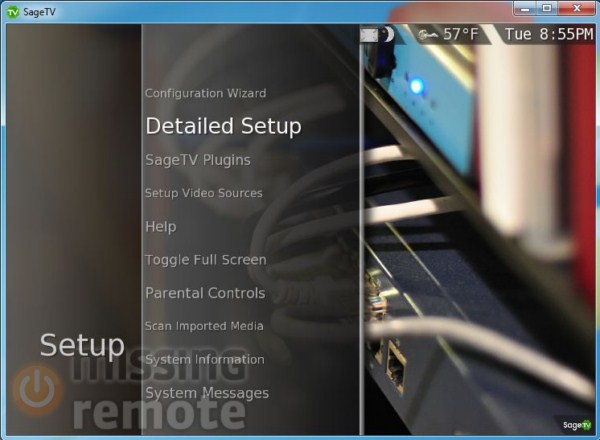 |
Detailed setup is found under “Setup”. Either hit “OK”, “Enter”, or use the “Right” key to drill into each menu item. Note that unlike many of the top level menu items there is not a “*” on “Setup”, if there were, the mark denotes a default action where “OK” and “Enter” execute that action (usually drilling to a specific experience) where “Right” opens the submenu.
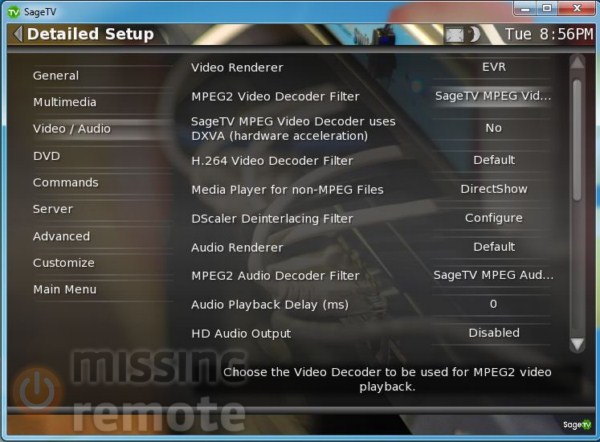 |
Go to the “Video/Audio” section and confirm that EVR is selected as the video renderer (Vista/7 users only, sorry XP don’t know what the right option for you is), then click on the “MPEG2 Video Decoder Filter” to change it.
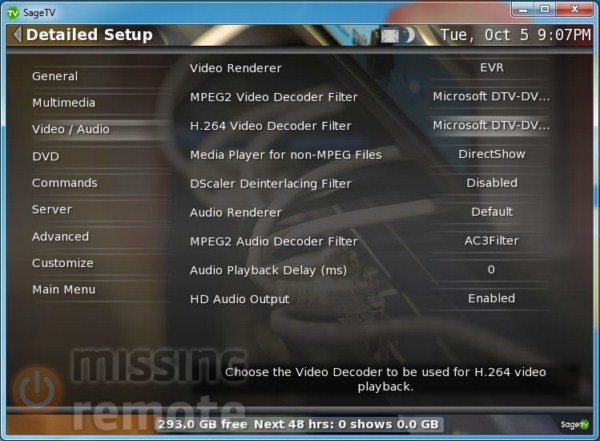 |
You will see a dialog that allows you to select from a list of known decoders or browse through all the DirectShow filters on the PC. I like to use the “Microsoft DTV-DVD Video Decoder” for both MPEG2 and H.264, then select AC3Filter as the audio decoder filter before clicking on HD Audio Output (which is disabled by default) if you installed ffdshow and have HDMI 1.3 capable hardware (or configured ffdshow to decode to multi-channel LPCM on your own).
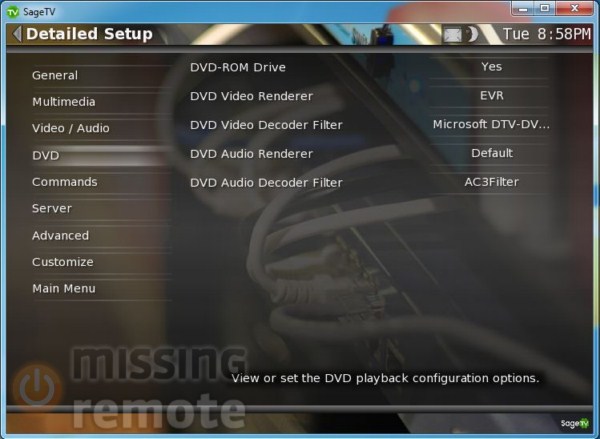 |
Then go to the “DVD” section and change the video renderer to “EVR” and select Microsoft video decoder and AC3Filter in the proper areas.
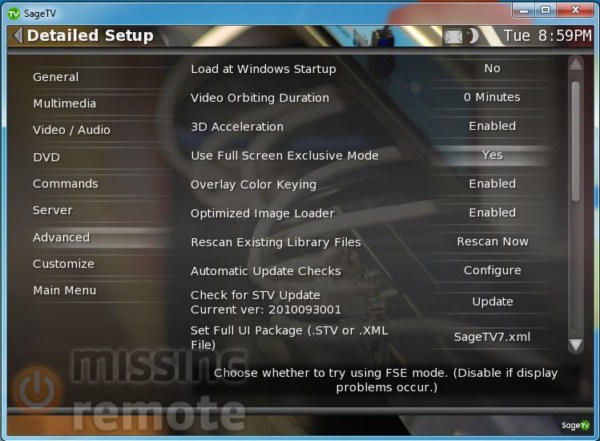 |
I like to use “Full Screen Exclusive Mode” (FSE) on my HTPCs. If you have a beefy video card you probably will not see much difference but anyone using integrated graphics or a lower end GPU (graphics processing unit) will see a nice bump in picture quality with FSE enabled.
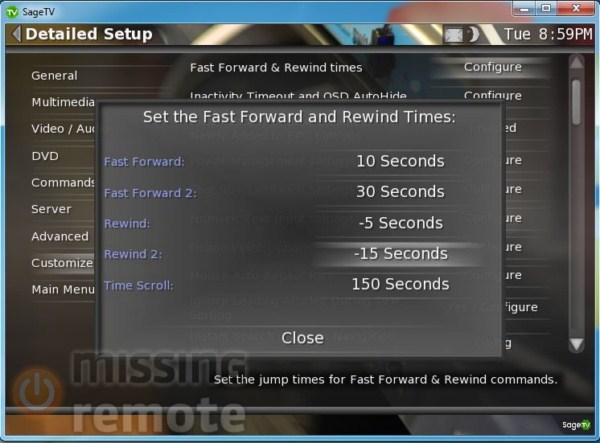 |
Finally set the fast forward and rewind times in the “Customize” section. The defaults are pretty good if you will not be using automatic commercial skipping, but they are not ideal otherwise. Select “Main Menu” to return to the home screen.
 |
I like to enable the hidden features, which gives you some extra really geeky features like an enhanced recorded TV experience as well as enabling the disk space bar to name a couple. If you want to give them a shot, first know that SageTV does not support them then head to the “System Information” section under “Setup”.
 |
Then enter “5309” on the remote to unlock the hidden features. If you see a little dot in the top left corner and the disk space bar on the bottom you are all set.
Plugins and Properties
Plugins:
In previous version of SageTV managing plugins was a huge chore. V7 changes that with an integrated plugin manager also found under “Setup”.
We are not going to walk through installing plugins in detail because it is mostly just a click through experience, but I have listed the plugins I use and where to find them in the plugin manager. If you are curious what a plugin does, see pictures, or get more information outside of SageTV most plugins present a list of options for all of those as well as one to do the install when you select it from the list. Some of the plugins have dependencies that should install automatically, so don’t be worried if selecting one plugin installs more than that.
General:
- Sage Webserver
- Sage Alert
- Metadata Tools for SageTV – Web Interface
- Sage Mobile Web Interface
UI Mod:
- Phoenix Fanart for Malore Menus
- Phoenix Fanart for SageTV V7
- Comskip Playback
- Multi Function Stop
- SageMyMovies
It’s worth noting that some plugins will require the UI or the service to restart. You will have the option to wait, and if there if the service is recording it will make you confirm the choice if it will restart the service.
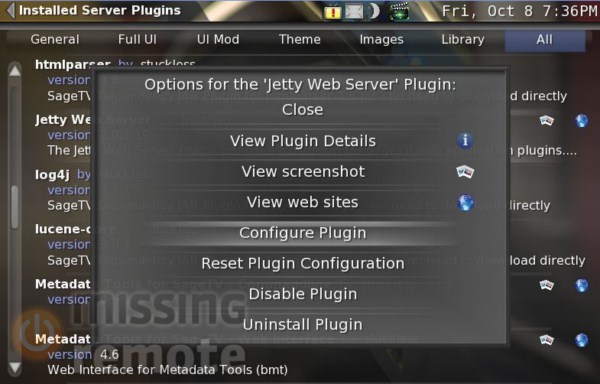 |
Some plugins have configuration options, so it is a good idea to check. In this case we want to change the default password for the webserver plugin, so select the “Jetty Web Server” from the list of installed plugins then choose “Configure Plugin” to open the options menu.
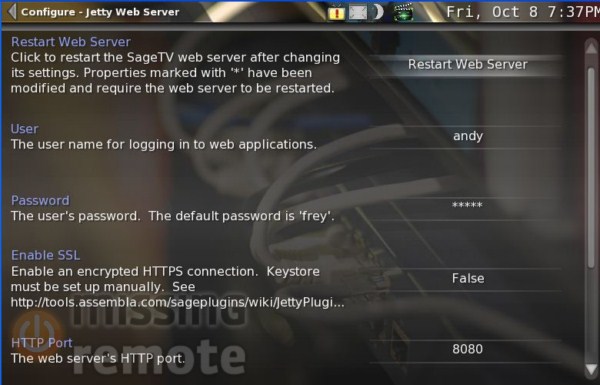 |
There are several options available, but the only really important one is to stop using “sage/frey” as the username/password (assuming that you will be exposing the web server through your firewall).
 |
Before shutting down the UI, we should take a quick look at the “System Messages” screen (also available from the “Setup” sub-menu). There are several types of system message that let you know about changes (new channels, missing recordings, tuner failures, etc.) in the system. One of my favorites is that they also provide a notifications when a new version of SageTV, extender firmware, or even an installed plugin is available.
Now it is time to close down the SageTV client and service to finish the configuration. With the client closed, open up the SageTV service control application (or services.msc) and stop the SageTV Service. Then open up Windows Explorer and browse to the SageTV\SageTV install folder.
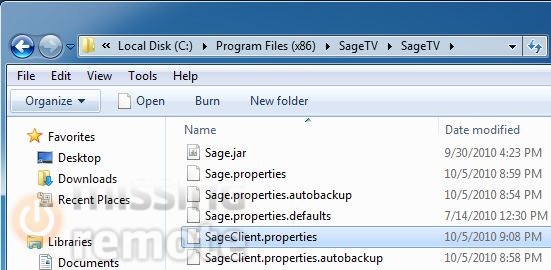 |
Most of the settings used by SageTV are stored in one of two “.properties” files (the rest are in the registry). Settings related to the UI application are in “SageClient.properties” and the services uses “Sage.properties”, they are simple text files so I find it easiest to just double-click and associate the .properties extension with Notepad.
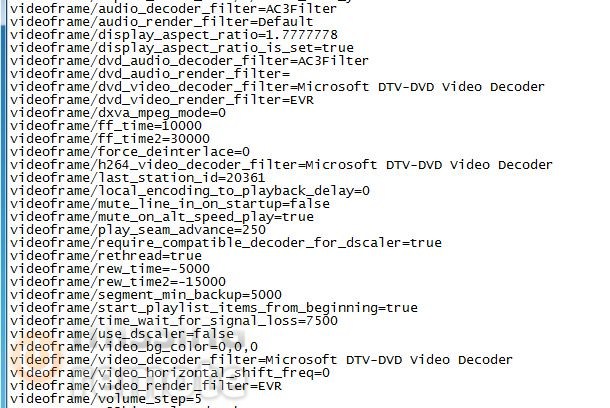 |
The files can be intimidating at first, but since each setting is on its own line it is not that important to understand what everything does. Scroll down to the “videoframe” section and some of the items should look somewhat familiar from what we accomplished earlier in the “Detailed Setup” section.
If you installed ffdshow for HD audio add the following lines to the bottom of the SageClient.properties file (don’t worry about putting them in the right place, the next time the client application runs it will sort them):
videoframe/dolbytruehd_audio_decoder_filter=ffdshow Audio Decoder

videoframe/dts-ma_audio_decoder_filter=ffdshow Audio Decoder
ArcSoft TMT Video Decoder Users:
videoframe/vc1_video_decoder_filter=ArcSoft Video Decoder
Finally if you enabled FSE:
disable_fse_on_focus_lost=false
 |
When you are done, it should look something like this.Before moving to the server properties file note that videframe/mediatype entries will get added for each codec SageTV tries to play, but only after it is played. If you ever have trouble playing a particular file you can look at the file’s media type in the UI and then add in the name of the filter you would like it to use in the line that has been created.
Then in the Sage.properties add the following entry if you use an extender and have standby configured on the server:
extender_power_keeps_server_out_of_standby=true
Next run regedt32.exe and change the value of HKLM\SOFTWARE\Frey Technologies\SageTV\JVMMaxHeapSizeMB (HKLM\SOFTWARE\Wow6432Node\Frey Technologies\SageTV\JVMMaxHeapSizeMB on x64) to “1024”. This changes the maximum amount of RAM that SageTV can allocate to 1GB, important for applications like SageMyMovies. With that complete go ahead and restart the SageTV service.
Now let’s check that the web server is working properly.
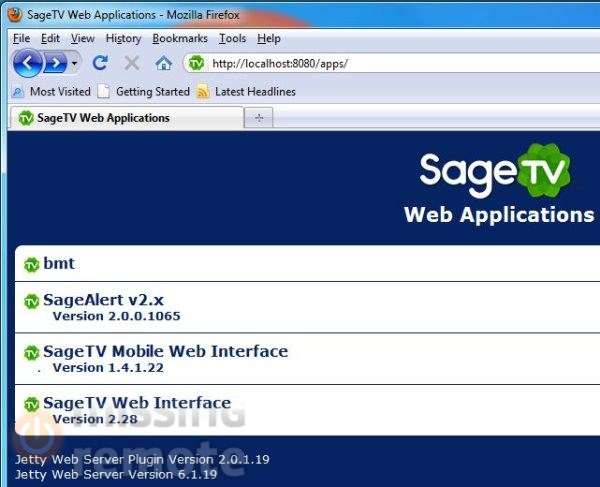 |
Open up a browser and point it to “http://localhost:8080/apps”, you should be prompted to enter the credentials entered in the configuration dialog. Assuming everything installed correctly it should look similar to the screen above.
SageTVLauncher
This section only applies to those who setup a MC remote to use with SageTV. SageTVLauncher, a system tray application that replaces ehtray.exe (the process MC uses to launch when pressing the Green Button on the remote).
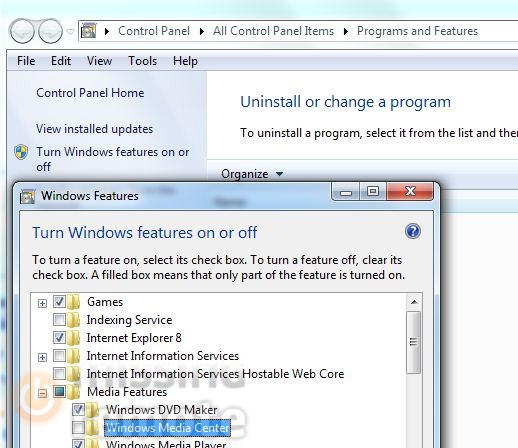 |
For those who do not plan to use Windows Media Center, the easiest way to disable ehtray.exe is to just turn off the “Windows Media Center” feature from the “Programs and Features” section of the Control Panel, but for those who want to keep Media Center around it is a bit more involved.
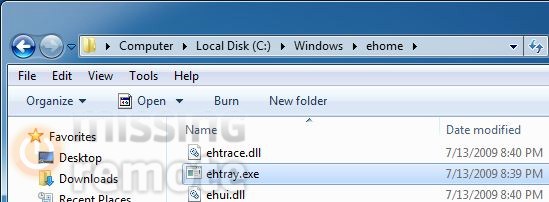 |
We need to disable ehtray.exe so it cannot run–I like to rename it just in case I ever need it again. Browse to “%WINDIR%\ehome”, then right-click on the file and select properties.
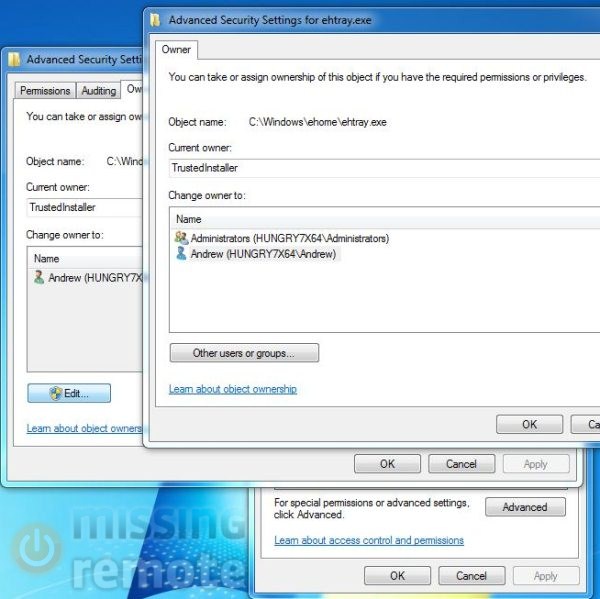 |
Go to the “Security” tab, click “Advanced”, select the “Owner” tab, click “Edit”, then select your user account from the list and click “OK”.
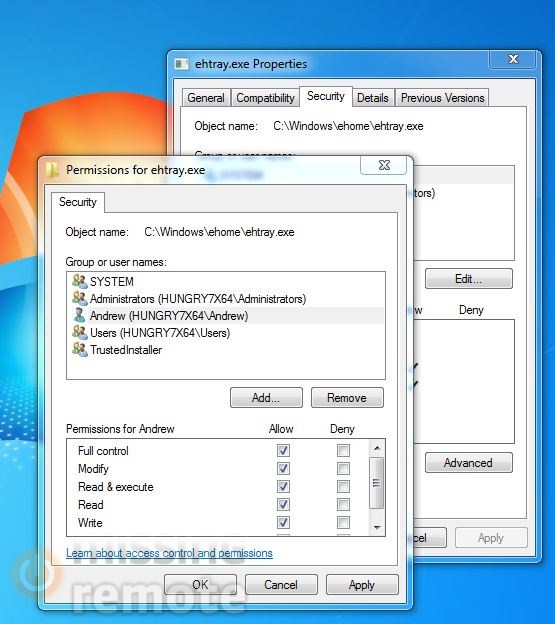 |
Reopen the “Security” tab and edit the file’s ACL to give your account full control.
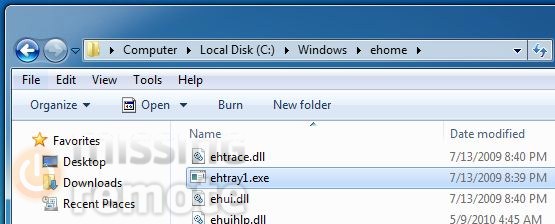 |
Now you can rename the file.
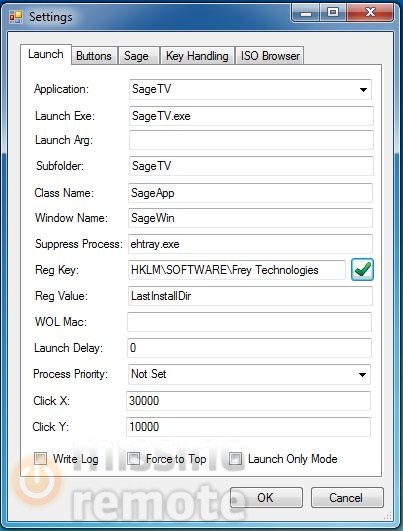 |
Run SageTVLauncher and right-click on the icon in the system tray to open the settings dialog. Verify that it can find the “Reg Key” (x64 users will need to edit this to add “Wow6432Node” between “SOFTWARE” and “Frey Technologies”). If you opted to enable FSE, ensure that “Force to Top” is not checked otherwise it should be checked. Then change the “Click Y” value to “10000” and then click “OK” to save your changes. Feel free to check out the other tabs in the dialog but note that are related to SageTVLauncher’s other features, which are beyond the scope of this guide.
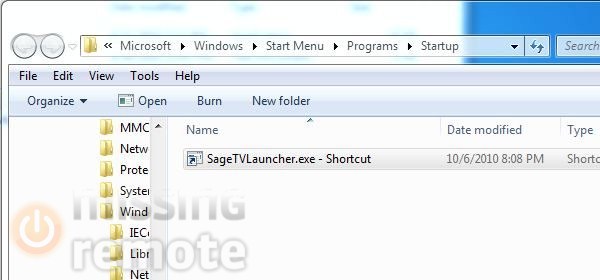 |
Lastly, create a shortcut to the SageTVLauncher in the startup folder for your user account. Note that Media Center will probably load the first time you press The Green Button, but it should not load again after that.
Enjoy:
With all of the steps complete, you should be ready to sit back and enjoy SageTV V7. I tried to hit all of the important areas but it is likely that I missed some things as well, so let me know if you have questions or some of the steps are unclear.
Very hard work and throughly
Very hard work and throughly explained. One of best tutorial i have seen on Sage TV.
Very good guide, covers every
Very good guide, covers every detail. I felt I had to post a comment mostly because there was only one other! I figure if we want more guides like this, everyone should post a quick comment to let the author know they should keep more like this coming.