
QNAP TS-219P
|
QNAP TS-219P Recently released from QNAP the TS-219P is the new addition to the two slot NAS family. Read on to see if it will fit your storage needs. |
Introduction
Previously, we took a look at the TS-209 Pro II NAS from QNAP and found it to work very well. Today we will take a look at the new addition to the TS-2xx family, the TS-219P.
Instead of making this review into a quick-start guide as was done in the past, I wanted to quickly cover the TS-219P hardware and then touch on some of the value-add features that are included in addition to the generic NAS features that you will find in most, if not all, NAS units available today.
Hardware Stuff
The packaging for the QNAP NAS hasn’t changed much from our last review of the TS-209 Pro II except that the box background is white now instead of black. The packaging otherwise contains similar information about features and stats.
 |
 |
| Packaging front | Packaging back |
The NAS itself has undergone quite a facelift though. The last unit that we reviewed required that you remove the front faceplate to get access to the drives. The plate was held on with four screws that I thought stuck out quite a bit. In this unit however, the drives are always accessible but can be locked in place for security reasons.
 |
 |
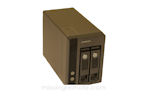
| TS-219P front | TS-219P back |
The front side has four LED indicators for HDD1, HDD2, LAN and eSATA activity. There is also a power button and a One Touch Copy button as well as a USB port. The One Touch Copy button allows you to insert a USB stick into the front USB port and then copy the contents from that drive onto the NAS without need of a PC. This is very handy if you want to transfer photos or MP3s or something onto the NAS with minimal hassle.
The rear of the TS-219P has a 70mm fan, 2x eSATA, 1 LAN, 2x USB, reset button and power input. The fan on the rear is powerful enough to keep the drives nice and cool while still remaining extremely quiet. I have been running this unit on the shelf next to me for a couple of weeks now and do not notice the fan noise unless I put my ear right next to it. I know that this isn’t a quantitative analysis but I would feel comfortable putting this unit directly on top of my entertainment center and not needing to worry about noise. According to QNAP the operating sound level is 36.3dB.
This unit has also undergone a size reduction compared to the TS-209 Pro II with overall dimensions of 150(H) x 102(W) x 216(D) mm. One of the ways that this was achieved was by rotating the drives to be vertical instead of horizontal. This also aligns with some of their larger offerings, such as the TS-419P, which will be reviewed here shortly.
The drives attach to the unit by way of drive sleds. The drives screw into the bottom of the sled with four screws. The drives are screwed directly to the sled without any rubber isolators but no drive noise appears to be transferred into the rest of the system. Once attached to the sleds, the frames are inserted into the NAS with use of the latches on the front. When closed, these latches hold the drive sleds in place to keep them from moving. When locked, the mechanism prevents you from being able to lift the lever which prevents you from removing the drive. In my opinion it is a very nice design.
 |
 |
| Drive sleds | Drive sleds in NAS |
====================================
Power level:
====================================
Hardware Specs
| CPU | Marvell 1.2GHz |
| DRAM | 512MB DDRII RAM |
| Flash Memory | 16MB |
| HDD |
2 x 3.5" SATA I/II HDD or 2 x 2.5" SATA HDD NOTE:
|
| HDD Tray | 2 x hot-swappable and lockable tray |
| LAN Port | 1 x Gigabit RJ-45 Ethernet port |
| LED Indicators | HDD 1, HDD 2, LAN, eSATA, Status, USB |
| USB | 3 x USB 2.0 port (Front: 1; Back: 2)
|
| eSATA | 2 x eSATA port (Back) |
| Buttons | Power button, USB one-touch-backup button, reset button |
| Alarm Buzzer | System warning |
| Form Factor | Tower |
| Dimensions | 150(H) x 102(W) x 216(D) mm 5.91(H) x 4.02(W) x 8.5(D) inch |
| Weight | Net weight: 1.74kg/ 3.84 lb Gross weight: 2.92kg/ 6.44 lb |
| Sound Level (dB) | W/o HDD installed: 32.5 dB Stand by: 32.7 dB In operation: 36.3 dB (Background: 25.2 dB) |
| Power Consumption (W) | Sleep mode: 5W In operation: 21W (with 2 x 500GB HDD installed) |
| Temperature | 0~40ËšC/ 32~104°F |
| Humidity | 0~95% R.H. |
| Power Supply | External power adaptor,60W, Input: 100-240V |
| Secure Design | K-lock security slot for theft prevention |
| Fan | 1 x quiet cooling fan (7 cm, 12V DC) |
Extra Features part 1
Linux Shares:
Linux uses a protocol called NFS to mount network folders locally. In order to mount directories from the TS-219P the first thing that needs to be done is to enable the NFS service in the NAS. This can be done by connecting to the NAS web interface (enter the NAS’s IP address into a web browser or open the QNAP Finder tool and double click on the NAS of interest) and logging into the administration section.
 |
 |
| QNAP Finder | Administration icon |
Once logged in click on the Network Services folder and then NFS Service. In the NFS Service window check the Enable NFS Service box. Then click the Apply button. At this point the NFS service has been enabled and you can either mount one of the default folders or create a new one. Folder specific NFS access will be described shortly.
 |
| NFS Service |
Windows Shares:
Windows uses a similar setup as Linux except that it is done via Samba. To share folders on the TS-219P with a Windows system, log into the NAS as described above. Then select Network Services and then Microsoft Networking. Here you need to verify that the Enable file service for Microsoft networking checkbox is checked, although this should be selected by default. Once that is completed click on the Apply button and the default folders should be available to your Windows systems.
 |
| Windows Networking |
Creating new folders:
If you would like to create new folders to share from your NAS, log into the NAS as previously described and select Access Right Management and then Share Folders. This will list all of the folders currently available from your NAS. To create a new folder click on the New Share Folder button. This brings up a wizard to aid in the creation of a new folder. Click Next. On the next screen give the folder a name. You can optionally enter a description here if desired. Click Next. Select the privileges you want to give this folder – Full Access, By User, By User Group or Only the system administrator (admin) has full access. General users have Read Only access. Click Next. Confirm your settings and click Next. Once the folder has been created successfully click Finish. The new folder should now appear in your Share Folders window.
 |
 |
| Share Folders | Share Folder Settings |
 |
 |
| Access Control | |
Linux folder access:
Once the folder has been created the NFS permissions can be modified specifically for that folder. To do this, click on the NFS button for the folder you wish to modify. In the NFS Access Control window you can modify the Access Right – available options are Deny access, Read only and No limit. There is also a section that allows the user to specify which IP addresses and domains can access it. Wildcards (*) are accepted here. For example, if you want to allow your local network to access the NAS but not anyone else you can enter 192.168.1.* in the box (assuming that you use 192.168.1.xxx for your IP addresses). Click Apply when finished.
 |
| NFS Access Control |
To mount the drive under Linux, as root run the following command:
mount –o vers=3 (IP address):/(share folder) (directory to mount to)
For example, if the IP of the NAS is 192.168.1.109, the folder that you want to mount is Public and you want to mount it under /media/TS-219P then the command would be:
mount –o vers=3 192.168.1.109:/Public /media/TS-219P
Note that the directory that you want to mount to needs to be created ahead of time. In the case of our example above, this means that /media/TS-219P was already created. You can create folders in Linux using the command:
mkdir (folder name)
For example: mkdir /media/TS-219P
If all has gone well, at this point you should be able to run the df command and it will show that the NAS folder has been mounted to your local filesystem.
 |
| df output |
Windows folder access:
Mounting folders from the NAS in Windows works the same way as mounting any network folders. Open Windows Explorer, and click on Map network drive at the top. In the Map Network Drive window, select a drive letter to assign to the share and then choose the folder to map. You can use the Browse… button to select the folder if you are unsure of the server name and folder share name. Click Finish when done. Once that has been completed the shared folder will show up as a local drive in Windows Explorer.
 |
 |
| Windows Explorer | Map Network Drive |
Apple Networking:
Untested in this review, the QNAP TS-219P also has the capability to work with an Apple network. Similar steps are followed to enable the Apple Networking functionality as described for Microsoft Networking and NFS.
 |
| Apple Networking |
Multimedia sharing – UPnP:
An easy way to share your multimedia files stored on the NAS with other systems is via the TwonkyMedia Server. To enable this feature, log into the NAS as described previously, select Applications and then UPnP Media Server. Check the box for Enable UPnP Media Server and then click on the URL on that page to configure the server.
The linked URL brings up the TwonkyMedia Configuration page. By default the QMultimedia folder will be shared. Additional folders can be added by using the Browse button. If you would like to keep adding more folders to share there is an Add new content directory button that will insert new folder text boxes.
There are a number of additional settings available that can be further tweaked, but things work pretty well with the defaults.
 |
 |
| UPnP Media Server | TwonkyMedia Configuration page |
iTunes:
Another feature available on this QNAP system is the ability to have it serve up your iTunes media collection. In the TS-219P administration section under Applications there is a section called iTunes Service. To enable this functionality check the box labeled Enable iTunes Service and enter your iTunes password. When that completes click on the Apply button. After enabling the service you can create playlists by selecting the SMART PLAYLIST tab and entering in the appropriate information.
 |
 |
| iTunes service | iTunes playlists |
Once it has been setup you can use the TS-219P to act as an iTunes server, sharing your music collection throughout your home.
Extra Features part 2
Photos:
Using the Multimedia Station portion of the QNAP NAS, you are now able to share digital photos easily via the web. Multimedia station allows for user accounts as well as guest access so that you can control who has access to each photo. If you do not wish to have the NAS connected directly to the Internet (i.e., if you are using a router to share the Internet connection with multiple systems) QNAP also includes DDNS access that can associate a website with your NAS IP address.
Once setup, making your photos available is as simple as uploading the photos to the NAS and configuring album access. QNAP also provides CoolIris photo browsing support for a little extra bling if that is of interest.
Web Server:
Another value-add feature for the QNAP NAS units is a built in web server. The server is enabled in the admin page under Networking Services -> Web Server. Check the Enable Web Server box and away you go. QNAP NAS units use phpMyAdmin and Joomla! for their web server support – phpMyAdmin to administer the MySQL database and Joomla! for the actual website. QNAP has a good page on how to get things setup.
Backup:
QNAP also provides a Remote Replication feature which allows you to mirror a shared network folder to the NAS for backup purposes. This allows you to setup either a manual or scheduled backup of other systems in your house so that you never have to worry about a drive failure again.
Bit Torrent:
Another feature that is provided is a built-in bit torrent downloader. All you need to do is enable the Download Station (Applications -> Download Station -> Enable Download Station) and then add the bit torrent task with a previously downloaded torrent seed. No longer do you need to have a full system running to do BT downloads. As the download progresses there is even a nice download status window available.
Not only does the download station download torrents, it also allows for downloading from http or FTP.
Home Surveillance:
For those of you that have security cameras at home, the QNAP TS-219P also includes a Surveillance Station. This allows you to monitor and control IP based camera feeds. The interface allows for Pan-Zoom-Tilt control and can be set to record continuously or on motion detection.
Print Server:
For those looking to use this in a home or small business, the QNAP NAS units also have the ability to act as a print server, allowing connection of up to three USB printers. The printers are then made available across your entire network.
Conclusion
If you’re looking for additional storage capacity for your HTPC but don’t have more drive bays or SATA ports available, a NAS is a good option for you. The TS-219P being offered from QNAP is one such option and as you’ve seen it has many features to offer in addition to its storage capability. The TS-219P can house two drives for a total capacity of up to 4TB. After using the review unit for a couple of weeks now I have seen nothing but stability from it. It runs silently and uses very little power. Adding to that all of the other features that QNAP has designed into their units accessible via a nice looking, easy to use interface, the TS-219P offering is a very good product. Its size and looks allow it to fit into almost any setting and QNAP has suggested a reasonable price for what you get @ $399. All in all, if this unit fits your needs I don’t think you will have any regrets. This unit is MissingRemote Recommended.