
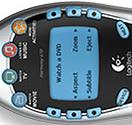
Logitech Harmony 670
|
|
Logitech Harmony 670 Universal Remote Review On the table today is the Harmony 670 Universal Remote from Logitech. Let's find out what it's capable of for an MSRP of $149.99. |
So, you find yourself armed with a fancy new tv, a top notch receiver, fancy floor shaking speakers, a new HTPC to drive it all and about 1,723 different remotes. What do you do next? You buy one remote to rule them all. Enter the Harmony 670 from Logitech.
Initial Impressions & Specs
Ever since I started looking at building an HTPC, one name that comes up over and over again is the Logitech Harmony series of remotes. It seems that no matter who you ask to recommend a universal remote, the Logitech Harmony will be at the top of the list. Now we'll see how worthy those recommendations really are.
Here are the specifications according to Logitech:
Product Features
- Integrate up to 15 devices, including lighting and household appliances
- Color-coded activity controls. A single press configures your television, stereo, DVD player, or other device required for the selected activity.
- Designed for DVRs. The most commonly-accessed controls are located centrally, for easy access at thumb's reach.
- Backlit keys. Easy to see; easy to use. No more fumbling for the correct button to play, pause, mute or change aspect ratios.
Technical Details
- Model: 915-000002
- Item Package Quantity: 1
- supported_devices_quantity: 15
- remote_control_technology: Infrared
- Display: LCD display
- Width: 2.25 inches
- Height: 8.0 inches
- Weight: 5.75 ounces (w/ batteries)
- Warranty: 1 year warranty
Now that the basics are out of the way, let's see what it can really do.
Unwrapping
The Logitech Harmony 670 arrived in what I would call a fairly standard Logitech box. That is to say, a very solid, green and white colored box with hard plastic in the center, prominently displaying the remote inside the box. Special features are displayed on the sides and back.
 |
 |
| Remote in box | Back of box |
This box includes the remote itself, a USB cable, 4 Duracell AAA batteries, an installation guide, a driver CD, a product guide (with 20% off coupon) and a list of customer support numbers for when you get stuck.

|
| Contents (Remote, Cables, Manuals, etc) |
The remote itself is peanut shaped which I really like. All the edges are rounded. There are two impressions on the back which my fingers fit into nicely making it easy to balance. The remote seems to be of good quality; the body seems much more robust than my previous remote which felt lightweight and made of cheap plastic compared to this one.
 |

|
| Remote | Comparison to a C battery |
With the exception of the DVR controls, the buttons on this remote are arranged very logically. The DVR controls form a U-shape around the directional pad. They are not difficult to use, but I am used to them being arranged in two rows of three plus skip and repeat below the directional controls.

|
| Remote bottom |
The LCD screen is very easy to read, and the backlight will turn on whenever you press certain buttons on the remote, including the GLOW button (the buttons that will activate the GLOW feature can be customized). The screen itself is not colored and is not a touchscreen, but there are three buttons on either side that are used to select the appropriate menu options.
 |
 |
| Language selection screen |
Tutorial screen |
In general the remote exudes the feel of quality. The casing is hard plastic, the buttons are well rounded on the edges, the layout is nice, the color scheme is good. There's just not much to complain about here.
Software Install
The software installation process is very standard, with a couple of exceptions.
During the initial installation, the Harmony software will query the internet and check for updates automatically. This is nice because you can keep your software up to date with no extra work.
 |
 |
| Standard Installation screen | More installation screens |
You can see from the above screenshot though, this software REQUIRES an internet connection. I can understand why they did it this way, but it can be an annoyance for some. This mean you will need a username and password for your remote…![]()
 |
 |
| Username and password? | Automatic Updates |
Not shown is the registration screen asking for your Name and Location, as well as some other information. I'm not sure why they need this, other than marketing, but okay.
Other than that, installation is very simple. The instructions are very clear in what you are expected to do. Installation is a breeze.
Software Initial Config
In my family room, you will find a fairly basic home entertainment center. It includes a Sony CRT TV, an RCA receiver, my HTPC client, a standalone DVD player from pre-HTPC days, a PS2 and a Gamecube. Each has its own remote, and there are one or two additional universal remotes that I have tried to integrate with limited success previously. It's not an audio/videophile's dream, but it gets the job done well.
Now let's see how easy it is to setup the remote to work with my stuff.
 |
 |
| Connecting the remote | Confirming remote connection |
 |
 |
| Adding devices | Look at all those devices |
 |
 |
| Unknown device addition | Device selection based on remote |
The first time you run through the configuration wizard, it is handy to have the model information on all of your components as well as any remotes you might have available. I found that it was not necessary to have the remotes available though as long as you knew the model numbers of your equipment. The Harmony software was very accurate with the IR codes. The only issue I had was for setting up my HTPC. Initially I defined a Media Center PC with a Hauppauge PVR350 because that is where my remote came from. However, using this setup, the Harmony software did not believe that there was a DVD player in my HTPC, so I was not able to setup the Watch DVD activity properly later on. So I setup my Media Center PC as a Generic Media Center PC, then used the PVR350 remote to define all the buttons that the Harmony used. In the end, the remote was determined to belong to a PVR150. Close enough. At least I was able to setup my HTPC as a DVD player. I could also have probably chosen Mythtv as the type of Media Center PC instead of Generic and it would have turned out the same.
Now comes the fun part, activity configuration. This is where you configure the remote to make everything play nicely together. While this portion took me a fair bit of time to make it all work the way I wanted, for the most part it was fairly easy and straight forward.
 |
 |
| Suggested activities to setup | Activity review |
Activities are where you make all those devices you just setup play nicely together. For example, you can configure the Watch TV activity to turn on your tv, your receiver, and your STB, turn the tv to channel 3, and turn the receiver to your STB input. Or you can setup the Watch DVD activity to turn on your TV and change to the DVD input, turn on your Receiver and change to the DVD input, and turn on the DVD player while turning everything else off.

|
| Activity review |
If you make a mistake while initially setting up your activities, you will have a chance later to fix them. One nice thing about this software is that it's very powerful once you get the hang of what you're doing.
Setup is easy as long as you do what they tell you. I will admit that I tried to skip a step or two while setting up my devices and the back button isn't always available or doesn't always work the way you might expect it to. I had to do setup twice once I realized what I was doing wrong. After following the instructions properly though, it couldn't be easier.
Software Customization
Now that the basics are out of the way, you have a chance to tweak anything you just setup. For example, you can select a device that you just configured and customize it to always remain on (this can be handy for an HTPC).
|
|
 |
| Activity overview | Activity button customization |

You can also select an activity and customize the buttons for the activity. For example, I customized the up and down arrows (located above the directional pad) to command commercial skip forward and back.
 |
 |
| Activity button customization | Device overview |
You also have the ability to change which activities are linked to the physical activity buttons.
 |
 |
| Device customization | Remote customization |
There are also features in the remote itself that can be modified, such as how long the backlight stays on, or which buttons turn on the backlight.
The Harmony software allows you to pretty much tweak anything any way you want it. If something doesn't work quite right while you are testing out your remote, chances are you'll be able to come back to the customization area and fix it. Again, this software is very powerful.
Usability
Once I had the remote configured to a way that I felt comfortable with it, I decided to run it through the torture test. I gave it to my wife and said, "Try this out and tell me what you think." This is usually not a good idea but that's how comfortable I felt about this remote. She played with it for about 30 min, and besides wanting the buttons layed out a little bit differently (for example, making + (CLEAR) key that isn't used for anything else function as the Delete key and moving commercial skip forward and back to the Up and Down Arrows above the 4-way directional pad) the only issue she had with it was that the INFO button didn't work properly. This wasn't a fault of this remote, the problem was that the original remote that I programmed this from (the PVR-350) didn't have a separate INFO button. In the end, I was able to fix even this by linking the INFO button to the # key on my original remote, then telling Mythtv to pull up Info whenever the # command was received (you really can do a lot when you control both ends of the communication path). Needless to say, WAF is very high here.
|
|
 |
| Dual IR Emitters | USB interface |

I have now been using this remote for about a month and there has been absolutely no indication that I'm anywhere near the end of my batteries. Due to the dual IR emitters on this remote (seen above), range is great at 45+ feet! The only reason I can't say it has a larger range is that I ran out of room to test. My TV is on one side of the house and I was standing within 6 inches from the other end (I guess my house is about 50 feet wide). The button press repetition rate is also about 5x faster than on my original PVR350 remote meaning that I can fly through the program guide much faster. In some cases it was almost a little too fast because I was used to the slow response of the old one. After a small learning curve here, we were good to go.
One issue I did have was with the directional pad on the remote. Up and Down were great, but Right and Left sometimes caused me problems because the sides of the directional pad were a little narrow in my opinion. Occasionally, when I would press the Left or Right pad, I would accidentally hit Up or Down skipping me all over the place in my shows. I'm also still getting used to the layout of the DVR buttons. As I mentioned earlier, I'm used to the buttons being layed out in three rows. This won't be a problem long term, but it means I still have to become familiar with it.
Something that would have been nice to see is a cap for the USB port. Somehow during my testing I dropped it in some crumbs on my kitchen table and ended up with the entire port encased in Oreo cookie filling.
Final Thoughts
In the end, I really like this remote. It has its quirks, but the look, feel, and functionality are awesome. I am actually happy that this remote does not have a touchscreen on it because I find it much easier to use a remote from day to day when I don't have to look down at what button I'm pressing. The six buttons located on either side of the LCD screen really expand the capability of this remote. While the physical number of buttons on the remote doesn't change, there are essentially an unlimited number of buttons available to you via this menu feature.
Overall, I like the shape of the remote, I like the feel and layout of the buttons, I like the customization available, I like the range of use.
Other than a few problems I had with the software initially, I was left with a good impression from Logitech. Do I think this remote is worth the MSRP of $149.99? Yes. Will I be recommending this to others? Yes. I feel that this remote is well worth is and will be right at home in anyones home theater.