
Migrating SageTV from XP to Windows 7 (64-bit)
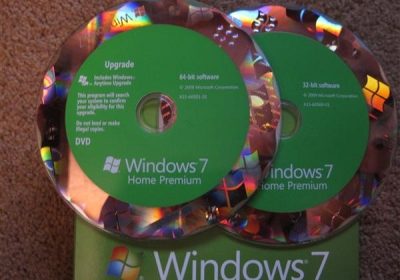
I have had 2 copies of Windows 7 lying around the house ever since it was released. One version is Home Premium and the other is Professional. I had been debating whether to go with a 32-bit or 64-bit install on my HTPC client and with some gentle nudges, I decided to take the plunge into the 64-bit pool. For those who aren’t aware, retail copies of Windows 7 come with two DVDs and a single product key. The key is good for a single install from either the 32-bit DVD or the 64-bit DVD. In fact, you can even switch back and forth, deactivating one and then activating the other. Kudos to Microsoft for this!
Finding myself with a day off, due to another major snowstorm here in the Northeast, I decided to give the Windows 7 upgrade a try on my HTPC. This would involve not only upgrading the OS from one version to another, but a simultaneous change from 32-bit to 64-bit… all while attempting to maintain my theater setup, which includes SageTV with SageMC, a USB-UIRT, a Harmony 880, and then there’s Windows Home Server. Keep in mind that because I have a client/server setup, I don’t need to worry about SageTV "losing" my recordings or its wiz.bin database during this upgrade. For me, all of that critical information is safe on my server (and backed up nightly). However, if you do not fall into this group, SageTV has a great FAQ which covers just about every scenario. So, will this adventure turn out to be a piece of cake or cruel and unusual punishment? Actually, you might be surprised. Read on to find out how this all turned out and whether I’m still happily married or moving in with Tiger Woods…
Day One
Not wanting to hose my existing XP install, I disconnected the two 320GB drives (RAID1 array) from the motherboard and connected a 1TB drive to SATA1. Since I no longer had a copy of Windows XP installed, as far as Windows 7 would be concerned, and I had purchased an upgrade version of Windows 7, I didn’t enter my product key during the install process (thereby enabling the “trial” period) and planned to do a double installation. After the first install completed without a single issue, I rebooted and began the 2nd installation process, choosing “Upgrade” this time. Lo-and-behold, I was greeted with a message stating that I needed to remove the install DVD, boot into Windows first (Windows 7, mind you), and then insert the DVD to perform the “upgrade”. I did so, and the 2nd installation started without any issues directly from within Windows.
When the computer reboots during the upgrade install, you may see a selection screen asking you whether you want to boot into Windows 7 Setup or Windows 7. It will quickly choose Windows 7 Setup for you and continue the upgrade. The next reboot will present you with a Windows 7 and Windows Setup Rollback option, again quickly selecting the first one for you. I assume the second option would undo the installation work it just did. After a few more reboots, I was again asked for my product key, which I finally entered. A few minutes later I was at the desktop, downloading updates and ready to begin the fun part of getting my HTPC back! In all, the installation took about two hours, almost none of which required me to be sitting at the computer, but I sat through the tedium just to be able to tell you what to expect. That was almost too easy. I was getting scared now.
While I don’t recommend that everyone else do this, the first thing I did was turn off UAC. If you choose to leave UAC enabled, please read this post to understand the repercussions. I then quickly realized I needed to tell Windows to show file extensions , system files, and hidden files. I went in and manually activated Windows just to ensure my upgrade worked okay, which it did. I then proceeded to download the latest videocard drivers from ATI, install Threatfire, and finally Windows Home Server Connector. For those WHS users who aren’t aware, you don’t need to find or create a CD so you can install the Connector software. On the computer which doesn’t have it, just point your browser to http://[your servername]:55000 and you’ll be presented with a couple of options, including a button to download and install the Connector software. I find this much easier than rummaging around to find the disc.
|
 |
|
Click to enlarge
|
Now that I felt Windows 7 was going to work fine, I decided to quickly (wishful thinking) check that my XP install would work after I hooked up the old drives. In theory, it should, but you just never know when a controller, especially a RAID controller, is going to decide not to work with your drives. Thankfully, everything worked just fine and I went back to Windows 7.
The first order of business was to get the USB-UIRT working. As it turns out, the drivers on the official USB-UIRT website claim 64-bit Windows 7 support, but 64-bit Windows 7 apparently is not able to install them. After some reading and frustration, I found this thread with the required 64-bit files. I first ran the “install1st.zip” file a little further down the thread and then installed the drivers from the first post. I’m not sure if the “install1st” part was required or not, but this sequence worked for me.
I also downloaded EventGhost, but decided to hold off on installing it just yet and proceeded to move on to SageTV. After the SageTV installation was completed, I checked out all the setup options and changed them to what I thought I recalled them being previously. I know plenty of people love it and that’s great for them, but I truly do hate the default SageTV interface.

Since I only have a single client license for SageTV, I installed it as a 21 day trial. Obviously, I have to get this done quickly! Alrighty then… moving on… I then opened up my XP PC’s most recent backup from WHS and copied the entire SageTV, EventGhost, and comskip folders to the Windows 7 drive so I could reference their configuration files and/or reuse them.

|
| Click to enlarge |
While this was going on, I went into the Windows 7 audio setup and configured my speakers properly for their 5.1 surround setup. It actually only took a few minutes for the restore to finish, at which point, the files get mapped as a local drive and you can do precisely what you would expect within Windows Explorer.
Ever since Windows 7 was installed, my system was mysteriously locking up… or so it seemed. The screen was still on and the PC itself was running, but the wireless keyboard stopped responding. It actually took until this occurred during a restore (where the progress percentage kept increasing) before I realized the computer was not actually frozen. I turned off the power management for all USB hubs and devices in Device Manager, in the hopes it would rectify the issue, but it didn’t. I then recalled that I made a change in the BIOS for power management and had set “Suspend Mode” to “suspend”, rather than “disabled”. This resolved the issue immediately. I failed to follow my own rule of, "Don’t change anything until you know it’s working!"
Now, it was time to get SageTV back to its proper form with SageMC installed. I downloaded the full install, as well as the latest development build (currently 23, as of this writing). I got SageMC installed, quite easily, to its default layout:

…and then copied over my sagemc_menu.xml from my XP install. That got some of the menus and menu PIN codes back to normal, but the main screen was still seriously messed up:
|
|
| Click to enlarge |
…so I had to do a restore using the backup SageMC configuration file application_start_backup.sagemc ,which is located in the SageTV\STVs\SageTV3\SageMCE\Backups folder. That got the main menu to be the correct way, but I realized all the custom icons and images were still missing. Looking at my sagemc_menu.xml file, I was able to locate where just about all of them were at in my XP folder. For me, they were in SageTV\STVs\SageTV3\SageMCE\Themes. I copied them all over to the new SageTV folder, but they still weren’t visible. Then it hit me… Windows 7 doesn’t install into C:\Program Files\SageTV, but rather to C:\Program Files (x86)\SageTV. A quick find/replace of the sagemc_menu.xml file swapped the two directories and I had my regular SageMC main menu back! Woo-hoo!

|
| Click to enlarge |
At this point, I decided to go for looks, rather than functionality, and get the rest of my SageTV imports working, so it was off to download all of them: TVE, AMIS, Movie Trailers, Movie Times, and BMT. I installed TVE and immediately noticed that it didn’t look the way I had customized it. TVE does have a backup option to create a file you could easily import, but I hadn’t done that (thus, I wouldn’t have it on my XP backup) and needed an alternative to hooking up the old drives and booting back into XP. Thankfully, a quick glance over the sageclient.properties file pointed out the “razrsharpe” entries, which, since there were no directories listed in any of the entries, was a simple, direct copy and paste from the old properties file to the new and I got my TVE back:

|
| Click to enlarge |
This seemed like a great point to conclude day one.
Day Two
Now that SageTV was looking good, I needed to get it playing good. So, I picked a recording to play back and viola! Playback error! Pretty much what I expected to happen. Note that since I didn’t have my remote working yet, I needed to use shortcuts to stop playback (CTRL-G, in case you were wondering). At this point the question is, “What codec should I install?” ffdshow? Ffdshow-tryouts? K-lite? (That last one was a joke. I wouldn’t install K-lite no matter what!) I had begun downloading ffdshow-tryouts when I remembered a very thoughtful post by by Andrew Van Til (babgvant) here on Missing Remote, titled oh-so-memorably “AntiPack”. (Great title, BTW, since I haven’t forgotten it since.) I decided that before I went and messed up a perfectly good Windows installation with codecs I may never use and/or potentially broken codecs, I’d give his AntiPack a try. In reading through his guide again, I noticed a mention of the HD-PVR’s Arcsoft software, so I decided to first install that. Because I only wanted the codecs, I browsed to the TME folder on my original Hauppauge CD and ran the setup program there. I unchecked everything it wanted to install and only did a bare bones installation. Upon reboot, Arcsoft Connect downloaded a 58MB update. However, the codecs still were not recognized by SageTV and TME wouldn’t start up, complaining about a missing plug-in.
At this point, I decided to attach the HD-PVR and do a full install, then uninstall what I didn’t actually need. Guess what? Still getting playback errors! After searching the SageTV forums for a little while, I found (and then remembered reading about) the new native recording patch. Follow the link and download the 10th update, then go here and download the two files which have been updated since the 10th update. Then you’re ready to follow the installation instructions back at the first link. This got video working just fine and all was good… except that audio wasn’t working yet inside SageTV, even though Windows sounds were just fine. A few trials and tribulations with AC3filter and SageTV’s audio setup did absolutely nothing. I decided it might make sense to try out my motherboard’s audio drivers from Foxconn to see if they were any better than Microsoft’s. Sadly, they didn’t have 64 bit Windows 7 drivers for my onboard Realtek, so I had to scour the web for them and finally found them at Guru3D. While this was taking forever to download, I did some further research on the SageTV forums and noted a little tidbit about SageTV’s volume mysteriously dropping to zero. Again, since I still had no remote, what’s the shortcut for raising the volume? According to the manual, CTRL-R is the magic combination. Guess what? It worked! I now had video and sound working within SageTV!!! Woo-hoo, again! I decided not to mess with a good thing and have not installed the Realtek drivers I downloaded.
The next task was to get EventGhost working so I could stop using those damned—yet oh-so-necessary—SageTV shortcuts and begin using my Harmony remote. I installed the latest version of EventGhost and loaded my old configuration file. This caused the proper plug-ins for SageTV and the USB-UIRT to be loaded.

Upon testing a few signals from my Harmony 880, I noticed that the codes were all over the place (3 or 4 different ones for a single button press), but this was due to bad positioning of the USB-UIRT. A quick reorientation fixed that. However, the codes also didn’t match the old codes. I wrote this off to either Windows 7, the latest EventGhost version, or the transition to 64 bit either on the USB-UIRT or Window 7 itself. To my surprise, EventGhost was also now showing the name of the remote I was emulating on my Harmony (an MCE remote), which was a nice added bonus.

I decided to just hit each button and drag and drop them to their proper places… hoping I’d remember which buttons mapped to what SageTV commands.

Once finished, I saved the xml config file to its new location in Windows 7 and tested things out, not finding a single issue. I now had full control of SageTV using my Harmony 880.
A couple of other little things that needed tweaking included telling SageMC where my Fanart folder was located. Something in the SageMC load must have caused it to default back to the local C: drive, rather than my WHS box. I also needed to update my phoenix API to version 1.58 in order to get My Videos (downloaded/imported videos) displaying at all. This completed day 2 and the wife and I were able to sit down and enjoy some recorded TV without a single issue.
Day Three
In closing, I wanted to note that I went back and took screenshots on day 3 after everything was already completed. In trying to recreate the messed up screens I saw, I managed to hose my SageTV setup quite a bit. However, all thanks to Windows Home Server, my new, working Windows 7 install was backed up the night before and I was able to restore all the config files for SageTV and SageMC without any incident in a matter of minutes. While Windows Home Server is clearly my choice for backup chores, any backup solution is better than none. As you can see, the fear of losing critical data is practically nullified when you have a solid backup solution.
Very good infographically
Very good infographically explaind posts.
Private label reseller