
Replacing the VFD in an Ahanix D4
I have an older Ahanix D4 case housing my main HTPC, one of the main reasons I bought this case over some of the completion was that it was one of the few full ATX cases with a parallel port (LPT) based Vacuum Florescent Display (VFD) at the time. Recently the display started to fade and some pixels have gone missing while we can debate how useful a VFD is on a HTPC (I still love it BTW), I think we can all agree that if it’s there it should work. Looking towards my next HTPC build, the reality that needing a motherboard with a built in LPT port drastically narrows the pool, where using a quality LPT card not only takes up valuable real estate but also costs about as much as a replacement display. So I took a chance and picked up the nMEDIA PRO-LCD (rebranded VLS L.I.S MCE), which is USB based, instead of trying to find another LPT based VFD.
The good news is that it does work, but requires some modification to the case and display. This project took me about 2 hours, but much of that was me staring at the pieces wondering how it was going to fit, so I’d expect it to go much faster for everyone else. Let’s get started.
Prerequisites:
- Drill and bits
- Masking tape
- Electrical tape
- Pliers, needle-nose work best
- Screwdriver
- Clear acrylic sheet ($4 from Home Depot)
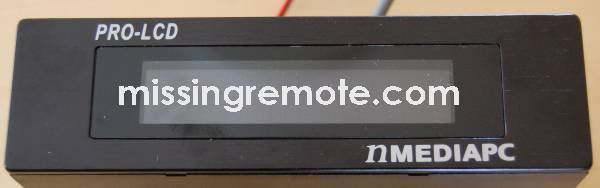
First let’s take a look at the display.

|
As you can see from these pictures I picked up the PRO-LCD-B instead of the PRO-LCD. The internals are the same, but I opted to get the one with the shell for two reasons. The main reason is that I didn’t know how long it would take to adapt LCDWriter to work with the display so it would need to be mounted temporarily in my development PC; and also because I didn’t know if it would even fit, the external case provided some additional options. While I didn’t end up using the faceplate and bracket tray, it’s actually much nicer than I expected. The front of the unit is actually a thin layer of brushed aluminum that would fit nicely on any case made of similar material.
The faceplate is connected to the tray with four tabs; a little tug on either side frees it quickly.
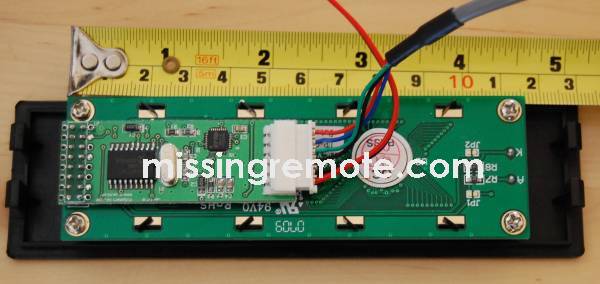
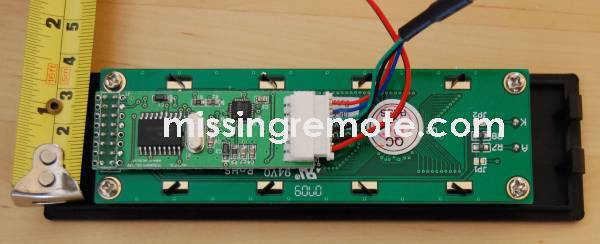
Just in case anyone needs to adapt the display to a different case I took some measurements. As we can see the display is 4.5” long and 1.5” high. Later we will remove the four screws that hold the display to the faceplate, but for now let’s keep it safe while disassembling the HTPC.
Once the top is off the case, we need to remove the front.
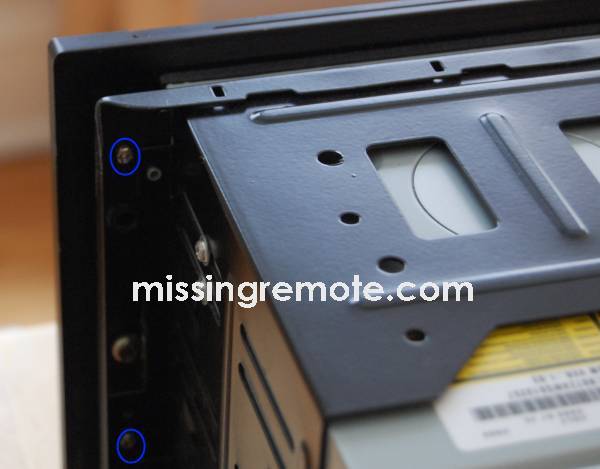

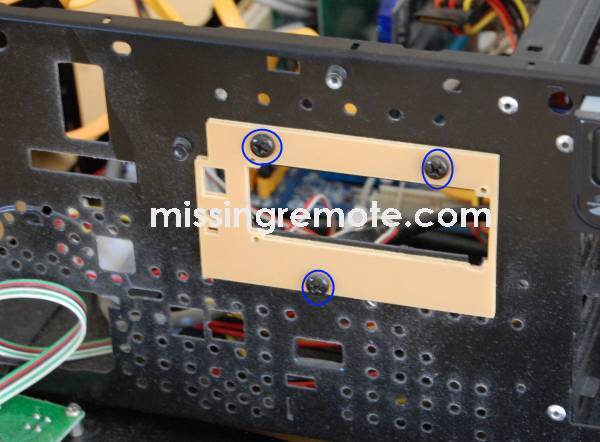
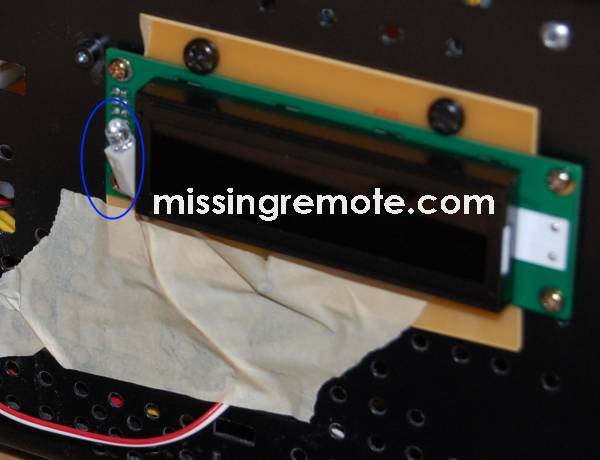
The front piece is held in place by six screws (circled in blue) and will require removing the hard drive tray to get to the middle set. Be careful to remove the bottom set of screws first because the front is much heavier than it looks and it would be easy to damage if removing from left to right.

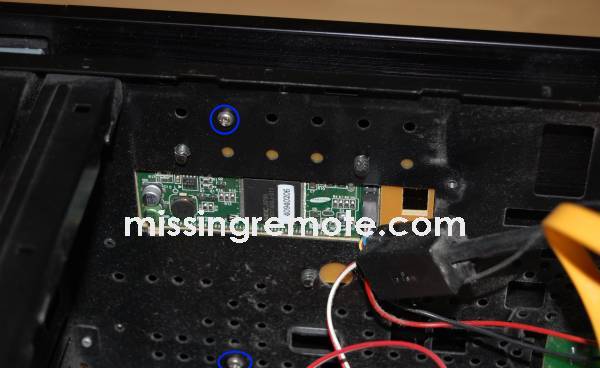
Once the front piece is off we will remove the LPT display by taking out the three screws that hold it in place. Make sure you keep these close, we will use them when mounting the new display.
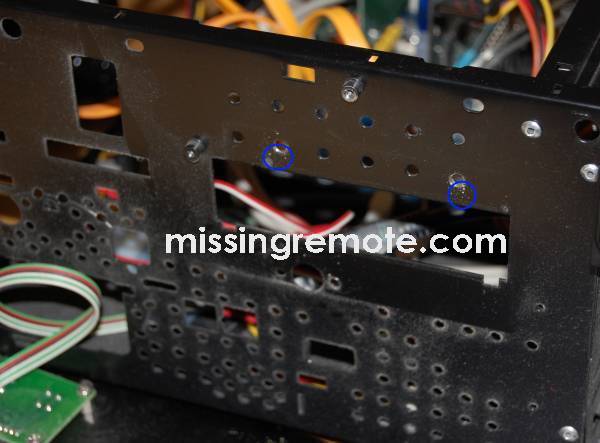
Then remove the three larger screws that hold the old mounting bracket in place
Once everything is disassembled it should look like this. As you can see some metal fillings were displaced so before moving on make sure to inspect and clean anything that will cause trouble later. Masking tape is a great way to get these; just take a piece of tape and use it to gently pull off the mess.
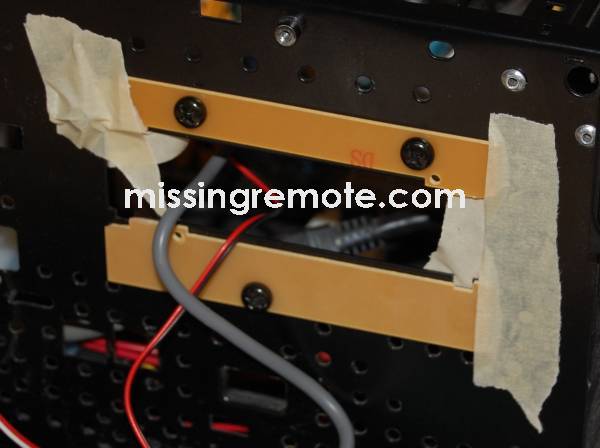
We need to keep the new display from making direct contact with the metal in the case so now’s when we cross the line; take one of the spacers used to mount the original display and break off the sides and remount the spacer. Note that the top spacer is flipped from its original orientation to make more space on the left side.
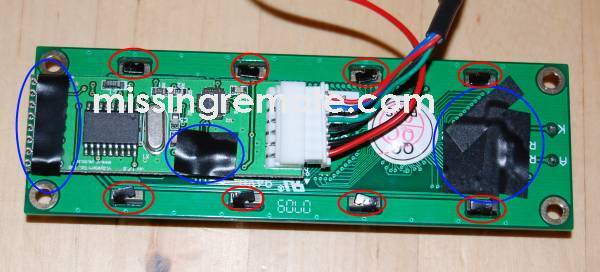
Remove the new display from the faceplate, and just to be safe use some small bits of electrical tape to protect the contacts (circled in blue). Then use the pliers to straighten and flatten the tabs that keep the display together (circled in red) against the board.
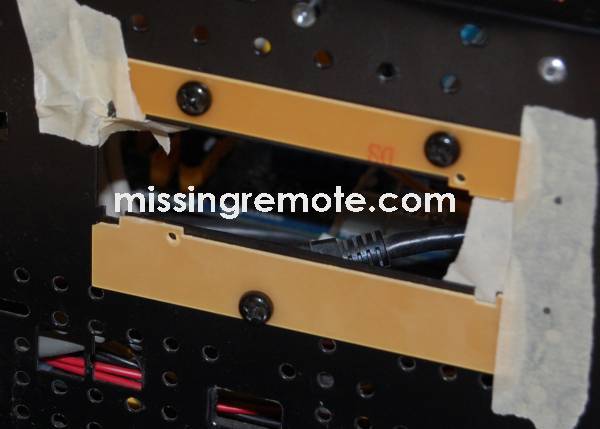
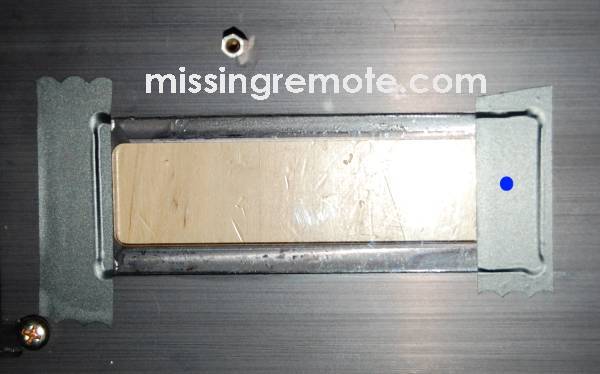
Mask the area with tape, and mark the holes that we will drill by placing the display against the case.
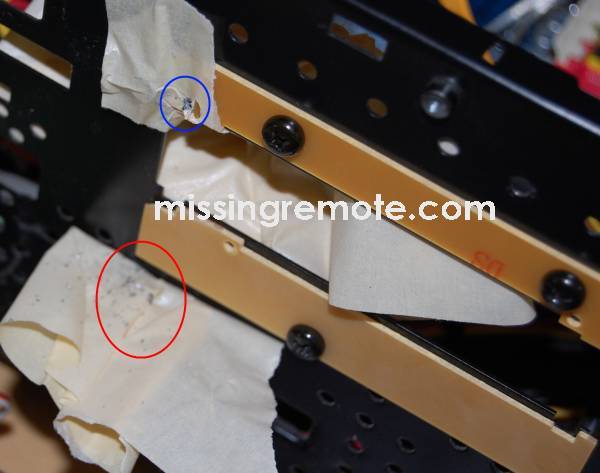
We are going to drill small pilot holes first, so use the screws saved earlier to select a small and full size bit. Then before drilling, use some masking tape to build a sticky ledge on either side of the holes to catch the metal filling that will be created. The picture above shows the hole in blue, and the mess in red. While the trap on the inside of the case isn’t shown (we can see it through the slot) directly, it is the more important of the two.
Because it’s so close to the edge the only spot that really requires the pilot hole is the one that’s shown. It’s a good idea to make a pilot for the other two, but it you’re feeling brave and have a steady hand it can be done in one shot.
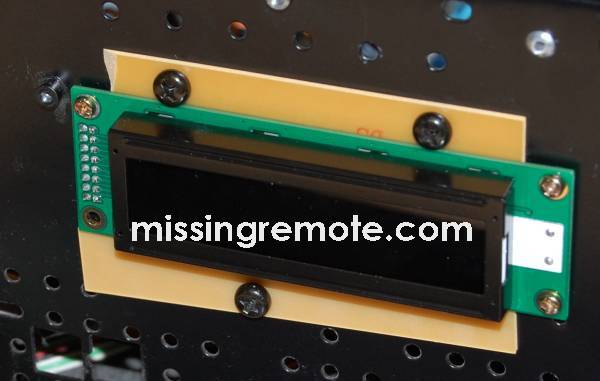
Once the area has been cleaned, go ahead and mount the new display.
Because we destroyed the hard drive light bracket, an alternate mounting mechanism is required. I opted to just tape it next to the new display.
After putting it all back together, I discovered that the original acrylic shield was to dark to read the display from more than a few feet away. Nothing that a quick trip to Home Depot for some clear acrylic couldn’t fix, but everything had to be taken apart again.
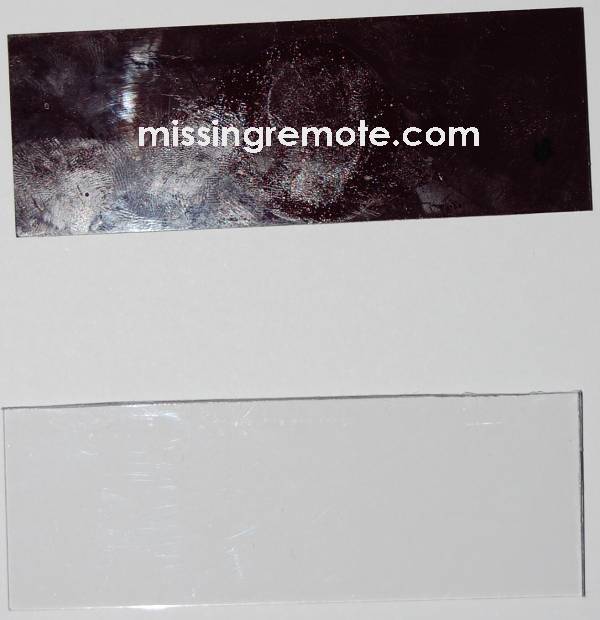
Use the original as a template to cut a new piece. As you can see it doesn’t have to be perfect 🙂
Because the new shield is clear we need to mask the ugly (green) parts of the display. I was going to use black electrical tape to hold it in place anyway so everything worked out nicely. Note the extra offset on the right and the blue dot where a small hole needs to be made for the hard drive indicator to be seen. As long as you keep everything clean and are careful to smooth out the bubbles everything looks like it belongs when reassembled.
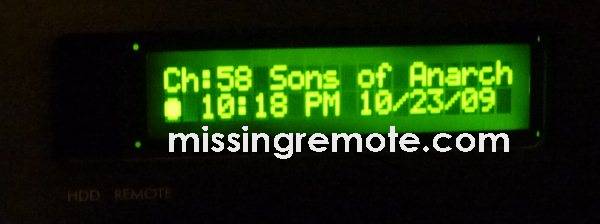
After putting it all back together, everything is working great.