
Use a Let’s Encrypt certificate with Unifi Video 3.8.1+ on Microsoft Windows
In a previous post we looked at how to install a Let’s Encrypt certificate with a Unifi Video installation. As it turned out, shortly after publishing our guide Ubiquiti made it possible to do this in a [sort of] official way with Unifi Video 3.8.1+, simplifying the process somewhat.
Of course there was still some effort required, figuring out how to make the new process work on Microsoft Windows. Which is where this guide comes in.
Steps:
- I’m going to assume that you’ve already read the previous guide, and have a Let’s Encrypt certificate on the server. If not, please take care of steps 1-5.
- Download a copy of OpenSSL for Windows. I used Win32 OpenSSL v1.1.0g Light.
- Make sure you have a backup, then stop the Unifi Video service
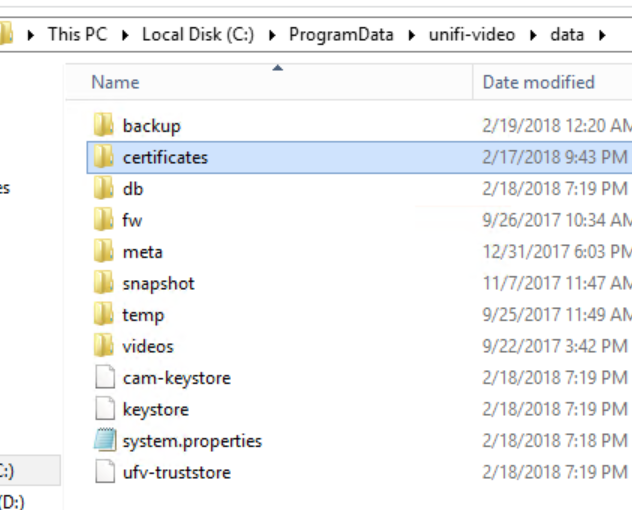
- Create a “certificates” folder in the unifi-video data folder (should be C:\ProgramData\unifi-video\data):
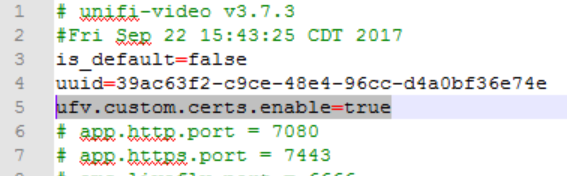
- Edit system.properties in the data folder to include the line “ufv.custom.certs.enable=true”:
- Now we want to use OpenSSL to generate the der files Unifi Video expects:
C:\OpenSSL-Win32\bin\openssl.exe x509 -in "C:\ProgramData\letsencrypt-win-simple\httpsacme-v01.api.letsencrypt.org\fqdn-chain.pem" -outform DER -out "C:\ProgramData\unifi-video\data\certificates\ufv-server.cert.der"

C:\OpenSSL-Win32\bin\openssl.exe pkcs8 -topk8 -inform PEM -outform DER -in "C:\ProgramData\letsencrypt-win-simple\httpsacme-v01.api.letsencrypt.org\fqdn-key.pem" -out "C:\ProgramData\unifi-video\data\certificates\ufv-server.key.der" -nocrypt
The first command uses the full chain pem file to create the certificate, and the second changes the private key into the key file. Please note that you will need to change the “fqdn” above for the fully qualified domain name of the site you generated the certificate for.
- The next step is to delete all the old certificates:
del "C:\ProgramData\unifi-video\data\ufv-truststore"
del "C:\ProgramData\unifi-video\data\keystore"
del "C:\ProgramData\unifi-video\data\cam-keystore"
del "C:\ProgramData\unifi-video\conf\evostream\server.*"
- Now restart the service, and it should use the Let’s Encrypt certificates.
As before, this will need to be done each time the certificate is renewed. So it’s handy to have a script (run as Admin) around to reduce error.
net stop UniFiVideoService

del "C:\ProgramData\unifi-video\data\certificates\*"

C:\OpenSSL-Win32\bin\openssl.exe x509 -in "C:\ProgramData\letsencrypt-win-simple\httpsacme-v01.api.letsencrypt.org\fqdn-chain.pem" -outform DER -out "C:\ProgramData\unifi-video\data\certificates\ufv-server.cert.der"

C:\OpenSSL-Win32\bin\openssl.exe pkcs8 -topk8 -inform PEM -outform DER -in "C:\ProgramData\letsencrypt-win-simple\httpsacme-v01.api.letsencrypt.org\fqdn-key.pem" -out "C:\ProgramData\unifi-video\data\certificates\ufv-server.key.der" -nocrypt

del "C:\ProgramData\unifi-video\data\ufv-truststore"
del "C:\ProgramData\unifi-video\data\keystore"
del "C:\ProgramData\unifi-video\data\cam-keystore"
del "C:\ProgramData\unifi-video\conf\evostream\server.*"

net start UniFiVideoService