
SilverStone Milo ML03b HTPC Case
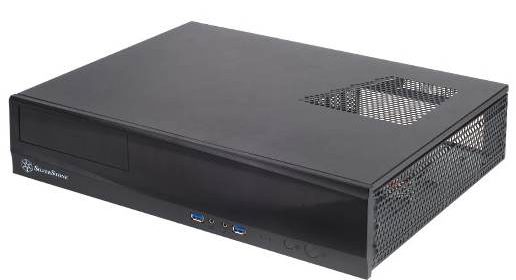
Silverstone Technology was founded in 2003 and has been building cases specifically for the home theater PC (HTPC) market since almost the very beginning. Aimed at HTPC users who must have a low profile case but don’t want to sacrifice expansion options, Silverstone offers the Milo ML03b. At a mere 105 mm in height, and only 340 mm in depth (4.13 x 13.38 in), it will fit into places that other HTPC chassis could only dream about while offering expansion options typically only available in a full-height HTPC case. Today, we will put this case to the test and max out all expansion options to see if it is up to the task.
SPECIFICATIONS
The Silverstone Milo series chassis continues where their popular Grandia series left off; it takes many of the full-size features available and puts them into a nice small form-factor box with a profile at 105 mm in height and depth of 340mm that would integrate wonderfully in any living room. The case can accommodate up to three 3.5” or five 2.5” hard drives, and has mounts for up to four 80mm fans (not included). There are also numerous small touches, including a pre-cut hole for VGA (D-SUB) connector, Kensington lock support, and an additional full-size expansion slot for installing a fan controller, or other accessories product.
|
Material |
Aluminum skin reinforced plastic front panel, 0.8mm SECC body |
|---|---|
|
Motherboard |
Micro-ATX, DTX, Mini-ITX |
|
Drive Bays (External) |
5.25” x 1 |
|
Drive Bays (Internal) |
3.5 “ x 2, 2.5 x1 |
|
Fans |
4 x 80 mm fan slots (fans not included) |
|
Expansion Slot |
4 low profile + 1 utility |
|
Front I/O Port |
USB 3.0 x 2, Audio x 1 MIC x 1 |
|
Power Supply |
Standard PS2 (ATX) depth Limitation of 140 mm |
|
Weight |
3.3 kg |
|
Dimensions |
440 mm x 105 mm x 340 mm ( W x H x D) |
PACKAGING & HARDWARE
The Milo ML03 arrived via FedEx in good condition in via standard retail packaging. The case was wrapped in a plastic bag and suspended inside the box by Styrofoam bumpers. Wedged next to the chassis was a small box containing a manual, a couple of reusable cable ties, and all the hardware necessary to assemble a system inside the case. The full package included the following items:
1. Milo ML03 Chassis
2. Manual
3. Package of Screws
4. Power Supply fan filter
5. Internal USB 3.0 to 2.0 header
Once all the packaging has been removed, we are greeted by an all black chassis. The glossy all black front and drive bay cover is sleek and would blend in very well in any A/V stack. Below is a video we prepared to document the unboxing and first look at the enclosure.
TEST BUILD
| Motherboard | Gigabyte GA-H67MA-USB3-B3 DDR3 1333 LGA 1155 Intel H67 |
|---|---|
| CPU | Intel Core i5-2400 |
| Memory | Corsair Vengeance Blu 8 GB PC3-12800 1600mHz DDR3 |
| Hard Disk |
Crucial RealSSD C300 (OS) 2xWDEARS (Recorded TV) |
| Disk Drives | LG WH10LS30K 10x Blu-ray Burner |
| Tuners |
2 x Aver-media M780 PCIe Ceton InfiniTV4 PCIe |
| Graphics | Intel HD 2000 |
| OS | Windows 7 Ultimate |
To start this build, we began by removing the top panel of the case. The panel was secured with three screws which required a screw driver to remove; while the use of thumbscrews would have made access easier, the use of screw’s provided for a much more polished CE look for the chassis. The panel was in the shape of an “L” such that it covered both the top of the case as well the left side of the case (when viewed from the front). Once removed, the fact that the there was access from both the top as well as the side of the case allowed for greater access during the build. The downside to this shape, however, was that it tended to “stick” while it was being removed and replaced.
Next we began by installing the power supply. As this was a small chassis, Silverstone provided us with a power supply with the right dimensions (150mm x 86mm x 140mm) as the case only supports power supplies with a maximum depth of 140mm. While a power-supply of this depth phyiscally fit into the case we did run into problems when trying to install the optical drive. Thus, when choosing a power supply make sure to plan accordingly as space within is at a premium.
After the power supply was installed, we set about installing the motherboard. As the case is aimed at smaller footprint pc’s it was no surprise to us that the standoffs came pre-installed for a Micro-ATX motherboard; additional mounting points and standoffs were available to accommodate DTX or Mini-ITX . With the brace bar removed from the top, the motherboard slid into place with relative ease. Once the motherboard was in place, we then installed the front header cables; each was clearly labeled, so installation was simple and straightforward. As our test build motherboard did not includ a front USB 3.0 port, we were forced to use the included adaptor to connect it to an available internal USB 2.0 port. While the adaptor was simple to install, it did add extra cord length which made for a tight fit inside the case.
After the motherboard was successfully installed, we next set about installing the hard drives and optical disc drives (ODD). The first 3.5 inch hard drive was screwed into the removable hard drive stand that which, once placed back into the case, suspended the hard drive over the main power connector, so it was necessary to connect that first before the hard drive was installed. We next set about installing the other 3.5 inch hard drive and the 2.5 inch hard drive. These were cleverly designed to be attached to the bottom of the case. However, successful installation required some trial and error before we got everything right. First, it was necessary to connect the power cable, as well as the SATA cable, to the drive and have them “threaded” through the case from the inside. We then used these cables to guide the hard drives into their spots; this was done by sliding the hard drive in through the opening on the left of the case created with the top panel removed. Once the hard drive was in place, we had to hang the edge of the case off the table such that the screw holes on the bottom of the case were accessible. While the case did provide for anti-vibration mounts on our build, we found that each mount “shredded” once the screws were installed. The 2.5 inch hard drive was installed in a similar fashion;but, Silverstone apparently assumes everyone will be installing a 2.5″ SSD, since they failed to include anti-vibration mounts with this mounting bracket. This was not an issue for our SSD, but anyone installing a mechanical 2.5″ drive might have preferred the inclusion of the mounts.”
Once the hard drives were installed, the last piece to be installed was the ODD. Unfortunately, while the ODD physically fit in the space, there was not enough room to attach the power or SATA cable.
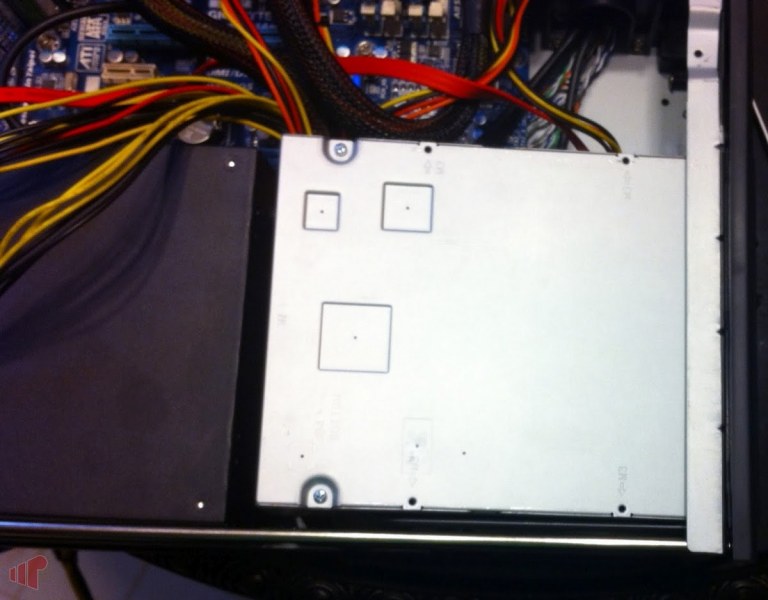
Thus, if you are considering this case, and the optical drive is a must have, you might want to consider a power supply with a smaller depth (100 mm). Finally we finished the build by installing the AVerMedia m780 cards (x2) and a Ceton Infinitv 4.
After adding two 80 mm intake fans , we were ready to put it through its paces to see how it fared. But, before we review the results, check out the video we prepared showing the completed build.
PERFORMANCE
For performance testing, we used synthetic tools to create a fairly worst-case scenario. We loaded up the CPU with Prime 95 In-Place FFT test and HDD I/O was created with the PassMark Advanced Disk Test using the Workstation profile (70% read/30% write). Furthermore, we set all tuners (eight in total) to record and then had one stream playing back locally with another playing back remotely via remote potato. The 80mm intake fans were set to run at full speed and the CPU fan was controlled by the motherboard. For both load and idle measurements, we let the temperatures rise to a steady-state condition and then recorded the measurements.
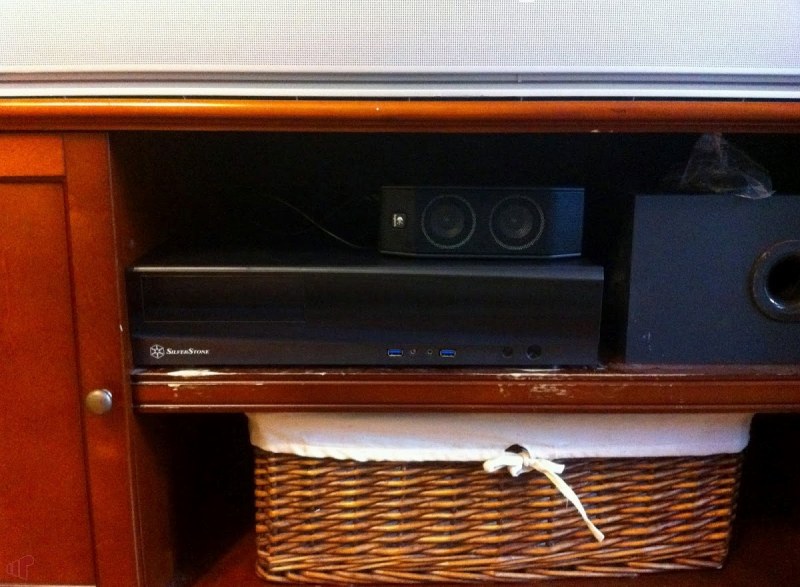
While testing, the chassis was placed inside a TV stand that was open in the front, but closed off in the back. There is one fan mounted on the back which exhausts air out to help keep fresh air circulating over the case.
It should be noted that in this build we only utilized two of the available fan slots; therefore, the results might have been lower had two more fans been used. Even with only two fans installed, and the case completely full of components, all temperatures (with the exception of two of the Ceton tuners) while warm were kept within a reasonable range.
| Idle | Load | |
|---|---|---|
| Ambient | 21 | 21 |
| CPU | 43 | 76 |
| System | 42 | 43 |
| PCH | 30 | 67 |
| HD1 | 30 | 33 |
| HD2 | 34 | 40 |
| Ceton 1 | 54 | 57 |
| Ceton 2 | 53 | 57 |
| Ceton 3 | 63 | 69 |
| Ceton 4 | 63 | 69 |
| CPU | 1063 | 2096 |
CONCLUSION
Overall, we were very pleased with the ML03b. At $59.99, it is very affordable; with room for three hard drives and four expansion slots, it provides more than ample space for expansion in a low profile HTPC case. The interior of the chassis is spacious, allowing for mostly efficient cable routing; however, your mileage may vary depending on particular motherboards. With its all black exterior and low profile, the Milo ML03b would look great in any AV stack. However, if a low profile case is not explicitly required, Silverstone’s Grandia line would likely be a better choice as they provide for better cable management and cooling options.
PROS
- Silicone mounting for hard drives
- Low profile
- Clear labeling of front cables
- Room for 3 hard drives, or 5 if all hard drives are 2.5”
CONS
- No case fans included
- Requires tools
- When fully configured, cable routing can be tricky
Thanks to SilverStone for the review sample.
Hi,
would this fit a Seasonic
Hi,
would this fit a Seasonic X460 PSU Dimension: W150 x L160 x H86 mm with the DVD drive? but i will need to install 1 x 3.5 HDD and 1 x 2.5 SSD drive?
Thanks
No a PSU with a depth greater
No a PSU with a depth greater than 140 mm wont fit in the case. With a depth of 140mm you might be able to fit a dvd drive using right angle power connectors.
Nice review!
I want to buy
Nice review!
I want to buy some thumb screws on eBay for the ML03. Can you tell me what size I should get?
Thanks.