
Build a temperature controlled Wi-Fi power strip with WeMos D1 Mini NodeMCU and ESP8266
After installing the Middle Atlantic DWR-12-32 wall cabinet, it was time to spend some time thinking about temperature control. Most of the time, our utility room is cool enough that there is no need for active cooling in the rack. But, with the furnace and water heater also located in the room it does get warm enough to worry about it, so it seemed like the perfect place to apply some custom home automation. So I grabbed some ESP8266 based WeMos D1 NodeMCU shields, and built a Wi-Fi power strip to turn the AC fans on/off depending on the temperature in the cabinet. Here’s all you need to build one too.
What you need:
- Powerstrip
- 14/16 gauge electrical wire
- Soldering iron & solder
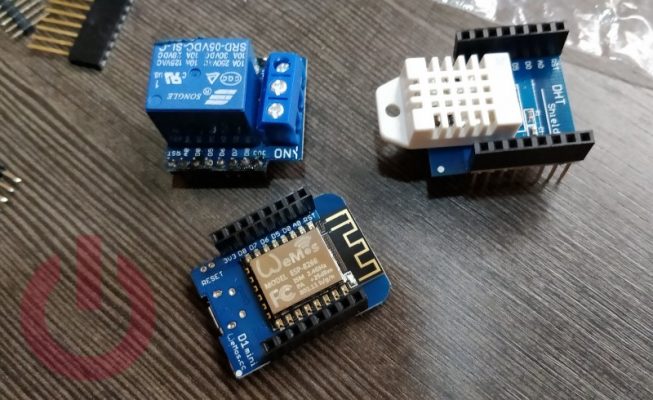
- WeMos D1 Mini (ebay)
- DHT22 shield for the WeMos D1 Mini (ebay)
- AC compatible 120V/240V relay shield for the WeMos D1 Mini (ebay)
- ESPlorer
- NodeMCU-PyFlasher
Build
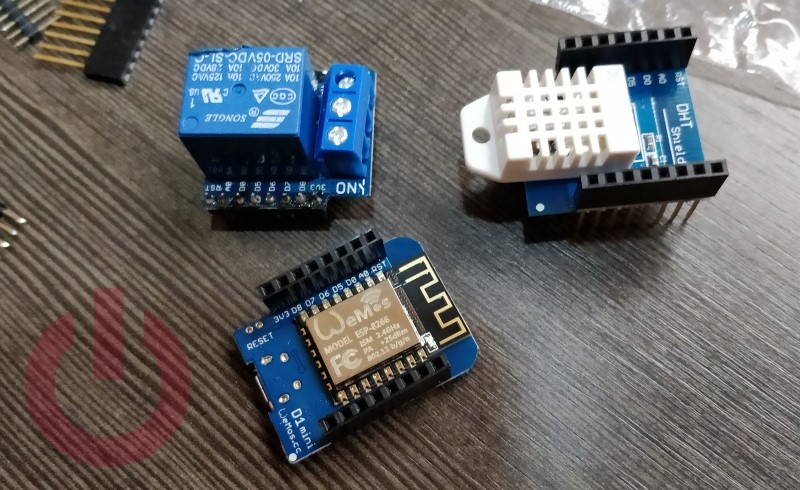
If you aren’t using a breadboard it is critical to solder leads on the WeMos shields in a way which makes the three of them stackable. I put the DHT22 sensor in the middle, but it does not matter the order, as long as they all fit together.
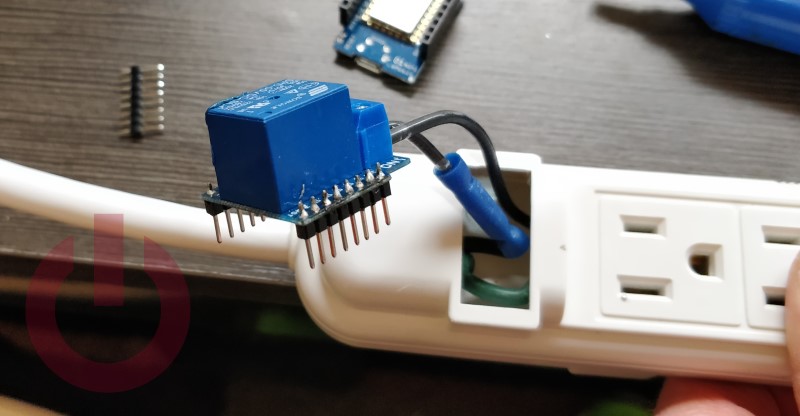
Take apart the power strip, and remove the on/off switch. Connect the live (black) wire to the center an NC (normally closed) contacts on the relay using small segments of the black electrical wire. Depending on the strip, you may need to reconnect the neutral (i.e. if the switch has a light) inside as well.
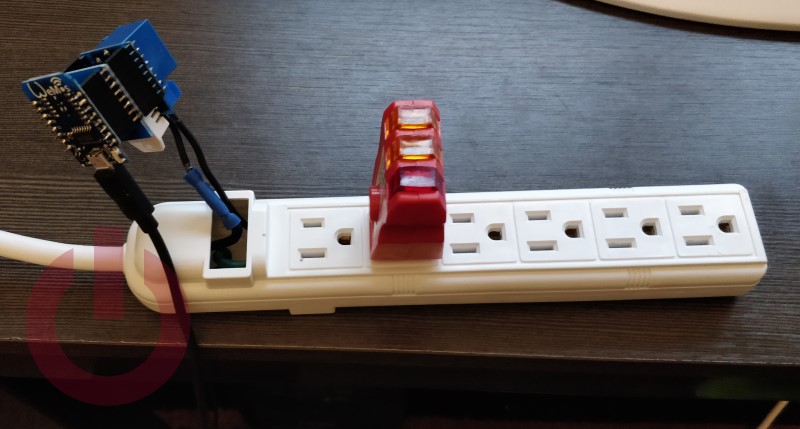
Stack the shields together and use a micro USB cable to connect the D1 Mini to your PC.
Software
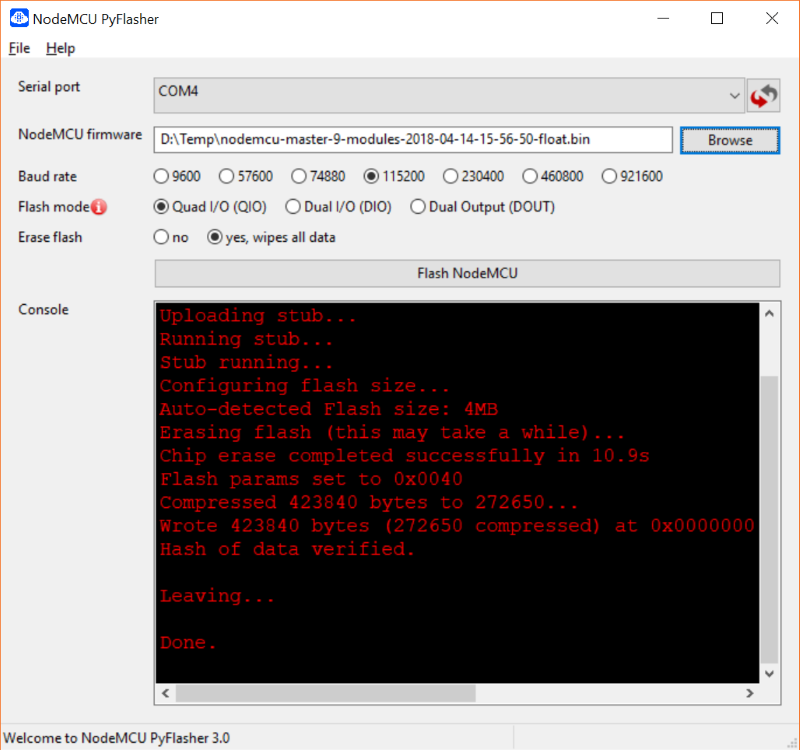
Grab a floating point firmware for the WeMoS D1, and use NodeMCU PyFlasher to flash it on the ESP8266. Once this is complete connect to the D1 using ESPlorer, and open all of the .lua and .htm files found in the GitHub repository. Some of will need to be edited before loading on the WeMos device.
The only file that must be edited is “wifi.lua”, as it contains the specific details necessary to connect to your wireless network. SSID and PASSWORD are required, and if you want to use a static IP. Uncomment (remove the “–” before) CLIENT_IP, entering an appropriate value for your network. Then do the same for NETMASK and GATEWAY.
SSID = "YOURSSID"
PASSWORD = "YOURPWD"
--CLIENT_IP="192.168.2.24"
--NETMASK="255.255.255.0"
--GATEWAY="192.168.2.1"
I do not expect that you will need to edit the GPIO pin numbers for the DHT22 sensor or relay, but just in case they are found at the top of “sensordata.lua” and “timer.lua”. You can confirm the correct pin by looking at the traces (wires in the circuit board) in the bottom of the shield.
PIN = 4 --  data pin, GPIO2

dht=require("dht")
status,temp,humi,temp_decimial,humi_decimial = dht.read(PIN)
--print("status: "..status.." temp: "..temp.." humi: "..humi.." temp_decimial: "..temp_decimial.." humi_decimial: "..humi_decimial)
if( status == dht.OK ) then
    dht_error = nil
	-- Prevent "0.-2 deg C" or "-2.-6"
	temperature = temp
	humidity = humi
	-- If temp is zero and temp_decimal is negative, then add "-" to the temperature string
	if(temp == 0 and temp_decimial<0) then
		temperature = "-"..temperature
	end
	print("temperature: "..temperature.." humidity: "..humidity)
elseif( status == dht.ERROR_CHECKSUM ) then
	dht_error = "DHT Checksum error"
	temperature=-9991 --TEST
elseif( status == dht.ERROR_TIMEOUT ) then
	dht_error ="DHT Time out"
	temperature=-9992 --TEST
else
    dht_error ="DHT Error"
    temperature=-9993 --TEST
end

-- Release module
dht=nil
package.loaded["dht"]=nil
Sensordata.lua reads the current temperature from the DHT22 sensor based on the GPIO pin (PIN) of the sensor.
switch1_pin = 1
gpio.mode(switch1_pin, gpio.OUTPUT)

print("start temp timer")

dofile("poll_settings.lua")

if chkTmr then chkTmr:unregister() chkTmr=nil end
chkTmr = tmr.create()
chkTmr:register(checkInterval*1000, tmr.ALARM_AUTO, function(t)
    dofile("sensordata.lua")
    if(dht_error ~= nil) then
        print ("DHT error: "..dht_error)
    else
        local pinVal = gpio.read(switch1_pin)
        local fTemp = tonumber(temperature)

        print ("pin: "..pinVal.." temp: "..temperature)
        if(fTemp >= tempHigh) then
            if(pinVal == gpio.LOW) then
                print("enable relay")
                gpio.write(switch1_pin, gpio.HIGH)
            end
        end
        if(fTemp <= tempLow) then
            if(pinVal == gpio.HIGH) then
                print("disable relay")
                gpio.write(switch1_pin, gpio.LOW)
            end
        end
    end
end)

if not chkTmr then
    print("failed to create timer")
else
    chkTmr:start()
end
Timer.lua conducts the polling to check whether the current temperature is within the bounds where the relay should be open (on) or closed (off). Here too, you may need to edit the GPIO pin number.
With that complete, it is time to save the files to the ESP. The order is not that important, except for “init.lua”, which must be loaded last.
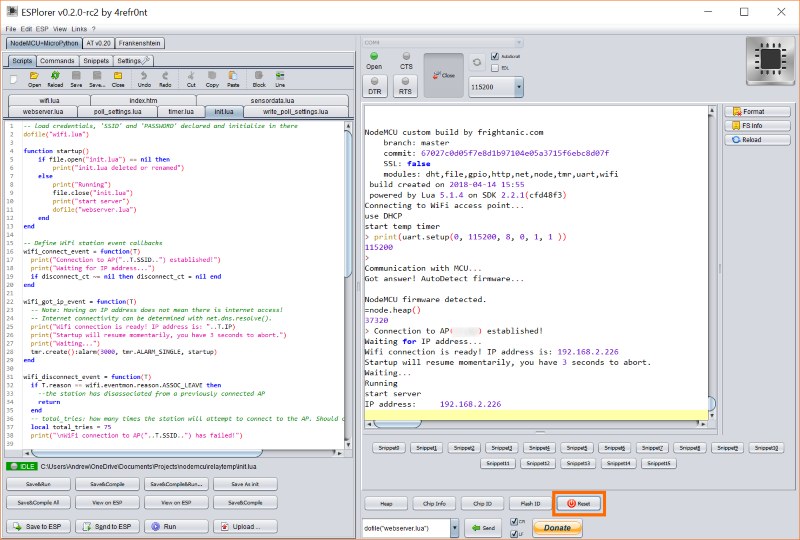
Then “reset” (reboot) the WeMos D1, and confirm that it loads correctly. You should see it connecting to your wireless network and the IP address. When it does, you can view the settings site for the “smart” power strip.
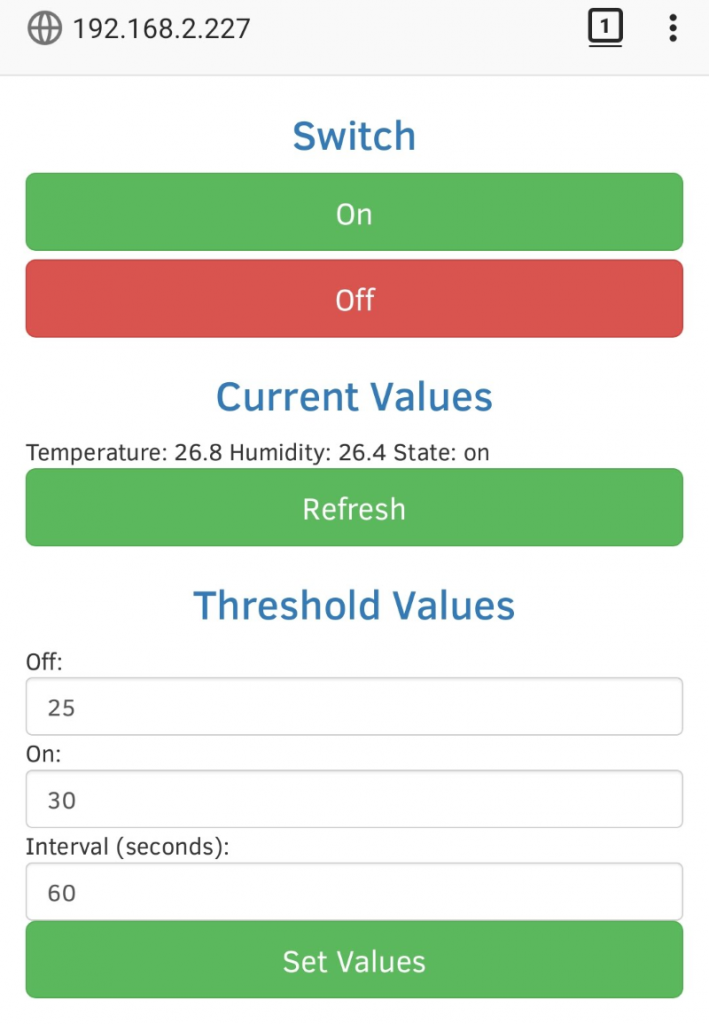
Current values should be self explanatory; indicating the current reading from the DHT22 and relay sensors. The threshold values section allows you to configure the temperature (in C) that the relay will turn off/on, and how often the temperature will be polled (in seconds). It is also possible to temporarily turn on/off the relay to test that the timer is running (i.e. it will turn on/off based on configured thresholds during the next interval).
Lastly, because on of the design goals of this exercise was also to create a mechanism where I could log temperature data in an automated way. There is a small powershell script to retrieve and write the data from the DHT22 sensor included in the project as well.
$request = 'http://192.168.2.227/get'
Invoke-WebRequest $request | ConvertFrom-Json | %{ "{0}, {1}" -f $_.temp, $_.humidity } | Out-File templog.txt -Append