
Using full disk encryption to cleanup data on old storage drives before discarding/recycling
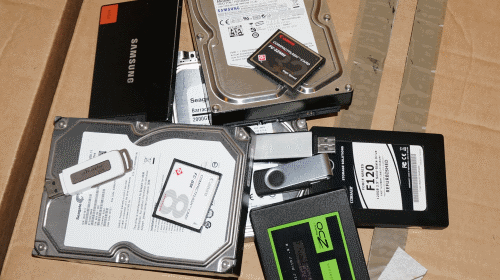
If you have been computing long enough, eventually you will end up with a pile of old hard drives (HDD) and USB drives that are not useful anymore, but still work. The problem of course is that at one point they held potentially sensitive data, so while you could just format them and hope for the best it really is important to ensure that any data that was on the drive can no longer be retrieved before recycling or handing them off to someone else who will use them – and why not, just because you have moved on it does not mean someone out there cannot get more value out of it.
In the past those looking for a secure mechanism to remove data were told to overwrite the disk a large number of times, which can be very time consuming. Personally, unless you have been selling secrets to a foreign power, I think there is a better, and quicker approach to solving this dilemma – full disk encryption.
Steps
If you are fortunate enough to have a [modern] “Pro” version of Window, the easiest way to do this is via the “BitLocker To Go” (BLTG) feature, because it is included with the OS. All is not lost for Home user though, you will just need to use some other full disk encryption software. I have outlined the process using BLTG below, but it should be conceptually similar – just make sure that when offered the opportunity that the whole disk is encrypted – not just the empty space.
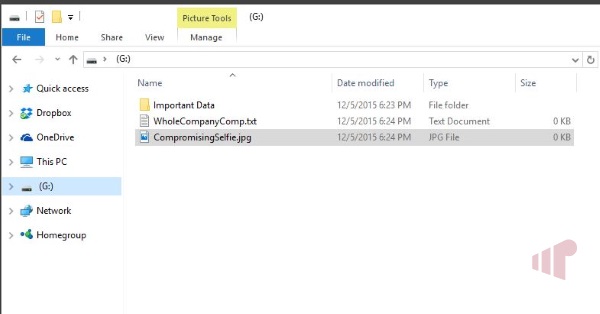
The first step is to insert the disk you want to get rid of. It is slightly easier if it is exposed as a removable drive, so if you have an eSATA or USB enclosure best to use that. If not, BitLocker can still be used on “fixed data drives” following a similar process, but obviously it is more complex to physically install the device.
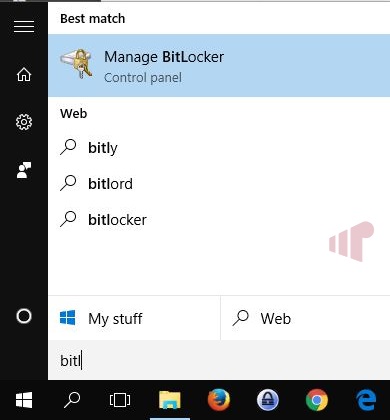
The next step is to find and launch BitLocker. There are a few ways to do this, but the easiest is to search for it directly from the Start Menu. When it shows up, either hit enter of click on “Manage BitLocker” from the list of options.
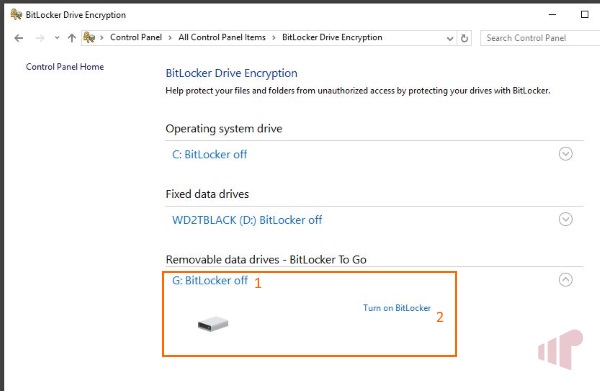
Next, expand the accordion section by clicking the letter (1), then select “Turn on BitLocker” (2) to start the encryption wizard.

Check “Use as password to unlock the drive” (1), then enter a really, really, really long and complex password in fields 2 and 3. In this case a 64 character jumble of text generated from a random password generator was used. This is the second most important step, do not be lazy – use a proper password. Then click “Next”.
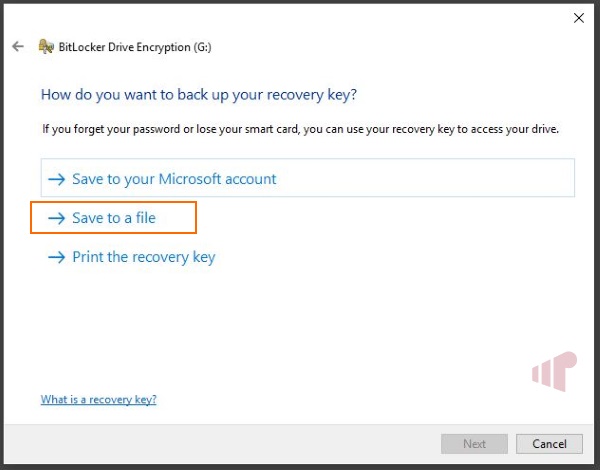
You will need to save the recovery key before proceeding. If you plan to actually use the drive in its encrypted state, it is absolutely essential that you keep this key as it is the only way you will ever access the data again.
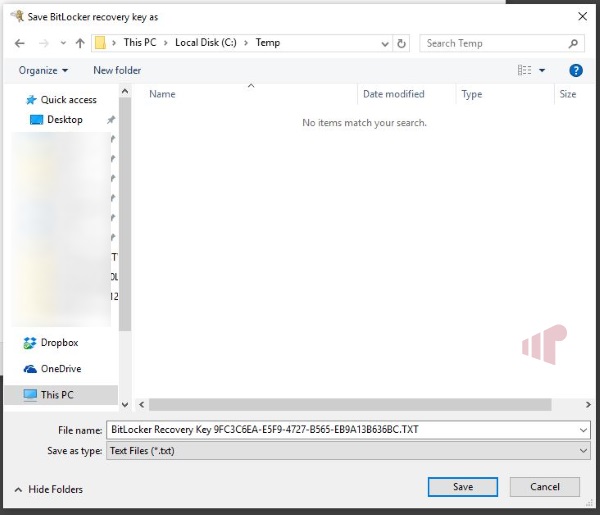
Pick a location to save the recovery key, then click “Save”.
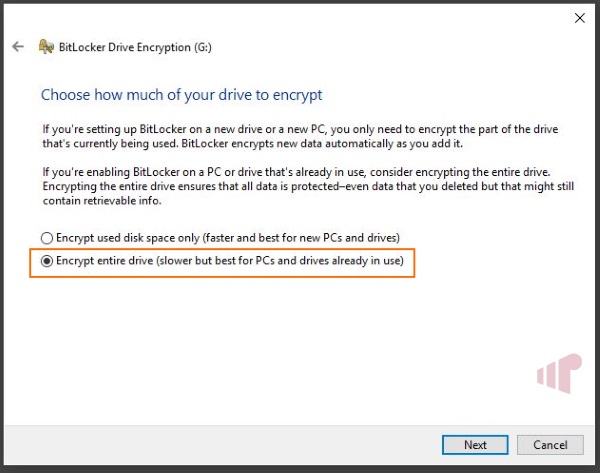
We have come to the most important step so make sure to select “Encrypt entire drive” from the two options. This will tell BLTG to encrypt everything, even the “empty” sectors. Then click “Next”.
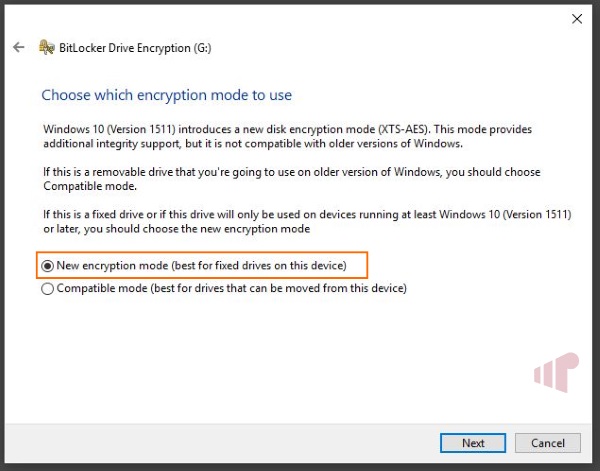
If you are using Windows 10 (and really, why aren’t you?), then naturally the more secure option is the best option. Go ahead and make it so, then click “Next”.
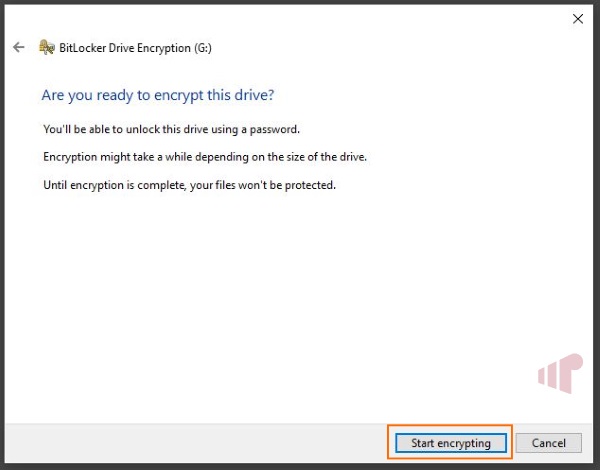
Of course you are ready. What a silly question! Do take a moment to reflect though, always good to measure twice and cut once.
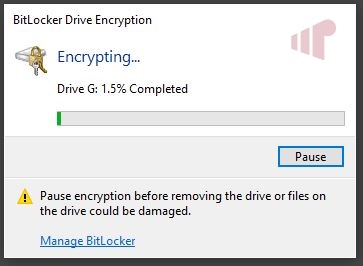
OK, while I did say it would be faster (significantly in most cases), full disk encryption still takes time. Depending on how big the drive, could be a lot of time. Feel free to wander off and have a cool beverage (or three).
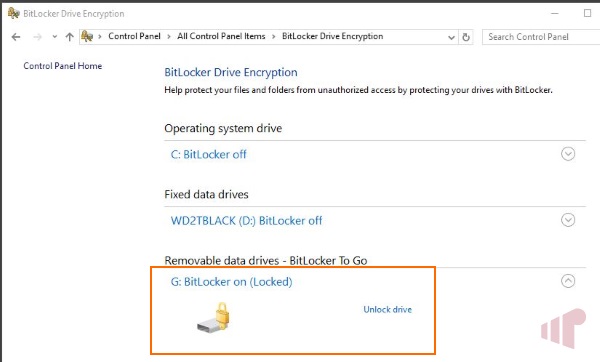
After you are finished, you can test it by ejecting (or rebooting if using a “fixed data drive”) the disk and reinserting it. At this point the whole disk has been encrypted. If you are planning to share it, I find it is a bit more next person friendly to format it (and it obfuscated a little the work we have just done) and make it ready for use.
Enjoy.